Loading ...
Loading ...
Loading ...
17
in the lter ((C3) or (C4)) (see instructions in section “4.1 Step
1 - Grinding”).
Proceed as described in section “The “perfect dose””.
4. MAKING COFFEE
4.1 Step 1 - Grinding
1. Put coee beans in the container (A3) (g. 9). It is best to
grind only a quantity of beans sucient for immediate use,
so that the coee will always be fresh.
2. The default grinding setting is 5 (medium ground). If this is
too ne or too coarse, adjust the level according to personal
taste and the type of coee used (adjust only when the cof-
fee mill is in operation (g. 10).
Please note: A grinding level between 3 and 6 is rec-
ommended for most coees. Grinding with 1 or 2 select-
ed produces a very ne result. Use only with very spe-
cial coee (light roast) or when you notice non-optimal
coee quality due to wear of the burrs (grinding too coarse).
3. Place one of the coee lters (C3) or (C4) in the lter holder
(C1). Press (B5) to select preparation of 1 or 2 cups.
This also doubles the quantity of espresso delivered.
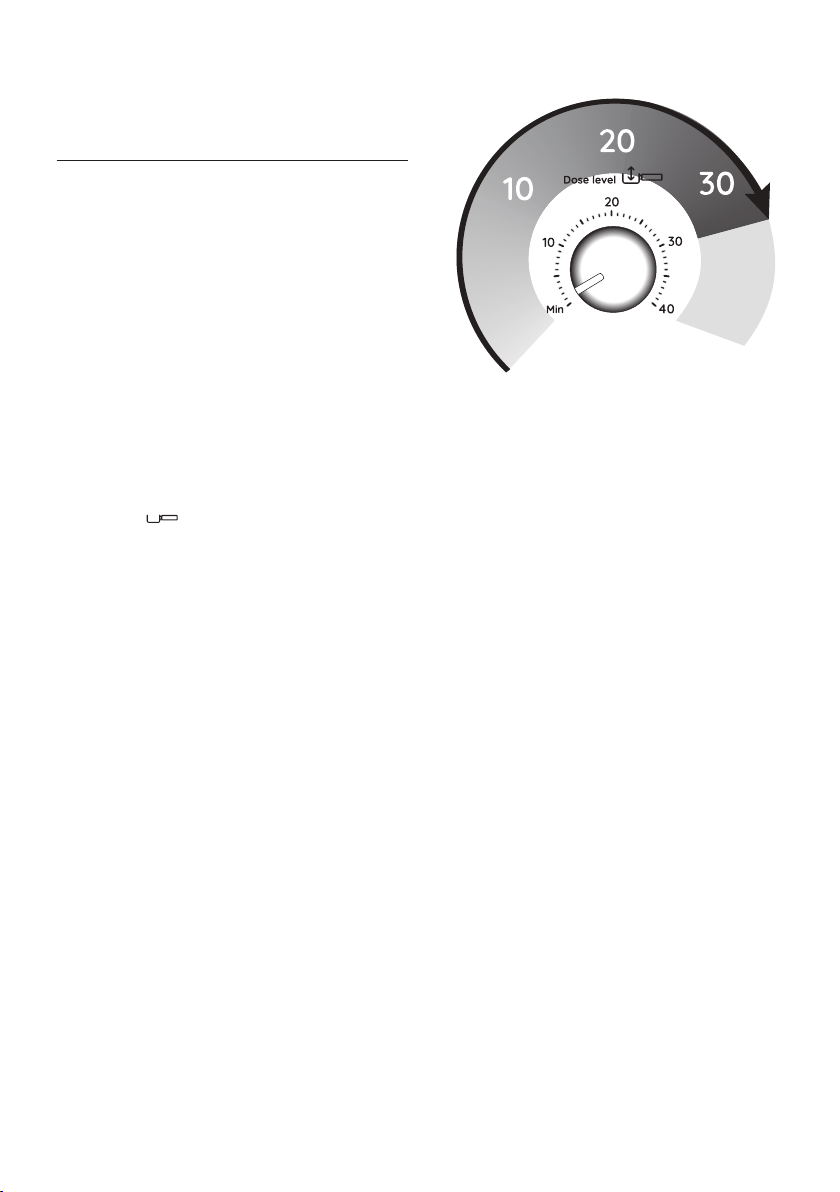
4. Set the quantity by adjusting the dial (B4), starting from
the minimum position (g. 11).
The rst time you use it, leave the dial in the Min. position. In
the beginning, it is normal to make a few attempts before nd-
ing the optimal setting. We suggest you start with the default
values, then modify them if necessary following the suggestions
in section “Adjusting the quantity of ground coee in the lter”.
5. Attach the dosing and tamping guide (C2) to the lter hold-
er: 1 press; 2 rotate to lock (g. 12).
6. Insert the lter holder in the coee mill outlet (A13) (g.
13).
7. Press the lter holder until you hear a “click” (g. 14), then
release. Grinding starts and stops automatically.
Please note: To manually stop grinding, just press the lter
holder again (until you hear a click).
Adjusting the quantity of ground coee in the lter
5
X
-
l
i
g
h
t
l
i
g
h
t
m
e
d
i
u
m
m
e
d
i
u
m
-
d
a
r
k
d
a
r
k
E
X
T
R
A
d
a
r
k
Dierent varieties of coee bean give dierent results when
ground: consequently, the initial adjustment of the dosage re-
quires special care.
This illustration shows how to regulate the dosage, based on the
roast colour: this should be taken as a general guide, given that
in practice, the nal adjustment can vary according to the com-
position of the beans.
1. Set the quantity (to the raised mark inside the coee lter),
starting from the minimum position. The numbers on the
dial are a handy reference to note down once the quantity
in the lter is ideal. The numbers do not correspond to the
coee mill settings, measurement units (g/oz) or grinding
time.
2. Looking at the roast colour of your particular beans, turn
the dial slowly to nd the right adjustment.
4.2 Step 2 - Tamping
1. After grinding, remove the lter holder (g. 15).
2. Tap the dosing and tamping guide (C2) to level the ground
coee.
3. (Certain models only): rest the lter holder in the housing
on the pressing mat (C12) (g. 16).
4. Press the coee using the presser (C11) (g. 17).
5. Remove the dosing and tamping guide by turning it anti-
clockwise and pulling upwards (g. 18) and check that the
quantity is correct (see “The “perfect dose””).
6. Attach the lter holder to the coee outlet (A10) (g. 19).
Please note: Coee left on the edges of the lter after pressing
does not in any way compromise the quality of the brewing and
therefore the end result.
The “perfect dose”
• The perfect quantity corresponds to the raised line inside
the coee lters;
Extra
grinding
range
Loading ...
Loading ...
Loading ...