Loading ...
Loading ...
Loading ...

- 3
Note: Flush the interior cleaner for 30 sec-
onds without adding detergents prior to
shutting it down. This will avoid crusting
and adhesion and thus premature wear of
the seals.
Switch off the separate high pressure
pump.
Shut off the cleaning liquid supply.
Pull out the mains plug.
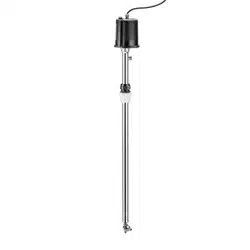
Remove the interior cleaner from the
container.
몇 CAUTION
Risk of personal injury or damage! Consid-
er the weight of the appliance when storing
it.
몇 CAUTION
Risk of personal injury or damage! Mind the
weight of the appliance during transport.
When transporting in vehicles, secure
the appliance according to the guide-
lines from slipping and tipping over.
The basis for a safe operational plant is
regular maintenance.
Use only original parts of the manufacturer
or part suggested by him, such as
– replacement and wear parts
– Accessory parts
– Fuel
– Detergent
DANGER
Risk of accident while working on the unit!
During all tasks:
Remove voltage from and secure high
pressure pump at the main switch.
Shut off the cleaning liquid supply.
Pull out the mains plug.
Maintenance work may only be carried out
by persons who have been instructed in the
safe operation and maintenance on the
high-pressure systems.
In order to guarantee a reliable operation of
the equipment, we success, you signed a
maintenance agreement. Please refer to
your local Kärcher service department.
Remove contamination in the gear area
on the cleaning head.
Check screws for tight fit.
DANGER
Risk of accident while working on the unit!
During all tasks:
Remove voltage from and secure high
pressure pump at the main switch.
Shut off the cleaning liquid supply.
Pull out the mains plug.
Operator
Work designated with the sign “Opera-
tor” may only be carried out by persons
who have been instructed in the safe
operation and maintenance on the high
pressure plant.
Electricians
Only persons with a professional train-
ing in the electro-technical area.
Customer Service
Work designated with the sign “Cus-
tomer Service” may only be done by the
fitters of Kärcher Customer Service.
1 Screwed sealing plug
2 Bevel wheel
3 Axle stub
4 Slide ring gasket
Loosen the locking screw.
Remove the disc and the circular blank.
Pull off the bevel wheel.
Remove the slide ring gaskets by
means of a small screwdriver. Ensure
that the grooves and borings are not
damaged.
Carefully remove dirt from the grooves
and borings.
A Slide ring
BO ring
Insert the O-ring into the groove.
Press the slide ring together to shape a
kidney-shaped form. Make sure that
there are no sharp kinks.
Insert the slide ring into the groove in
this shape and press into the groove in
the direction of the arrow.
Install the second slide ring gasket.
After that, calibrate using the mandrel
(order no. 5.901-068).
Grease the axle stub and the seals with
silicone grease.
Attach bevel wheel.
Mount the disc and the circular blank.
Lubricate locking screw with sealant
and screw it in.
Shutting down
Storage
Transport
Care and maintenance
Who may perform maintenance?
Maintenance contract
Maintenance schedule
Daily before use
Monthly
Troubleshooting
Troubleshooting notes
Who may remedy faults?
Replace slide ring gaskets
9EN
Loading ...
Loading ...
Loading ...