Loading ...
Loading ...
Loading ...
EN-83
Creating an Auto Accompaniment (User Rhythm)
• The operation shown here is performed as the steps of the
procedures below.
– Step 9 under “To create a totally new rhythm and save it”
(page EN-77)
– Step 9 under “To edit an existing rhythm and save it”
(page EN-79)
– Step 5 under “To configure only the mixer settings of an
existing rhythm and save it” (page EN-80)
1.
Long-press 9 PART (MIXER) until the
[MIXER] indicator appears.
This displays the Part On/Off status of the part being
edited.
2.
Use the [2] (w) and [5] (q) bm number keys to
display the menu item you want to change.
• Initial default setting values are indicated by an
asterisk (*).
*1 Only drum set tones can be selected for Drums and
Percussion parts. Drum set sounds cannot be selected for
the bass and the Chord 1 through Chord 5 parts.
3.
Use bn [–] and [+] or the bl dial to change the
setting value.
4.
When mixer settings are the way you want,
press the [4] (EXIT) bm number key.
1.
In the Rhythm Editing Mode, select the copy
destination accompaniment pattern.
• Perform steps 1 to 3 under “To create a totally new
rhythm and save it” (page EN-77), or steps 1 to 3
under “To edit an existing rhythm and save it” (page
EN-79).
2.
Press cs REGISTRATION [1].
This displays “Element”.
3.
Press the [6] (ENTER) bm number key.
This displays the currently selected rhythm number and
rhythm name.
4.
Use bn [–] and [+], or the bl dial to select the
number of the rhythm you want to use as the
source of the accompaniment pattern copy
operation.
5.
Select the accompaniment pattern you want to
use as the copy source.
The indicator for the currently selected accompaniment
pattern (page EN-47) will flash.
* Each press of the button toggles between Variation and Fill-
in.
• Select an intro when the copy destination is an intro, or
an ending when the copy destination is an ending.
• When the copy destination is Variation 1 to 4, select
any one of Variation 1 to 4.
• When the copy destination is Fill-in 1 to 4, select any
one of Fill-in 1 to 4.
• Pressing ck START/STOP here starts looped
playback of the accompaniment pattern you selected
as the copy source.
6.
To execute the copy operation, press [6]
(ENTER).
This displays “Sure?”
7.
Press bn [+] (YES) to execute the copy
operation or bn [–] (NO) to cancel.
• The message “Wait...” remains on the display while
the copy operation is being performed. Do not perform
any operation while this message is on the display.
“Complete” appears on the display after the operation
is complete.
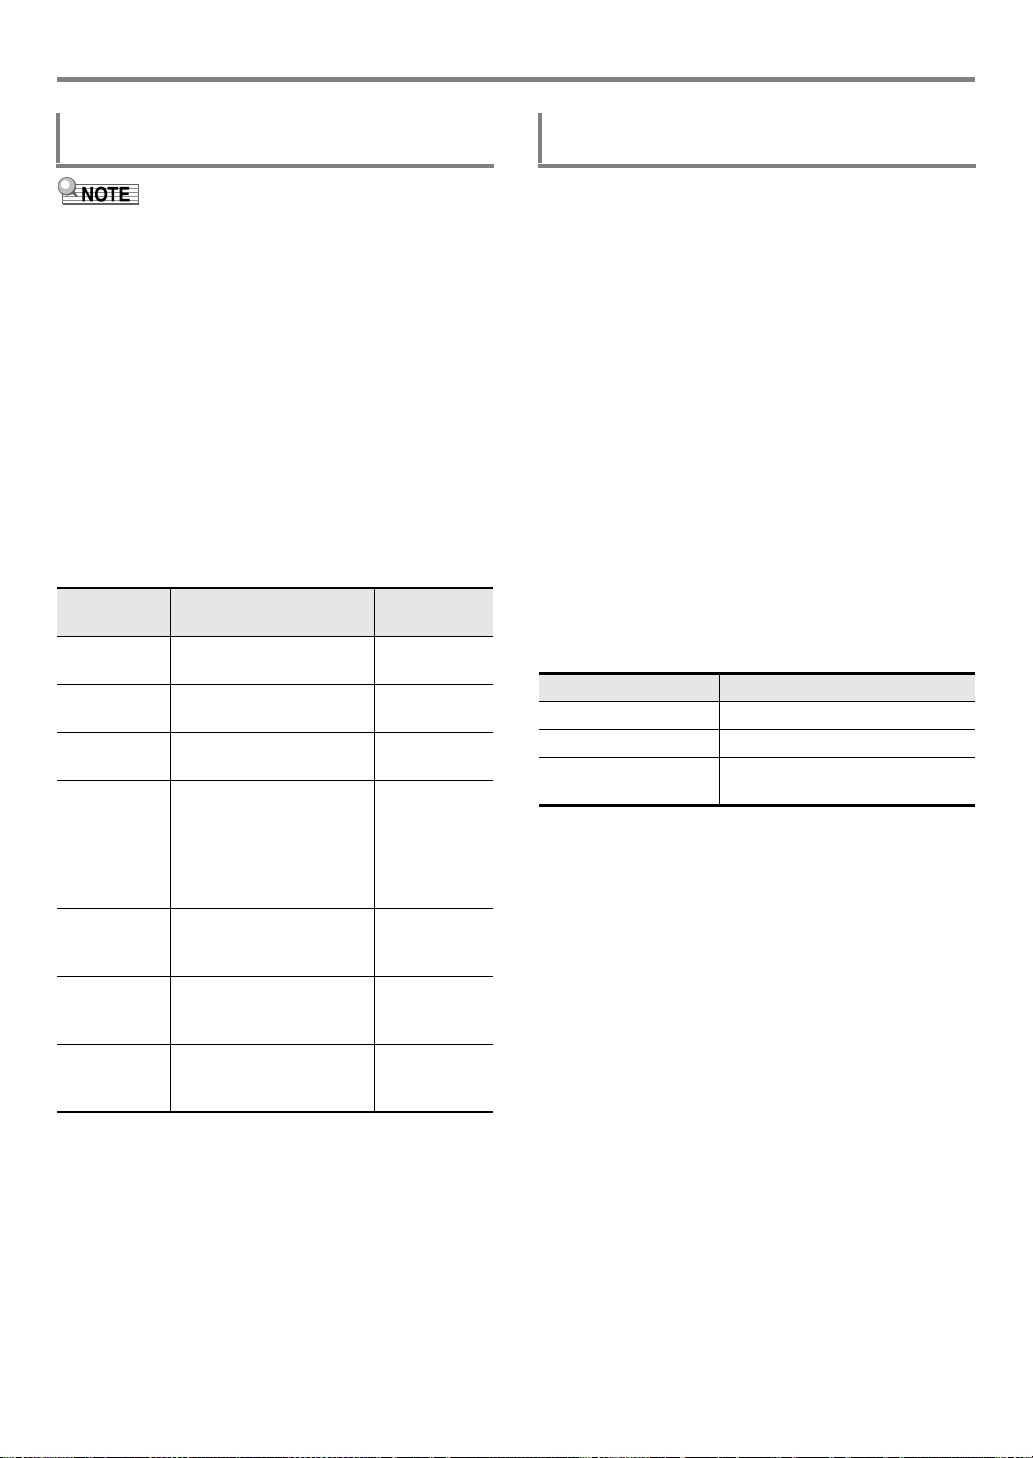
To configure mixer settings of a part being
edited
Item Name
(Display)
Description Settings
Part On/Off
(Part)
Specifies on/off for the
selected part.
On*, Off
Part tone
(Tone)
Specifies the tone of the
selected part.
*
1
Volume
(Volume)
Adjusts the volume level of
the selected part.
0 to 127*
Pan (Pan) Specifies the stereo pan
position of the selected
part. 0 indicates the center,
while a smaller value shifts
to the left and a larger
value shifts to the right.
–64 to 0* to 63
Reverb Send
(Rev Send)
Specifies how much reverb
is applied to the selected
part.
0 to 40* to 127
Chorus Send
(Cho Send)
Specifies how much
chorus is applied to the
selected part.
0* to 127
Delay Send
(Dly Send)
Specifies how much delay
is applied to the selected
part.
0* to 127
To copy an existing accompaniment pattern
for editing
To select this: Press this button:
Intro bo INTRO
Ending bt ENDING/SYNCHRO START
Variation 1 to 4,
Fill-in 1 to 4
bp VARIATION/FILL-IN 1 to
bs VARIATION/FILL-IN 4*
CTX5000_3000_EN.book 83 ページ 2018年2月26日 月曜日 午後3時56分
Loading ...
Loading ...
Loading ...