Loading ...
Loading ...
Loading ...
8 Philips · PicoPix Max
TV
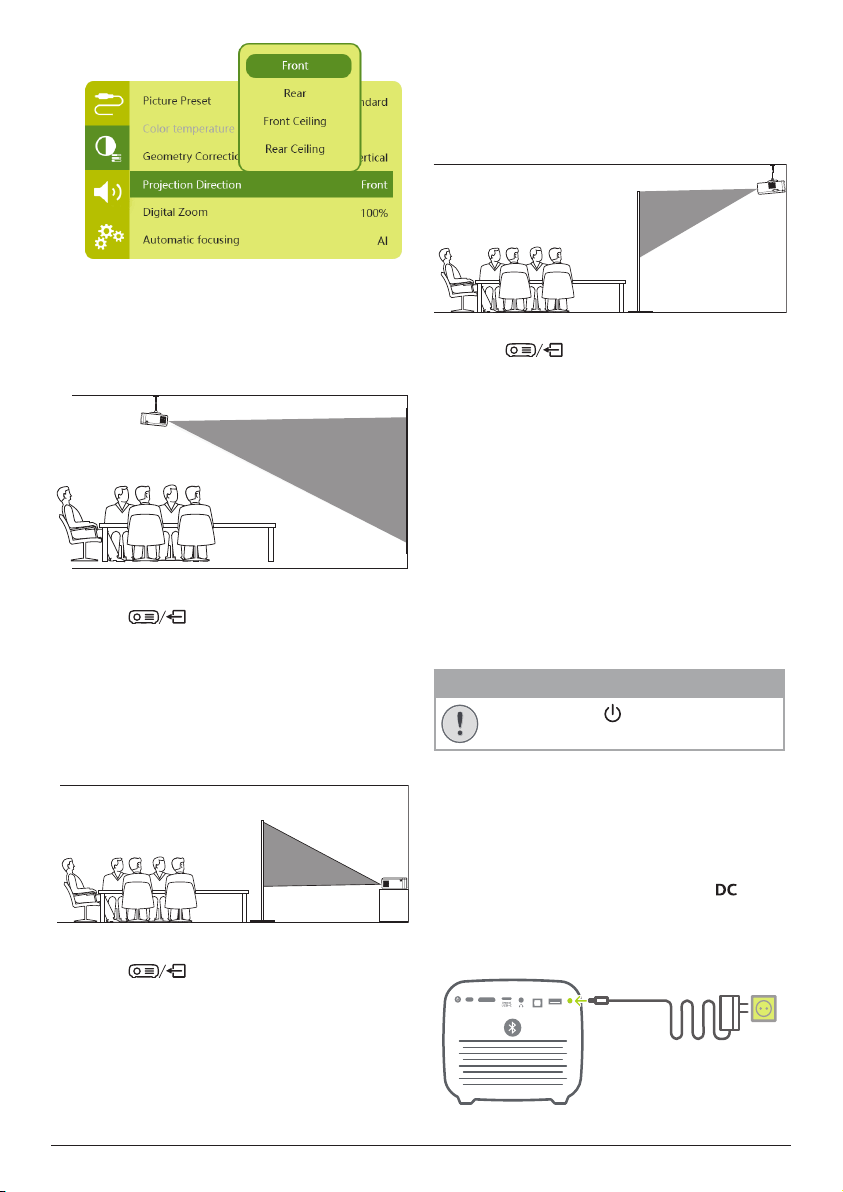
Front ceiling
1 Mount the projector on the ceiling with
upside up in front of the projection screen.
A projector mount is required to mount the
projector on ceiling.
2 To adjust projection to the correct position,
press
on the remote control to
access the settings menu and navigate to
Projection Direction - Front Ceiling.
Rear table
1 Place the projector on a table behind the
projection screen. A special rear projection
screen is required.
2 To adjust projection to the correct position,
press
on the remote control to
access the settings menu and navigate to
Projection Direction - Rear.
Rear ceiling
1 Mount the projector on ceiling with upside
up behind the projection screen. To mount
the projector on ceiling behind the screen,
a projector mount and a special rear
projection screen is required.
2 To adjust projection to the correct position,
press
on the remote control to
access the settings menu and navigate to
Projection Direction - Rear Ceiling.
Use a tripod (optional)
You can use the projector with a tripod
(optional) which allows more choices for
placing the projector.
Locate the tripod socket on the bottom of the
projector, then mount and secure the projector
on the tripod.
Connect power supply
The projector can be operated by either
external power or built-in battery.
CAUTION!
Always use the button to turn the
projector on and off.
Operation by external power
1 Select a supplied power cable with an
appropriate power plug. Insert the slotted
end of the power cable into the slot of the
supplied power adapter.
2 Connect the power adapter to the
socket on the projector, and then to the
wall outlet.
• The LED on the projector turns red.
a
b
HDMI
DC
USB
SPDIF
Loading ...
Loading ...
Loading ...