Loading ...
Loading ...
Loading ...
PREPARATIONS ➤ f Initial settings En 18
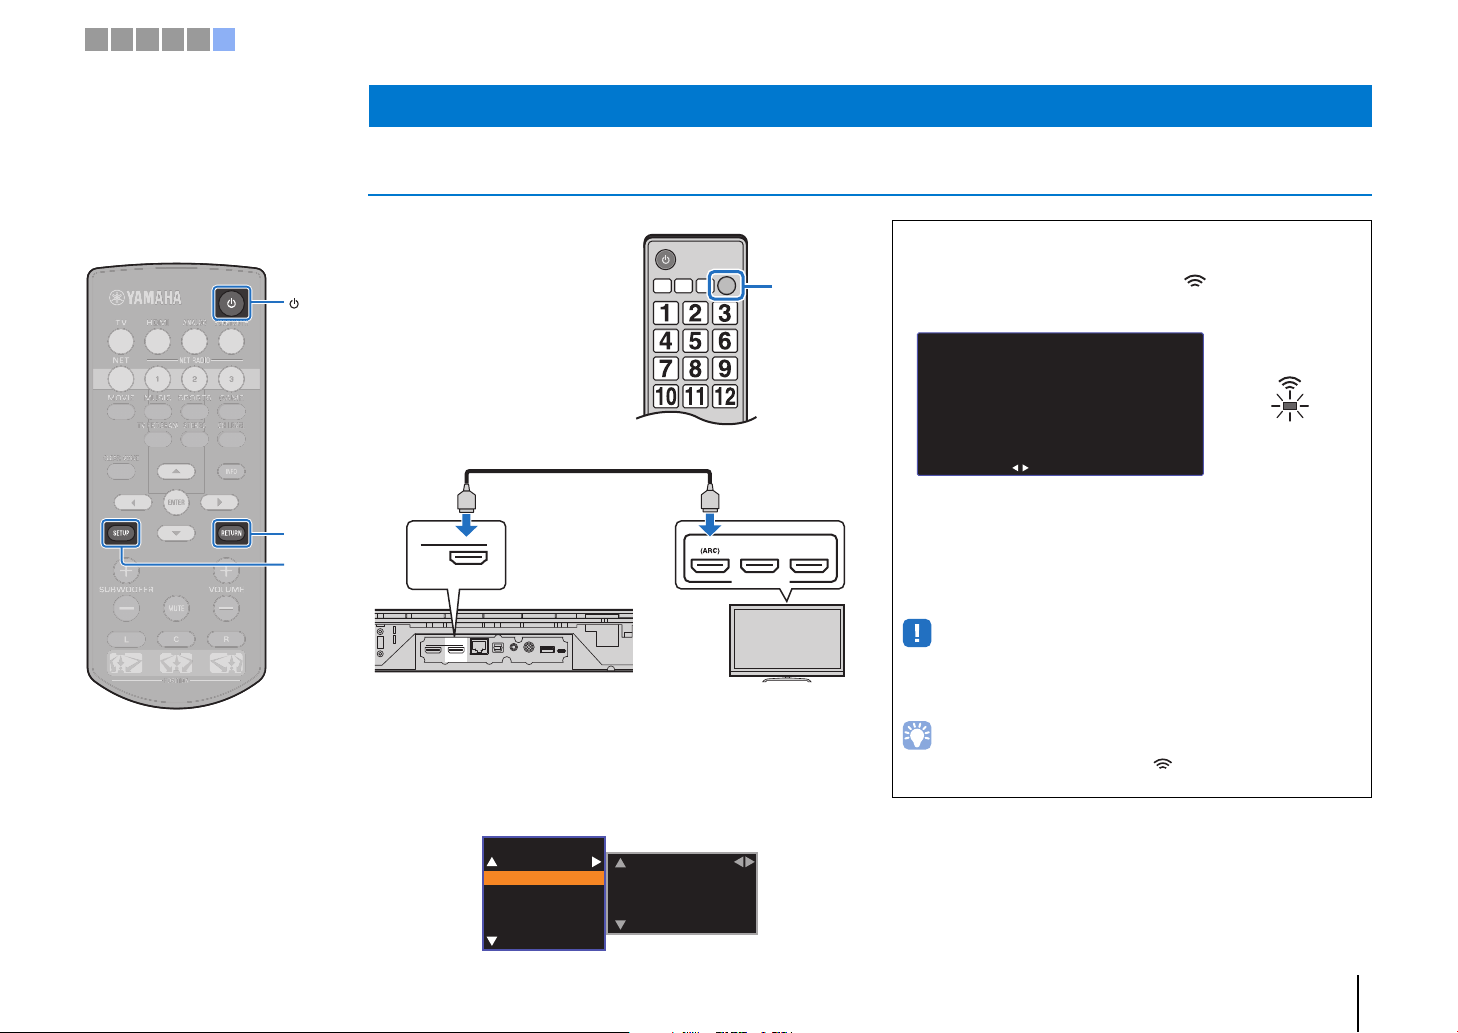
Displaying the menu screen on the TV
Visual operation of this unit is
possible by displaying its menu
screen on the TV.
Turn on the unit and the TV, and
then use the input button on the
TV’s remote control to switch input
so that video input from this unit is
displayed.
When this unit and the TV are
connected as shown below,
select “HDMI 1”.
The menu display
The menu is displayed on the TV screen when the SETUP key is
pressed. When the TV is receiving HDMI signals, the menu is
superimposed over video content. Press the SETUP key twice to
cancel menu display.
f Initial settings
TV remote control (example)
Switch
input
sources
HDMI
IN OUT(ARC)
NETWORK
TV
ANALOG
SUBWOOFER OUT
UPDATE ONLY
HDMI INPUT
123
OUT(ARC)
HDMI
HDMI
HDMI
TV
The unit (rear)
Setup Menu
Sound
HDMI
Function
Information
Channel Level
Dynamic Range
Audio Delay
Initial screen display
When the unit is turned on for the first time after purchase, the
screen below will be displayed and the indicator on the front
panel will flash slowly.
While this screen is displayed, an iOS device (such as an
iPhone) can be used to easily connect the unit to a wireless
network. See the Quick Reference Guide.
If you will not use an iOS device to connect to a wireless
network, press the RETURN key.
• You can use this function to connect to a wireless network at any time by
selecting “Share Wi-Fi Settings (iOS)” from the setup menu. However, be
aware that if a different wireless network, or a Bluetooth device, has already
been configured, doing so will erase any previous settings.
• This screen will not be displayed and the indicator will not flash if the unit
is connected to a router via its NETWORK jack (wired connection).
Share Wi-Fi Settings
You can share the wireless
(Wi-Fi) settings of the
network with Sound Projector
using a device with iOS7 or
later.
[ENTER]:Start
[RETURN]:Cancel
[ ]:OSD Language
Flashes slowly
1 2 3 4 5 6
SETUP
RETURN
Loading ...
Loading ...
Loading ...