Loading ...
Loading ...
Loading ...
14
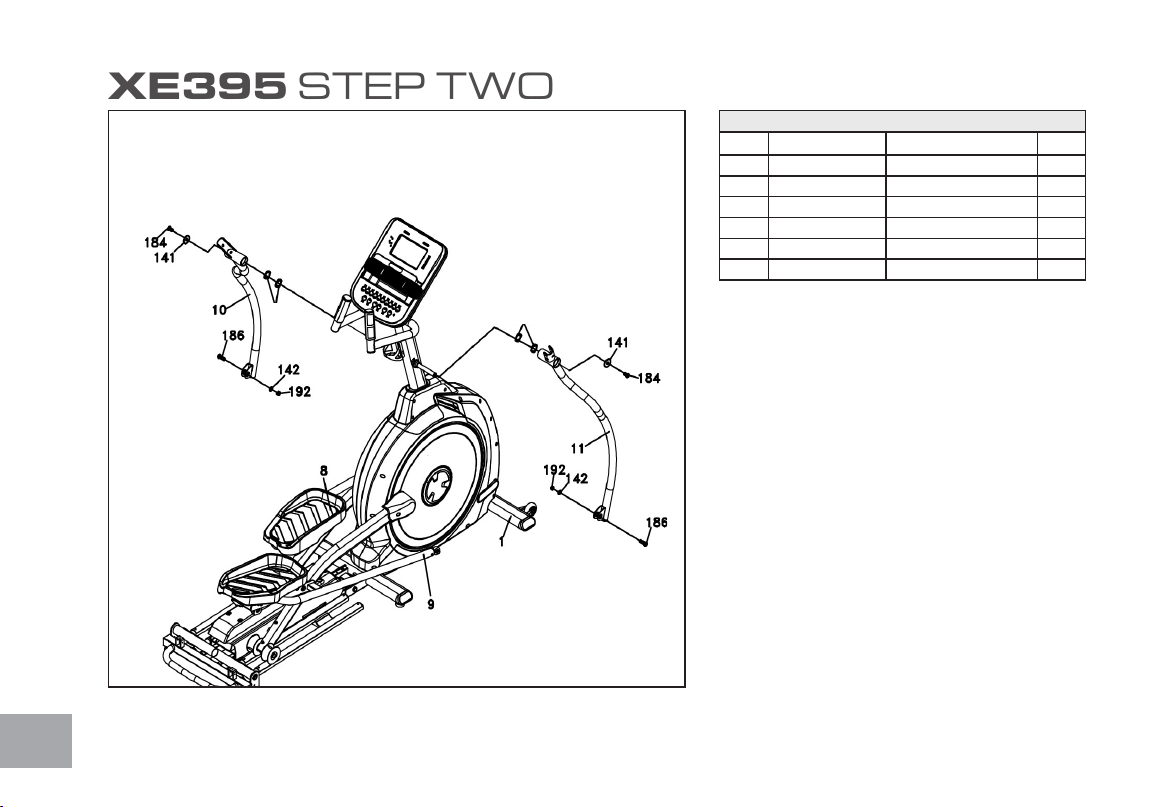
XE395 STEP TWO
HARDWARE FOR STEP 2
PART TYPE DESCRIPTION QTY
141 FLAT WASHER
5/16” X 23 X 1.5T
2
142 FLAT WASHER
5/16” X 20 X 1.5T
2
196 WAVE WASHER
Ø17
2
184 BOLT
5/16” X 15L
2
186 BOLT
5/16” X 1 - 1/4”
2
192 NYLOC NUT
5/16” X 9T
2
1. Gather HARDWARE FOR STEP 2.
2. Slide 2 WAVE WASHERS (196) onto each side
of the Swing Arm Axle. Slide the LOWER SWING
ARMS (10 LEFT,11 RIGHT) onto the axles
and secure with the 2 BOLTS (184) and FLAT
WASHERS (141). Do not force the Swing Arms
onto the axle. They should slide on, but you may
need to jiggle them to get them lined up properly.
The Swing Arms have been previously installed at the
factory so they do t properly.
3. Remove the tie that holds the spacer in the rod end
located at the end of the RIGHT CONNECTING
ARM (9) and line up the rod end with the bracket
at the bottom of the LOWER RIGHT SWING
ARM (11). Slide the BOLT (186) through the
bracket of the Lower Swing Arm and then through
the rod end and spacer. Install the FLAT WASHER
(142) and NYLOC NUT (192) on the bolt and
tighten as much as possible. Repeat this step for the
left side. Tighten using the WRENCHES (155 &
158).
196 196
Loading ...
Loading ...
Loading ...