Loading ...
Loading ...
Loading ...
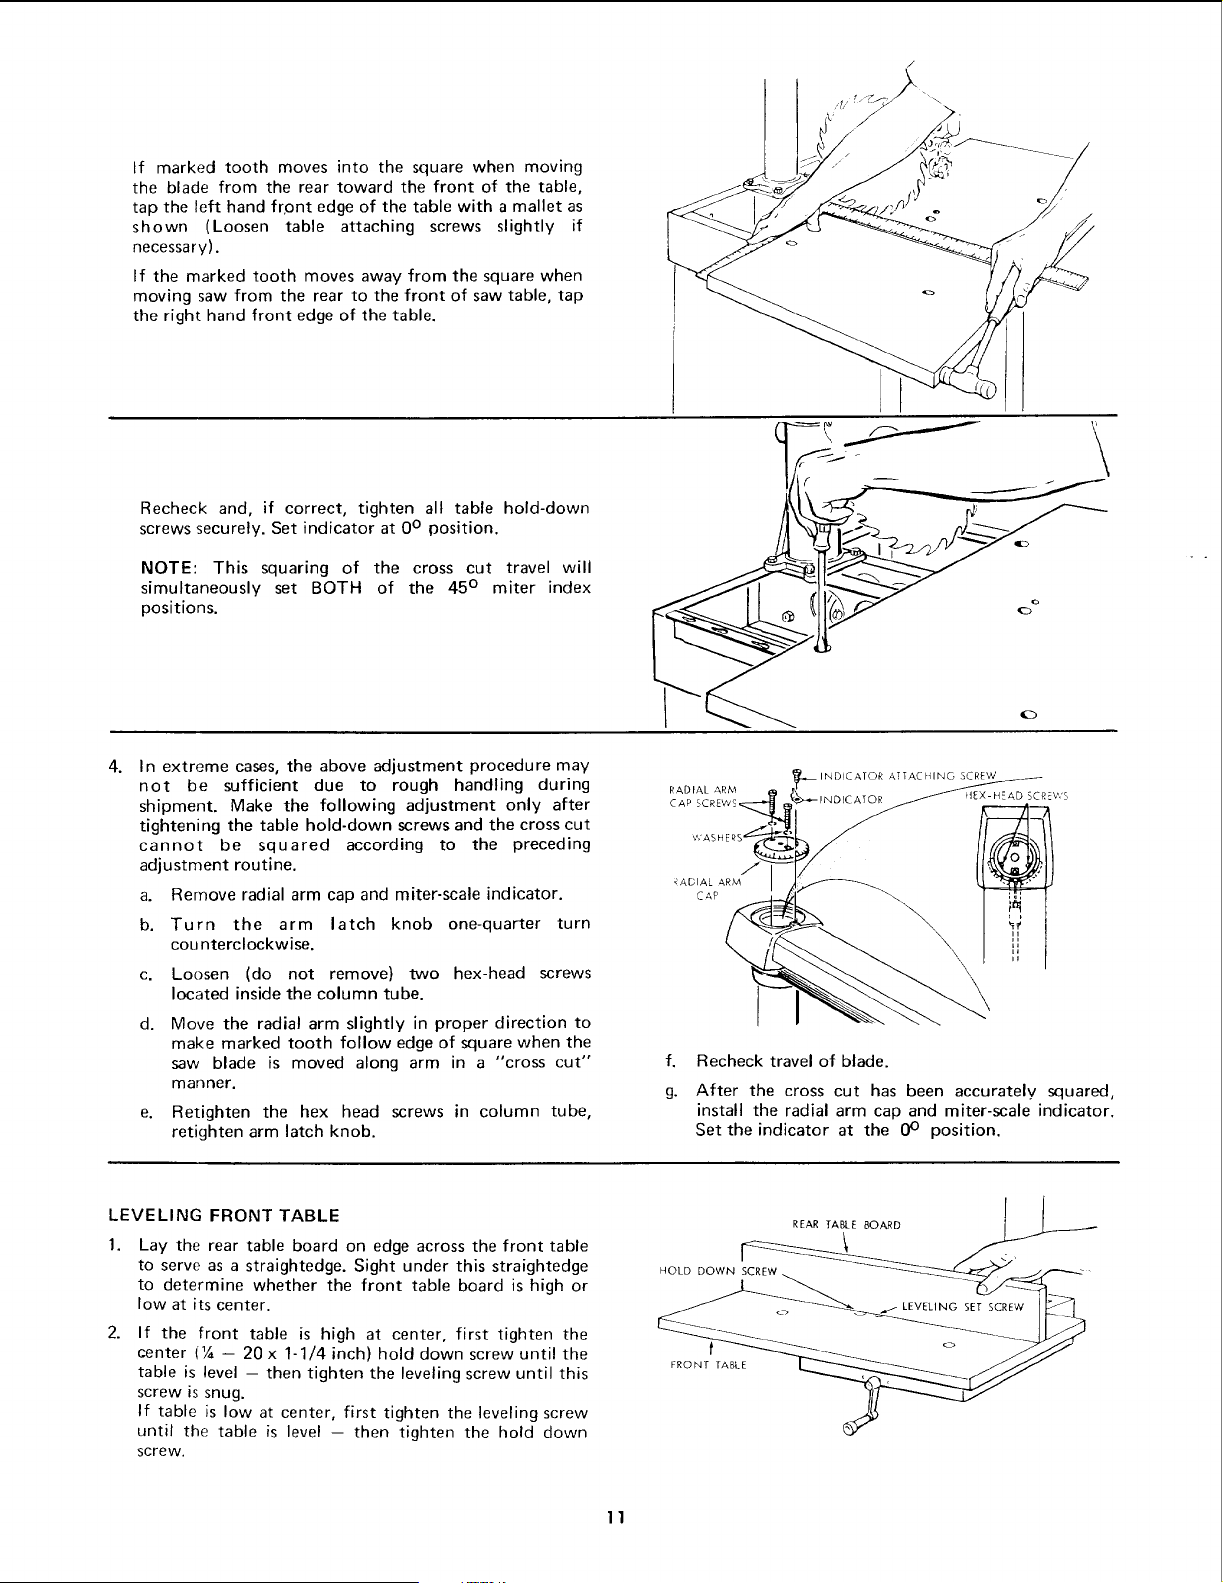
If marked tooth moves into the square when moving
the blade from the rear toward the front of the table,
tap the left hand front edge of the table with a mallet as
shown (Loosen table attaching screws slightly if
necessary).
If the marked tooth moves away from the square when
moving saw from the rear to the front of saw table, tap
the right hand front edge of the table.
/
Recheck and, if correct, tighten all table hold-down
screws securely. Set indicator at 0° position.
NOTE: This squaring of the cross cut travel will
simultaneously set BOTH of the 45 ° miter index
positions.
4. In extreme cases, the above adjustment procedure may
not be sufficient due to rough handling during
shipment. Make the following adjustment only after
tightening the table hold-down screws and the cross cut
cannot be squared according to the preceding
adjustment routine.
a. Remove radial arm cap and miter-scale indicator.
b. Turn the arm latch knob one-quarter turn
counterclockwise.
c. Loosen (do not remove) two hex-head screws
located inside the column tube.
d. Move the radial arm slightly in proper direction to
make marked tooth follow edge of square when the
saw blade is moved along arm in a "cross cut"
manner.
e. Retighten the hex head screws in column tube,
retighten arm latch knob.
RADIAL ARM
CAP SCREWS,
/I
RADIAL ARM
CAP
ATTAC HINO SCREW
f. Recheck travel of blade.
g. After the cross cut has been accurately squared,
install the radial arm cap and miter-scale indicator.
Set the indicator at the 0° position.
LEVELING FRONT TABLE
1.
2.
Lay the rear table board on edge across the front table
to serve as a straightedge. Sight under this straightedge
to determine whether the front table board is high or
low at its center.
If the front table is high at center, first tighten the
center (1/4 -- 20 x 1-1/4 inch) hold down screw until the
table is level - then tighten the leveling screw until this
screw is snug.
If table is low at center, first tighten the leveling screw
until the table is level -- then tighten the hold down
screw.
FRONT TABLE
11
Loading ...
Loading ...
Loading ...