Loading ...
Loading ...
Loading ...
i
I
_a
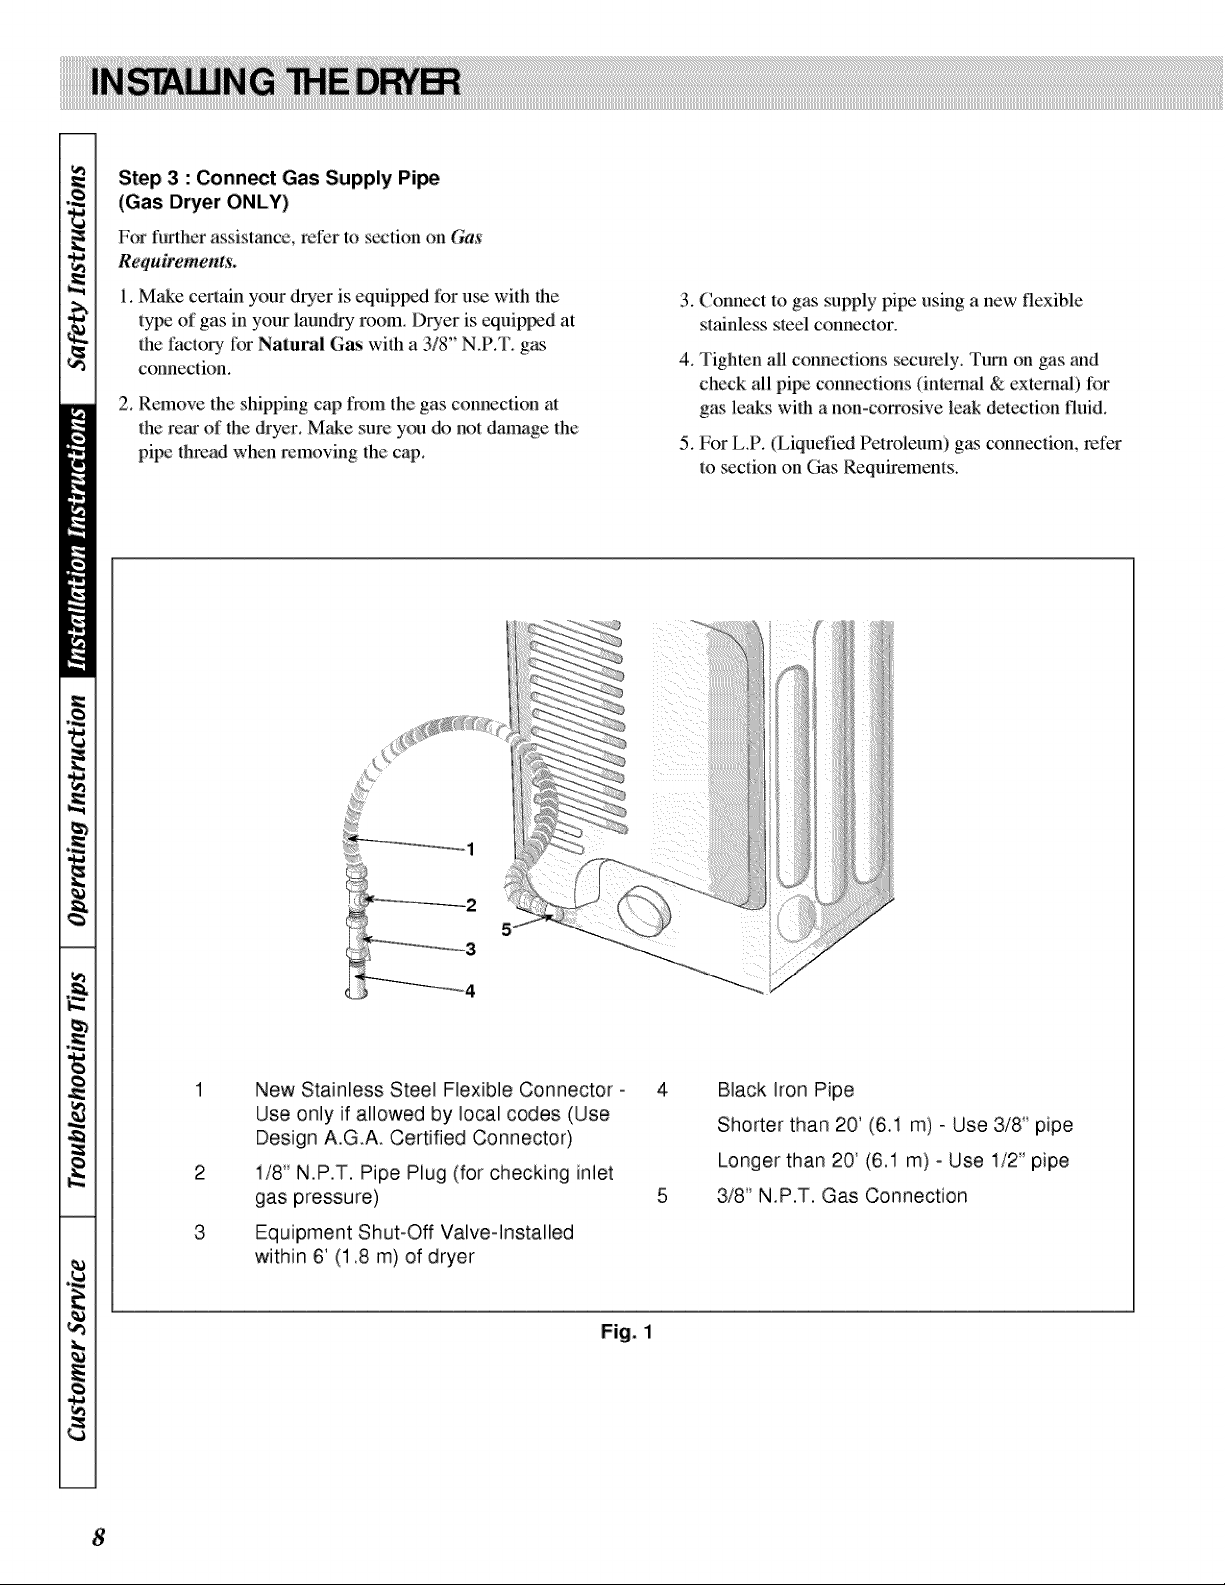
Step 3 : Conn_t Gas Supply Pi_
(Gas Dryer ONLY)
For l!u_lher assistance, relL_rto _ction on Gas
Requirements.
I. Make ceri:ain your dryer is equippvd fi_ruse with lhe
l:ypeof gas in your laundry room_ Dryer is equiplyad at
the tTml:OD,:liarNaiural Gas with a 3/8" N.P.T. g_s
connection.
2. Remove the shipping cap fix)m ihe gas connection at
ihe rear of the dryer. Make sure you do not damage the
pipe i:h:madwhen removing the cap.
3. (onnect to gas supply pipe using a new flexible
stainless sled connector.
4. Tighten all conneclious _:curely. 'l'um on gas and
check all pipe couneclions (internal & external) for
g_s leaks wilh a non-corrosive leak deiectkm fluid.
5. For L.P. (Liquefied Pe:troleum) gas conneciion, refer
l:o section on Gas Requiremems.
2
3
New Stainless Steel Flexible Connector -
Use only if allowed by local codes (Use
Design A.G.A. Certified Connector)
i/8" N.P.T. Pipe Plug (for checking inlet
gas pressure)
Equipment Shut-Off Valve-Installed
within 6' (1.8 m) of dryer
Black Iron Pipe
Shorter than 20' (6A m) - Use 318" pipe
Longer than 20' (6.1 m) - Use 1/2" pipe
3/8" N.P.T. Gas Connection
Fig. 1
8
Loading ...
Loading ...
Loading ...