Loading ...
Loading ...
Loading ...

TEC_TM_156 | REV. G | EN 10/23/2023 Page 37 of 10015 & 24 INCH INSTALL GUIDE
PRIOR TO INSTALL
STACKING KIT INSTALLATION
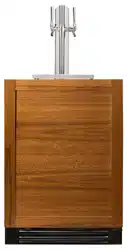
KIT CONTENTS
• (1) Louver Grill (stainless models)
• (2) Stacking Brackets
• (4) 1/4" Hex Head Screws
REQUIRED TOOLS
Required tools include (but may not be limited to)
the following:
• Floor protector
• Level
• 1/4" Hex Head Driver
• Drill
RECOMMENDED – This procedure may
require assistance.
RECOMMANDÉ – Cette procédure peut
nécessiter une assistance.
WARNING – Units may pose a tipping
hazard during stacking kit installation
or when moving the stacked units.
ATTENTION – Les unités peuvent
présenter un risque de basculement lors
de l’installation du kit d’empilage ou lors
du déplacement des unités empilées.
PROCEDURE
1. Position the floor protector near the final
installation location.
2. Uncrate the appliances. Secure the shelving,
doors, and drawers.
3. Install the anti-tip brackets (see "Anti-Tip Bracket
Installation" on page 45). Verify the brackets are
correctly positioned.
4. Carefully place the upper appliance on the lower
appliance.
NOTE: DO NOT LIFT THE CABINET BY
THE COUNTERTOPS, DOORS, DRAWERS,
OR GRILLS. THIS STEP MAY REQUIRE
ASSISTANCE.
5. Level the upper appliance.
6. Align the upper appliance with the lower
appliance's sides and back.
7. Install the rear stacking brackets. See fig. 1.
8. Position the stacked units in the final installation
location.
9. Verify the level of both appliance's. Adjust the
leveling legs as needed. See fig. 2.
10. Remove the upper appliance's kickplate. See fig. 3.
11. Install the louver grill. See figs 4-6.
NOTE: Be sure to consider air flow when adding a
panel to the grill or door.
Loading ...
Loading ...
Loading ...