Loading ...
Loading ...
Loading ...
French – 67
Entreposage avec poignée verticale
La poignée peut être réglée dans une position de
rangement verticale.
1 Desserrer les boutons de la poignée inférieure.
2 Faire pivoter le guidon et aligner les goupilles avec la
fente verticale du support.
3 Resserrer les boutons.
Position de transport et d’entreposage
On peut replier la poignée pour réduire l’espace nécessaire
pour le transport et l’entreposage.
MISE EN GARDE! Prendre soin de ne pas
endommager les câbles et les fils électriques lors du
pliage du guidon.
1 Desserrer les deux boutons de la poignée supérieure et
laisser la poignée s’abaisser vers l’arrière.
2 Desserrer les deux boutons de la poignée inférieure,
faire pivoter l’ensemble de la poignée vers l’avant et la
laisser reposer sur la tondeuse.
Collecteur d’herbe
Montage du collecteur d’herbe
1 Mettre le châssis du collecteur d’herbe dans le sac à
herbe en orientant la partie rigide du sac vers le bas.
S’assurer que la poignée du châssis se trouve à
l’extérieur de la partie supérieure du sac.
2 Fixer le sac à herbe sur le châssis au moyen des
attaches à fixation rapide.
Poignée du lanceur
Installer la poignée du lanceur
1 Desserrer le bouton de verrouillage.
2 Maintenir la poignée de frein moteur contre la poignée
supérieure.
3 Saisir la poignée du lanceur, tirer doucement la poignée
du lanceur du moteur jusqu’à ce que la corde du
lanceur puisse glisser dans la boucle de la corde guide.
4 Serrer le bouton de verrouillage.
MONTAGE ET RÉGLAGES
22 – English
Gear cases
• To keep your drive system working properly, the gear
cases and area around the drive should be kept clean
and free of trash build-up. Clean under the drive cover
twice a season.
• The gear cases are filled with lubricant to the proper
level at the factory. The only time the lubricant needs
attention is if service has been performed on the gear
case.
• Under normal usage the grass catcher is subject to
deterioration and wear. Check the grass catcher
frequently for wear or deterioration. Replace the bag
only with grass bags that meet the manufacturer’s
recommendations and specifications.
Water washout feature
Your lawn mower is equipped with a fitting that allows
quick and easy cleaning of the underside of the housing.
Note that water, grass and other debris will drain from
beneath the mower housing during the washout process.
1 Move the machine to an area of cut grass or another
hard surface.
2 Remove grass catcher or mulch plug from the lawn
mower.
3 Close the back shield.
4 Connect a garden hose to the washout port fitting.
5 Turn on water supply and check for leaks at the fitting.
6 If no leaks are present, start engine and let engine run
until the underside of the lawn mower is clean.
CAUTION! Do not engage the drive system during the
washout process.
7 Turn off the engine.
8 Shut off water supply and remove hose from fitting.
IMPORTANT! Do not remove hose from fitting while
engine is running. Water in engine can result in
shortened engine life.
9 Start engine and let engine run for a full minute to
remove excess water from mower.
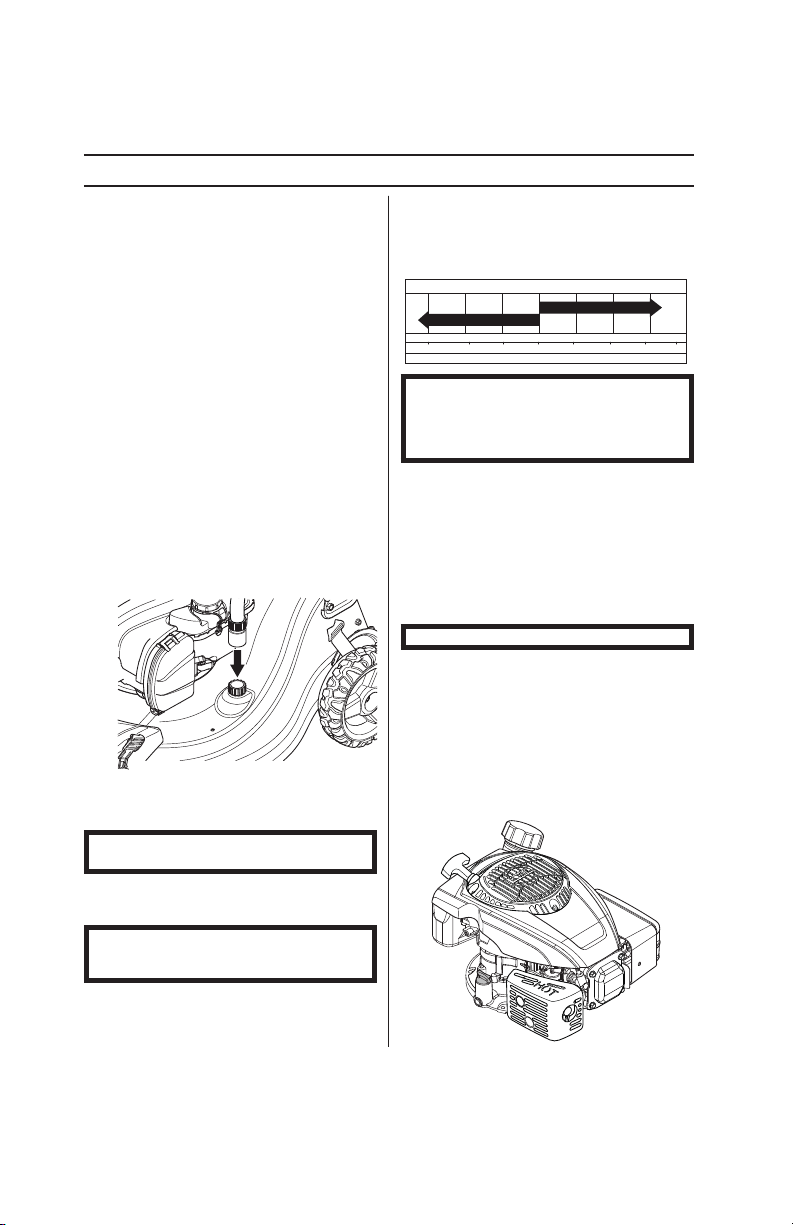
Engine
Lubrication
Use only high quality detergent oil rated with API service
classification SG-SL. Select the oil’s SAE viscosity grade
according to your expected operating temperature.
CAUTION! Although multi-viscosity oils (5W30,
10W30 etc.) improve starting in cold weather, these
multi-viscosity oils will result in increased oil
consumption when used above 32°F / 0°C. Check
your engine oil level more frequently to avoid possible
engine damage from running low on oil.
• Change the oil after every 25 hours of operation or at
least once a year.
• Check the engine oil level before starting the engine
and after each 5 hours of continuous use. Tighten oil
plug securely each time you check the oil level.
Oil level
Before starting for the first time
Your lawnmower is shipped without oil in the engine. You
receive a container of oil with the unit. Slowly pour the
entire container down the oil fill spout into the engine.
IMPORTANT! Do not overfill!
Check the engine’s oil level
The lawn mower should stand on flat ground when you
check the oil level. Ensure the ignition lead has been
removed from the spark plug before you open the oil filler
cap.
1 Check the oil level with the dipstick on the oil filler cap.
2 Remove the oil cap and wipe the dipstick clean.
3 Put the dipstick back in. The oil filler cap must be
completely screwed down to give a correct picture of
the oil level.
TEMPERATURE RANGE ANTICIPATED BEFORE NEXT OIL CHANGE
SAE VISCOSITY GRADES
-20 0 30 40
80
100
-30
-20 0
20 30 40
F
C
32
-10
10
60
5W-30
SAE 30
MAINTENANCE
TEMPERATURE RANGE ANTICIPATED BEFORE NEXT OIL CHANGE
SAE VISCOSITY GRADES
Loading ...
Loading ...
Loading ...