Loading ...
Loading ...
Loading ...
119
6
The Shooting Menus
IMAGE QUALITY SETTING (Still Photography)
Editing Custom Settings
Edit existing custom settings banks.
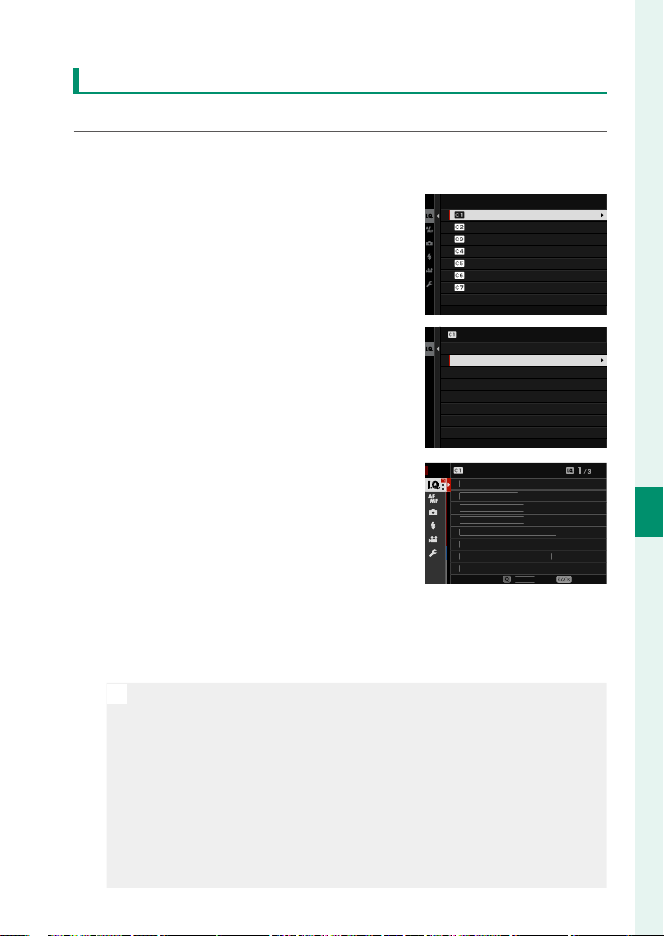
1
Select H IMAGE QUALITY SETTING> EDIT/SAVE CUSTOM
SETTING in the shooting menu and press MENU/OK.
2
Highlight the desired custom set-
tings bank and press MENU/OK.
CUSTOM 2
CUSTOM 3
CREATE NEW
CUSTOM 4
CREATE NEW
EDIT/SAVE CUSTOM SETTING
CREATE NEW
CUSTOM 1
3
Highlight EDIT/CHECK and press
MENU/OK.
SAVE THE CHANGES
COPY
RESET THE CHANGES
ERASE
EDIT CUSTOM NAME
EDIT/CHECK
CUSTOM 1
4
The camera will display a list of shoot-
ing menu items; highlight an item
you wish to edit and press MENU/OK.
Adjust the selected item as desired.
EXIT
S
AV
E
IMA
G
E
S
IZ
E
IMA
G
E
Q
UALIT
Y
RAW RE
CO
RDIN
G
F
ILM
S
IM
U
LATI
O
N
M
O
N
OC
HR
O
MATI
C
CO
L
O
R
G
RAIN EFFE
C
T
CO
L
O
R
C
HR
O
ME EFFE
C
T
CO
L
O
R
C
HR
O
ME FX BL
UE
EDIT/CHECK
CUSTOM 1
5
Press MENU/OK to save the changes and return to the shooting
menu list.
Adjust additional items as desired.
N
If DISABLE is selected for H IMAGE QUALITY SETTING> AUTO
UPDATE CUSTOM SETTING, red dots will appear next to the edit-
ed items but the changes will not be saved automatically.
•
To save the changes for selected items, highlight the items in the
list and press Q.
•
To save changes for all items, return to Step 3 and select SAVE
THE CHANGES. To cancel all changes and restore the previous
settings, select RESET THE CHANGES.
•
If you copy an item marked by a red dot, the item will be copied
with the changes intact.
Loading ...
Loading ...
Loading ...