Loading ...
Loading ...
Loading ...
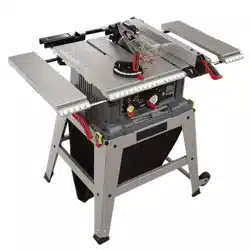
CONTENTS
WARRANTY ............................................................... 2
SAFETY INSTRUCTIONS FOR TABLE SAWS ......... 2
Rip Type Cuts ........................................................ 4
Cross Cut Type Cuts ............................................. 5
GLOSSARY OF WOODWORKING TERMS .............. 5
MOTOR SPECIFICATIONS AND ELECTRICAL
REQUIREMENTS .................................................. 6
UNPACKING AND CHECKING CONTENTS ............ 7
Tools Needed ......................................................... 7
List of Loose Parts ................................................. 8
AS SEM SLY ................................................................ 9
Installing Handwheels ............................................ 9
Checking Table Insert ............................................ 9
Checking Blade Squareness to Table ................... 9
Assembling Steel Legs ........................................ 10
Mounting Saw ...................................................... 10
Attaching Table Extensions ................................. 11
Mounting Switch .................................................. 12
Installing Rip Fence Guide Bars .......................... 12
Aligning Rip Fence ............................................... 14
Adjusting Rip Scale Pointer ................................. 16
Installing Blade Guard ......................................... 16
Mounting the Motor .............................................. 18
installing Belt Guard ............................................. 20
Plugging in Motor ................................................. 21
GETTING TO KNOW YOUR SAW .......................... 22
On-Off Switch ....................................................... 22
Elevation Handwheel ........................................... 23
Tilt Handwheel ................................................... 23
Tilt Lock Handle ................................................... 23
Rip Fence ............................................................ 23
Miter Gauge ......................................................... 23
Blade Guard ......................................................... 23
Table Insert .......................................................... 23
Removing and Installing Sawblade ...................... 24
Exact-I-Cut ........................................................... 24
BASIC SAW OPERATION ....................................... 25
Work Helpers ....................................................... 25
Safety Instuctions for Basic Saw Operation ......... 26
Using the Miter Gauge ......................................... 29
Crosscutting ..................................................... 29
Repetitive Cutting ............................................ 30
Miter Cutting .................................................... 30
Bevel Crosscutting ........................................... 31
Compound Miter Cutting .................................. 31
Using the Rip Fence ............................................ 31
Ripping ............................................................ 32
Bevel Ripping .................................................. 32
Using Featherboards for Thru-Sawing ............ 32
Resawing ......................................................... 35
Cutting Panels ................................................. 35
Using Featherboards for Non-Thru Sawing ..... 35
Rabbeting ........................................................ 36
Ploughing and Molding .................................... 36
Dadoing ........................................................... 36
Melding Cutting ................................................ 37
ADJ USTM ENTS ....................................................... 37
Miter Gauge ......................................................... 37
Heeling Adjustment or Parallelism of Sawblade
to Miter Gauge Groove ................................... 38
Blade Tilt or Squareness of Blade to Table ......... 39
Tilt Mechanism ..................................................... 41
MAINTENANCE ....................................................... 41
LUBRICATION ......................................................... 42
RECOMM ENDED ACCESSORIES ........................ 42
TFIOUBLESHOQTING ............................................. 43
REPAIR PARTS ....................................................... 45
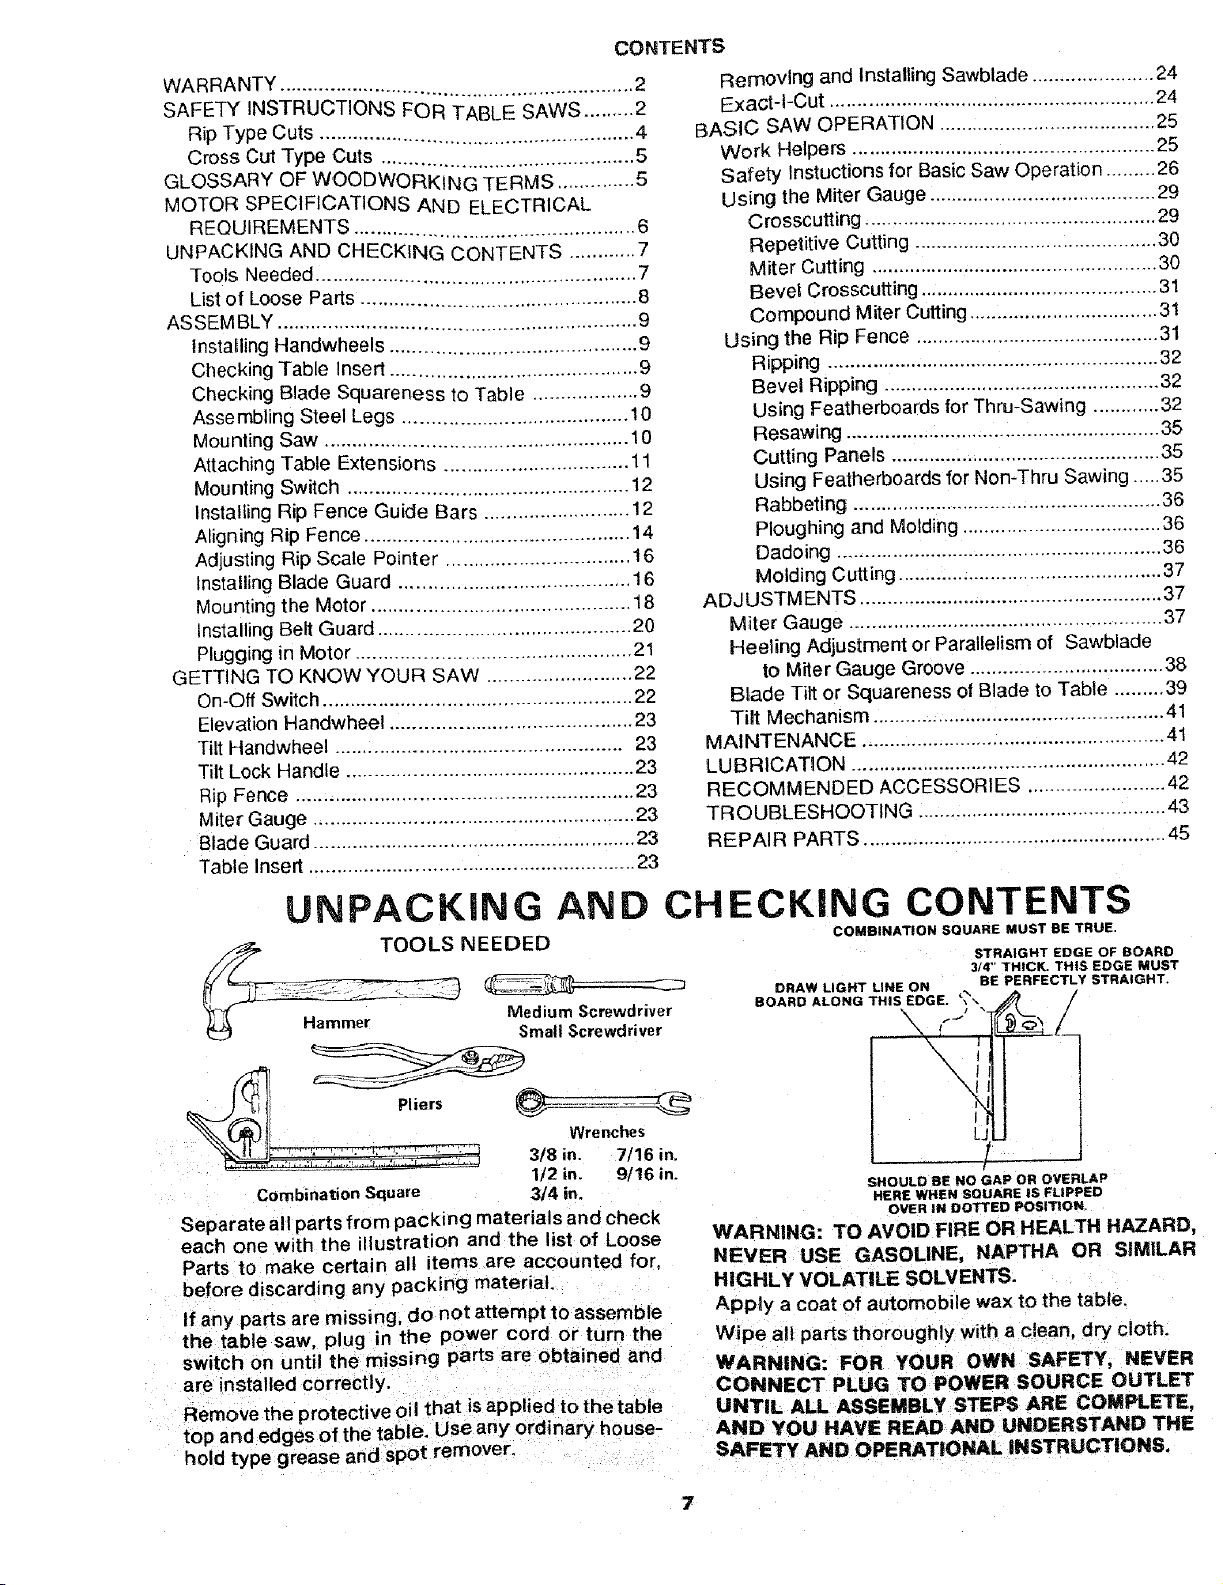
UNPACKING
NEEDED
_- ,_-,=-- _ Medium Screwdriver
(_ Hammer Small Screwdriver
__ .................... Wrenche
3/8 in. 7/16 in.
1/2 in. 9/16 in.
Combination Square 3/4 in.
Separate all parts from packing materials and check
each one with the illustration and the list of Loose
Parts to make certain all items are accounted for,
before discarding any packing material.
If any parts are missing, do not attempt to assemble
the table saw, plug in the power cord or turn the
switch on until the missing parts are obtained and
are installed correctly.
Remove the protective oil that is applied to the table
top and edges of the table, Use any ordinary house-
hold type grease and spot remover.
AND CHECKING CONTENTS
COMBINATION SOUARE MUST BE TRUE.
DRAW LIGHT LINE ON
BOARD ALONG THIS EDGE. '_
I
L_
STRAIGHT EDGE OF BOARD
3/4" THICK. THIS EDGE MUST
BE PERFECTLY STRAIGHT.
SHOULD BE NO GAP OR OVERLAP
HERE WHEN SQUARE IS FLIPPED
O_R tNDOTTEDPosmoN.
WARNING: TO AVOID FIRE OR HEALTH HAZARD,
NEVER USE GASOLINE, NAPTHA OR SIMILAR
HIGHLY VOLATILE SOLVENTS.
Apply a coat of automobile wax to the table.
Wipe all parts thoroughly with a clean, dry cloth.
WARNING: FOR YOUR OWN SAFETY, NEVER
CONNECT PLUG TO POWER SOURCE OUTLET
UNTIL ALL ASSEMBLY STEPS ARE COMPLETE,
AND YOU HAVE READ AND UNDERSTAND THE
SAFETY AND OPERATIONAL INSTRUCTIONS,
Loading ...
Loading ...
Loading ...