Loading ...
Loading ...
Loading ...
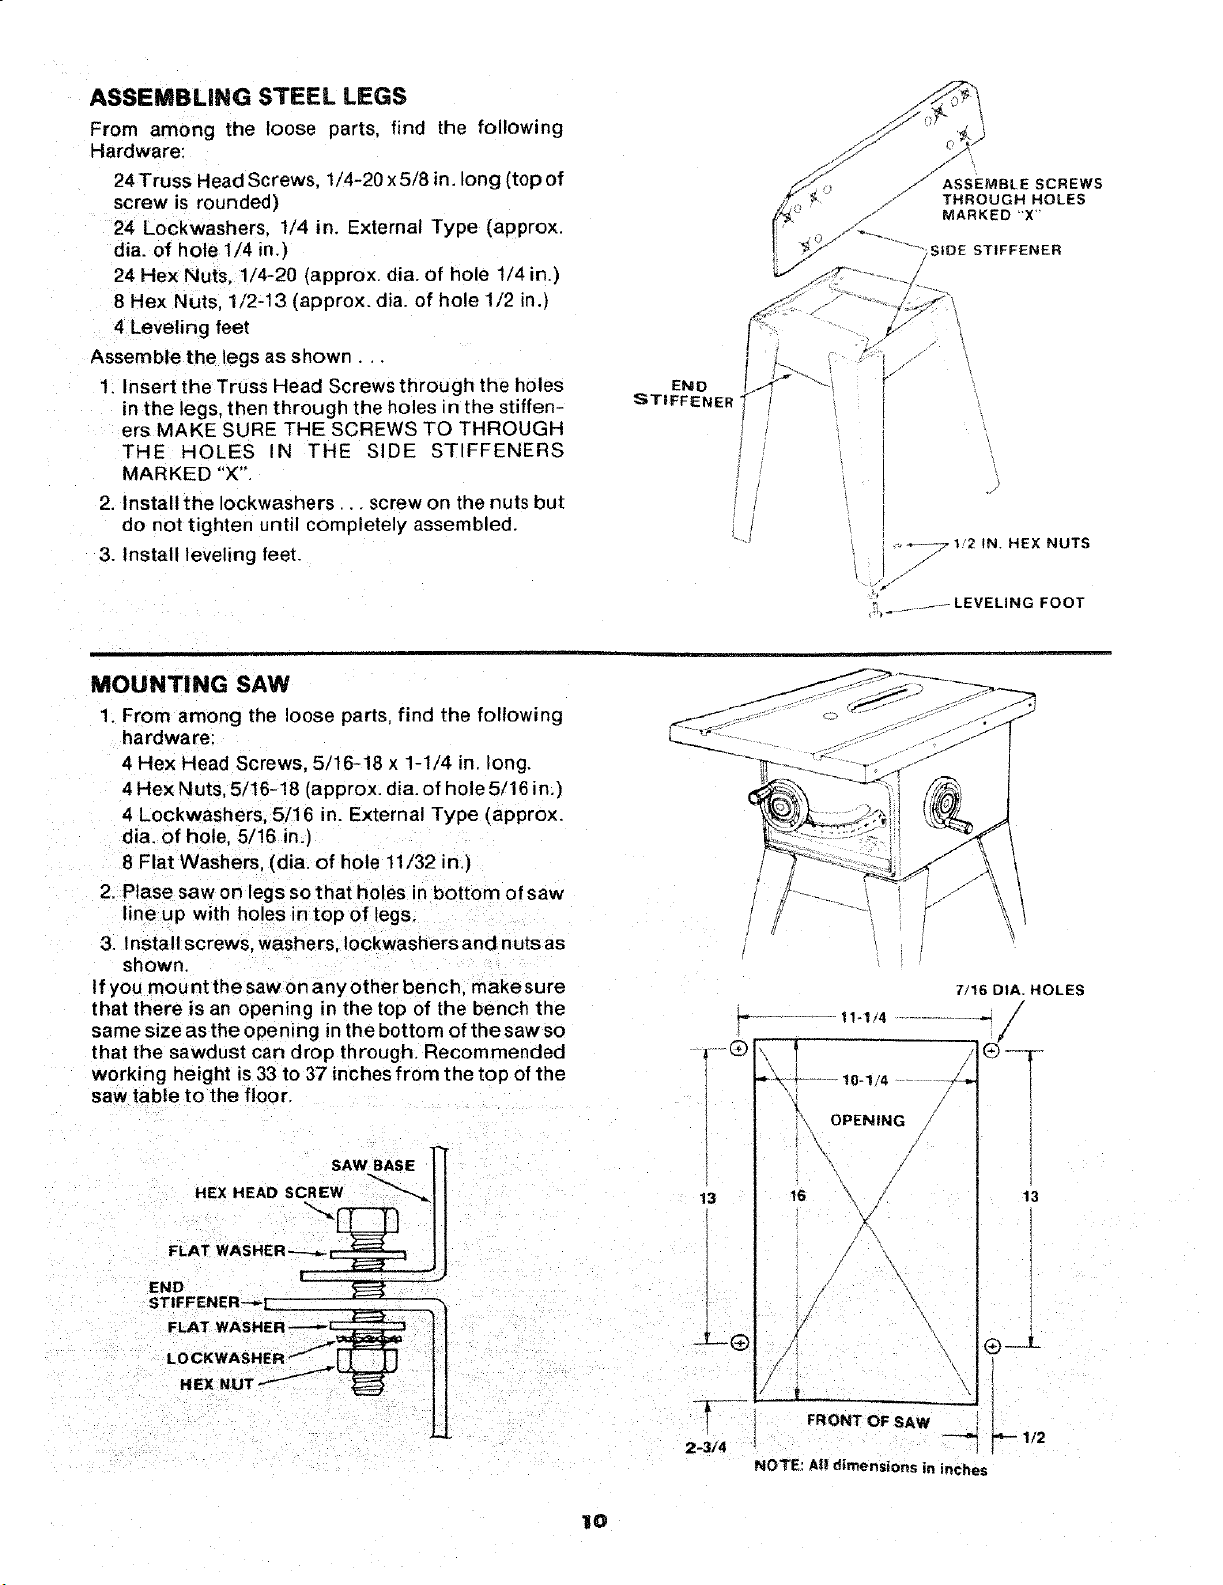
ASSEMBLING STEEL LEGS
From among the loose parts, find the following
Hardware:
24 Truss Head Screws, 1/4-20 x 5/8 in. long (top of
screw is rounded)
24 Lockwashers, 1/4 in, External Type (approx.
dia. of hote 1/4 in.)
24 Hex Nuts, 1/4-20 (approx. dia. of hole 1/4 in.)
8 Hex Nuts, 1/2-13 (approx. dia. of hole 1/2 in.)
4 Leveling feet
Assemble the legs as shown..
1. Insert the Truss Head Screws through the holes
in the legs, then through the holes in the stiffen-
ers MAKE SURE THE SCREWS TO THROUGH
THE HOLES IN THE SIDE STIFFENERS
MARKED "X'"
2. Install the Iockwashers.. _screw on the nuts but
do not tighten until completely assembled.
3. Install leveling feet.
.-,+_71!2 IN. HEX NUTS
......... LEVELING FOOT
MOUNTING SAW
1. From among the loose parts, find the following
hardware:
4 Hex Head Screws, 5/16-18 x 1-1/4 in. long.
4 Hex Nuts, 5/16-18 (approx. dia. of hole 5/16 in.)
4 Lockwashers, 5/16 in. External Type (approx.
dia. of hole, 5/16 in.]
8 Flat Washers, (dia. of hole 11/32 in.)
2. Ptase saw on legs so that holes in bottom of saw
line up with holes in top of legs.
3. Install screws, washers, Iockwashersand nuts as
shown.
tf you mount the saw on any other bench, make sure
that there is an opening in the top of the bench the
same size as the opening n the bottom of the saw so
that the sawdust can drop through. Recommended
working height is 33 to 37 inches from the top of the
saw table to the floor.
SAW BASE ]_[
HEXHEAOSC.EW
FLAT WASHE R'----_ _ tl
END f _ ""
STIFFENER--_L
FLAT WASHER ]/
7/16 DIA. HOLES
/
_-- ................. 11-1/4 .....................
,o,I
............
'_{' OPENIN G
\, /
I
13
2-3/4
/
16 _\
/
\
;/ \
FRONT OF SAW
NOTE: All dimensions in inches
13
Q__3_
112
IO
Loading ...
Loading ...
Loading ...