Loading ...
Loading ...
Loading ...
- Never cut more than one workpiece at a
time.
- Never turn your table saw "ON" before
clearing everything except the workpiece
and related support devices off the table.
Plan the way you will push the workpiece through.
- NEVER putt the workpiece through. Start and
finish the cut from the front of the table saw.
- NEVER put your fingers or hands in the path of
the sawblade or other cutting tool.
- NEVER reach in back of the cutting tool with
either hand to hold down or support the work-
piece, remove wood scraps, or for any other
reason.
- Avoid hand positions where a sudden slip could
cause fingers or hand to move into a saw blade o r
other cutting tool.
- DON'T OVERREACH. Always keep good footing
and balance.
- Push the workpiece against the rotation of the
blade. NEVER feed material into the cutting tool
from the rear of the saw.
- Always push the workpiece all the way past the
sawblade.
- As much as possible, keep you r face and body to
one side of the sawblade, out of line with a
possible kickback or throwback.
- NEVER turn the saw "ON" before clearing the
table of all tools, wood scraps, etc.. except the
werkpiece and related feed or support devices
for the cut planned.
WHENEVER SAW IS RUNNING
WARNING: DON'T LET FAMILIARITY (GAINED
FROM FREQUENT USE OF YOUR TABLE SAW)
CAUSE A CARELESS MISTAKE. ALWAYS
REMEMBER THAT A CARELESS FRACTION OF A
SECOND IS ENOUGH TO CAUSE A SEVERE
INJURY.
1. Before actually cutting with the saw watch it
while it runs for a short while. If it makes an
unfamiliar noise or vibrates a lot, stop immedi-
ately. Turn the saw off. Unplug the saw. Do not
restart until finding and fixing the problem.
,2. Make sure the top of the arbor or cutting tool
turns toward the front of the saw.
3. Set the cutting tool as low as possible for the cut
you're planning.
4. KEEPCHILDREN AWAY. All visitors should be
5. Let the blade reachfull speed before cutting.
c. Wait for all moving parts to stop.
d, Check blade, spreader and fence for proper
alignment before starting, again.
8. To avoid throwback of small, cut off pieces:
a. Use the guard assembly.
b. To remove pieces trapped inside the guard:
1. Turn saw off.
2. Remove switch key.
3. Unplug saw.
4. Wait for blade to stop before lifting the
guard.
additional instructions for
RiP TYPE CUTS
- NEVER use the miter gauge when ripping.
- Use a push stick whenever the fence is 2 to 6
inches from the blade. Use an auxiliary fence and
push block whenever the fence must be within 2
inches of the blade. (See "Basic Saw Operation
Using The Rip Fence" section.)
- Never rip anything shorter than 10" long.
-When using a push stick or push block, the
trailing end of the _)oard must be square. A push
stick or block against an uneven end could slip
off or push the work away from the fence.
- A FEATHERBOARD can help guide the work-
piece. See BASIC SAW OPERATION - USING
THE RIP FENCE. Always use featherboards for
any non-thru rip type cuts.
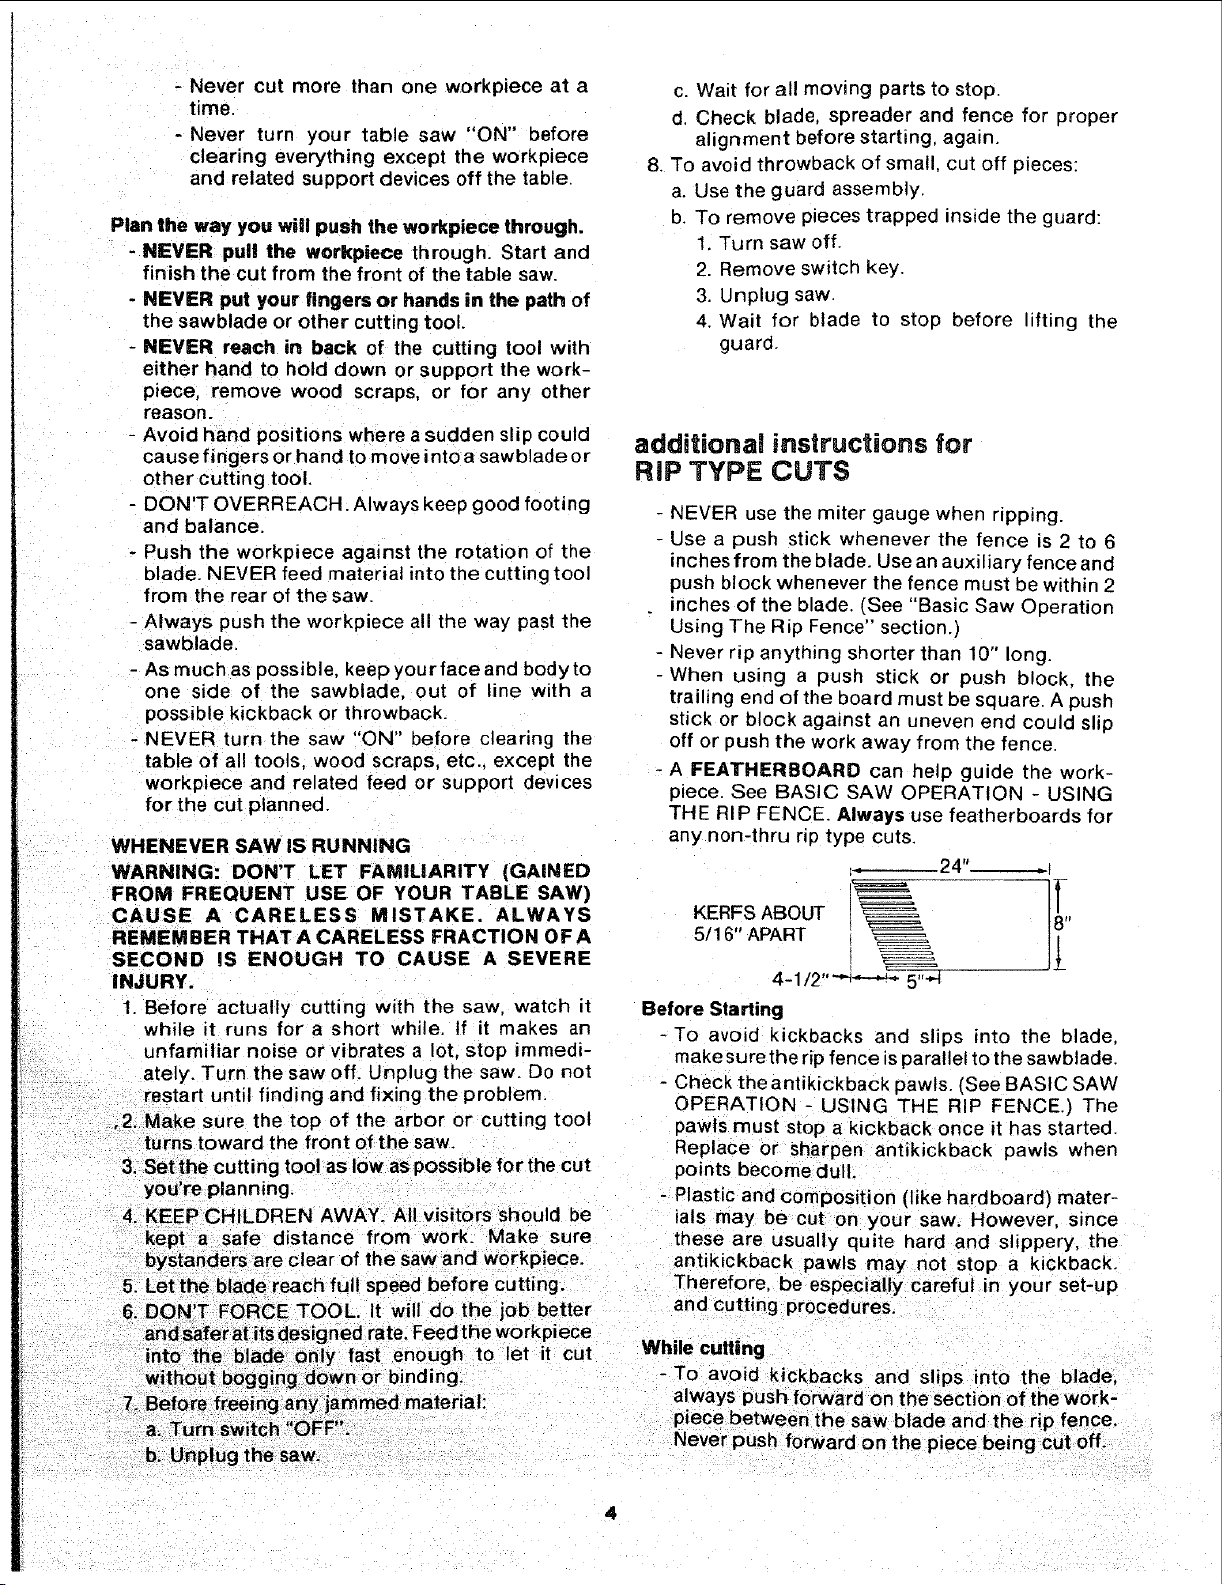
,__24"___
KERFS ABOUT !_,
5/16" APART IJ_
4-1/2 '' _''_'.'-''_ 5
Before Starting
-To avoid kickbacks and slips into the blade,
make surethe rip fence is parallel to the sawblade.
- Check the antikickback pawls. (See BASIC SAW
OPERATION - USING THE RIP FENCE.) The
pawls must stop a kickback once it has started.
Replace or sharpen antikickback pawls when
points become dul t.
- Plastic and composition (like hardboard) mater-
ials may be cut on your saw. However, since
these are usually quite hard and slippery, the
antikickback pawls may not stop a kickback.
Therefore, be especially careful in your set-up
and cutting procedures.
6. DON T FORCE TOOL. It will do the job bette
and,safer at its designed rate. Feed the workpiece
into the blade only fast enough to let it cut While cutting
without bogging down or binding. -To avoid kickbacks and slips into the bade
always push forward on the section of the work-
Loading ...
Loading ...
Loading ...