Loading ...
Loading ...
Loading ...
2.
3.
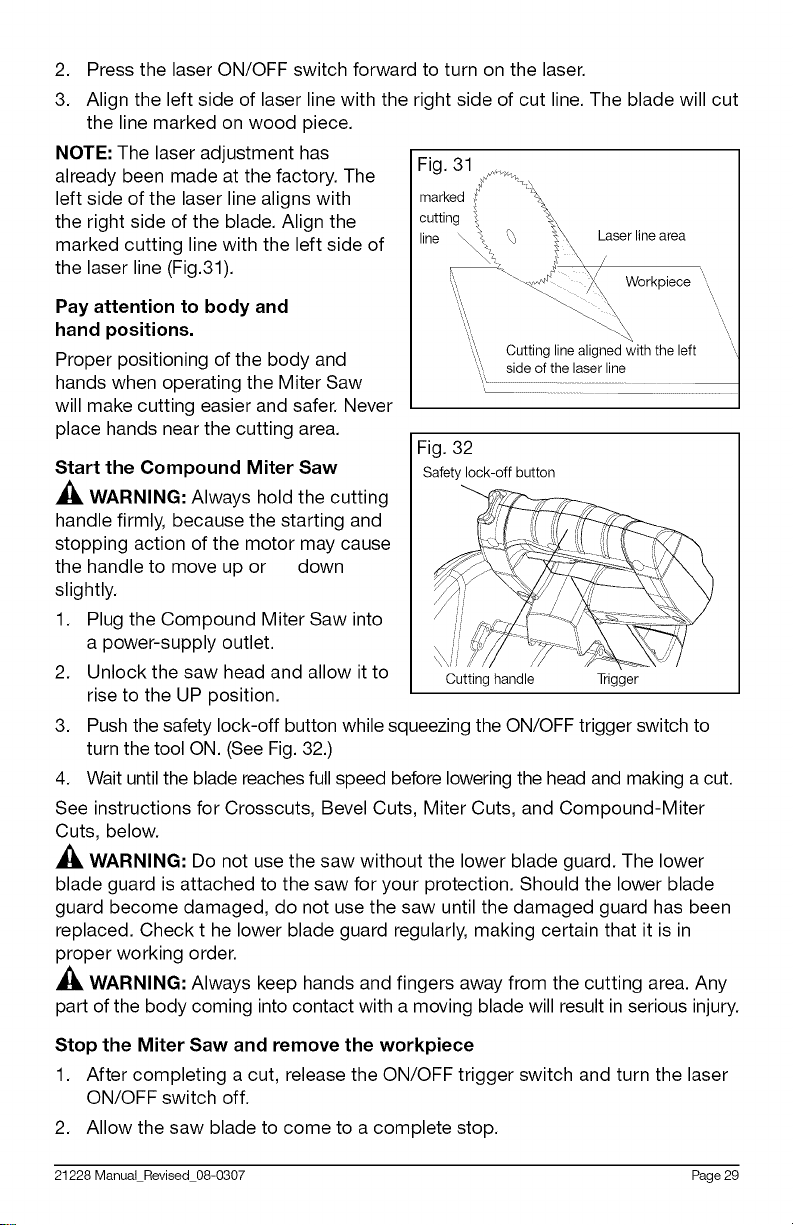
the line marked on wood piece.
NOTE: The laser adjustment has
already been made at the factory. The
left side of the laser line aligns with
the right side of the blade. Align the
marked cutting line with the left side of
the laser line (Fig.31).
Press the laser ON/OFF switch forward to turn on the laser.
Align the left side of laser line with the right side of cut line. The blade will cut
Pay attention to body and
hand positions.
Proper positioning of the body and
hands when operating the Miter Saw
will make cutting easier and safer. Never
place hands near the cutting area.
Start the Compound Miter Saw
_, WARNING: Always hold the cutting
handle firmly, because the starting and
stopping action of the motor may cause
the handle to move up or down
slightly.
1. Plug the Compound Miter Saw into
a power-supply outlet.
2. Unlock the saw head and allow it to
rise to the UP position.
Fig. 32
Safety lock-off button
Cutting handle Trigger
3. Push the safety lock-off button while squeezing the ON/OFF trigger switch to
turn the tool ON. (See Fig. 32.)
4. Wait until the blade reaches full speed before lowering the head and making a cut.
See instructions for Crosscuts, Bevel Cuts, Miter Cuts, and Compound-Miter
Cuts, below.
_, WARNING: Do not use the saw without the lower blade guard. The lower
blade guard is attached to the saw for your protection. Should the lower blade
guard become damaged, do not use the saw until the damaged guard has been
replaced. Check t he lower blade guard regularly, making certain that it is in
proper working order.
WARNING: Always keep hands and fingers away from the cutting area. Any
part of the body coming into contact with a moving blade will result in serious injury.
Stop the Miter Saw and remove the workpiece
1. After completing a cut, release the ON/OFF trigger switch and turn the laser
ON/OFF switch off.
2. Allow the saw blade to come to a complete stop.
21228 Manual Revised 08-0307 Page 29
Loading ...
Loading ...
Loading ...