HWD8040BW1
User Manual
Washer Dryer
Time/Air
Dry
Dry Spin
Speed
Extra
Rinse
Delay Start/PauseWash
Temp
8kg / 4kg
Wash + Dry
Dry
Wash
On / Off
Wash
Dry

2
Disposal
3
Index
Thank you for purchasing a Haier product
Legend
Safety and warnings............................................................................... 4-7
Installation.................................................................................................. 8-9
Product description...................................................................................
Control panel............................................................................................ 11-13
10
Programmes.................................................................................................
14
Consumption................................................................................................
15
Daily use.................................................................................................. 16 -19
Care and cleaning................................................................................ 20-22
Troubleshooting..................................................................................... 23-25
Technical data.............................................................................................. 26
Please read these instructions carefully before using this appliance. It contains
important information which will help you get the best out of your appliance and
ensure safe and proper installation, use, care and cleaning.Keep this manual in a
convenient place so you can always refer to it for safe and proper use.
If you sell the applicance, give it away, or leave it behind when you move, make
sure you alse pass on this manual so that the new owner can become familiar with
all features and safety warnings.
Yes
No
General information and tips
Warning! Important safety information!
Environmental information
The presence of this symbol on the product,
accessories or materials that goes with this
information indicates that at the end of its useful
life the product or its electronic accessories (e.g.
cable,inlet hose-assembly ) should not be disposed
with other household waste. To prevent possible
damage to the environment or human health from
uncontrolled waste disposal, please separate these
items from other types of waste and recycle them.
This will promote the sustainable reuse of material
resources. Household users should contact either
the retailer where they purchased the product or
relevant local authorities to find out how they can
take this item for environmentally safe recycling
and safety. Business users should contact their
supplier and check the conditions of the purchase.
This product and its electronic acc
essories should
not be mixed with other commercial waste.

4 5
Safety and warnings
Safety and warnings
!
WARNING!
!
WARNING!
IMPORTANT SAFETY INSTRUCTIONS
WARNING!
Caution, risk of fire-this is a safety symbol. Failure to follow the
warnings outlined in these user insructions can cause a fire hazard.
Fire Hazard
• Only dry fabrics that have been washed with water.
• Do not stop a washer dryer before the end of the drying cycle
unless all items are removed and spread out in order to dissipate
the heat.
• A washer dryer produces combustible lint; clean pump filter
regularly.
• Failure to follow these instructions can result in death or personal
injury.
Electric Shock Hazard
If you are using an extension cord or a portable electrical outlet device
(eg multi-socket outlet box), ensure that it is positioned so that it does
not come into contact with water or moisture.
Failure to do so may result in death or electrical shock.
When using your washer dryer, follow basic precautions, including the following:
• CAUTION: In order to avoid a hazard due to inadvertent resetting of thermal
cut-out, the appliance must not be supplied through an external switching device,
by the utility.
• This washer dryer is not intended for use by persons (including children) with
reduced physical, sensory or mental capabilities, or lack of experience and
knowledge, unless they are supervised or given instructions on how to use the
washer dryer by someone responsible for their safety.
• The washer dryer should only be used for washing, rinsing and drying of textiles
where this is indicated on the care label.
• The door will be locked from the start of the cycle until the cycle is completed for
safety reasons. It is possible to open the door during the cycle under certain
conditions .
• Never force the door to open.
• Keep children away from the washer dryer while it is in operation.
• Supervise children to ensure that they do not play with the washer dryer or
climb inside the drum.
• Do not touch the door during a drying cycle, as the door can become hot.
• Do not open the detergent dispenser during the cycle.
• The only user-removable parts of the washer dryer are the inlet hose, detergent
dispenser and the pump
filter. No other parts are designed to be removed by
• When disposing of the washer dryer, it is recommended that the door is removed
to avoid children getting trapped inside, and that the electrical cable is cut
close to the washer dryer.
• Do not add gasoline, dry-cleaning solvents, or other flammable or explosive
substances to the wash water
. These substances give
vapours that could
ignite or explode.
anyone other than a Haier trained and supported service technician.
• Do not wash or dry articles that have been previously cleaned in, washed in,
soaked in, or spotted with gasoline, dry-cleaning solvents, or other flammable or
explosive substances as they give
vapours that could ignite or explode.
shower caps, waterproof textiles, rubber backed articles and
clothes or pillows fitted with foam rubber pads
• Do not use heat to dry items such as foam rubber (latex foam),
,dry on”Time/Air Dry”.
Read the instructions
such as a timer, or connected to circuit that is regularly switched on and off
6 7
Safety and warnings
Safety and warnings
• Undergarments that contain metal reinforcements should not be placed in the
washer dryer. Damage to the machine can result if the metal reinforcements come
loose during washing or drying.
• Check
and remove all objects from pockets, e.g. lighters and matches.
• Do not overload your washer dryer
.
• Never wash or dry rubber articles, fibreglass, or any plastic items or film, e.g. plastic
lined tablecloths and baby bibs.
• Clothes must go through the cool down/airing phase in the final part of the drying
cycle. This ensures items are left at a temperature where they will not be damaged.
If for any reason the washer dryer is stopped before the cycle finished, dry clothes
•
should be removed immediately and not left in the dryer. Clothes should be
quickly spread
out flat to cool so heat can dissipate, not left bunched up, eg
in a clothes basket.
•
• Do not operate this product if there is an accumulation of lint in or around the
washer dryer.
• Children should be supervised to ensure they do not play with the washer dryer.
• Unplug the machine from the power supply when it is not in use.
• Do not swing or put weight on the door.
• Your washer dryer is designed to stop operatin
g in the event of power outage.
‘POWER’ button is
pressed. To restart the washer dryer, touch ‘POWER’, select your wash or drying
cycle and touch ‘
’.
• Never attempt to repair the washer dryer yourself.
• For problems that cannot be solved from information in this use
and unplug your washer dryer and contact a Haier trained and supported
service technician.
IMPORTANT!
To reduce the risk of fire in a washer dryer the following should be observed:
Items that have been spotted or soaked with vegetable oil or cooking oil are
a fire hazard and should not be placed in a tumble washer dryer.
•
sources such as a washer dryer. The items become warm causing an oxidation
reaction in the oil. This oxidation creates heat. If the heat cannot escape the
items can become hot enough to catch fire. Piling, stacking or storin
•
Fabrics that contain vegetable oil, cooking oil or have been contaminated by
hair care products should not be washed or dried. If unavoidable, these fabrics
should be washed in a hot water wash with extra detergent-this will reduce, but
not eliminate the fire hazard. The cool down cycle of the washer dryer should be
used to reduce the temperature of these items. They must not be removed from
the washer dryer and piled or stacked while hot.
•
Items th
a
t have previously been cleaned in, washed in, soaked in or spotted
with flammable liquids or solids, eg petrol/gasoline, kerosene, dry cleaning
solvents, vegetable or cooking oil, acetone, denatured alcohol, some brands of
spot removers, turpentine, waxes and wax removers or other flammable or
explosive substances should not be placed in a washer dr
yer.
•Do not dry unwashed items in the washer dryer.
•
Fabric softeners, or similar products, should be used as specified by the fabric
softener instructions.
•Washer dryer must not be used if industrial chemicals used for cleaning.
The maximum mass of dry and wash materials are respectively 4 and 8 kilograms
(HWD8040BW1 models)
This product has been designed for use in a normal domestic (residential)
environment. This product is not designed for any commercial use (whatsoever).
product’s Manufacturer’s Warranty.
Items that have previously been cleaned in, washed in, soaked in or spotted
•
Carpet does not obstruct the openings for washing machines with ventilation
openings in the base.
•
The appliance must not be installed behind a lockable door, a sliding door or a door
with a hinge on the opposite side to that of the tumble dryer, in such a way that a
full opening of the tumble dryer door is restricted.
•
If the supply cord is damaged, it must be replaced by the manufacturer, its service
agentor similarly qualified persons in order to avoid a hazard.
•
Spontaneous combustion
items can prevent heat from escaping creating a fire hazard.
98
Installation
Installation
Preparation
Remove all packaging material including polystyrene
base. While opening the package , water drops may be
seen on plastic bag and porthol e. This is normal as a
result from water tests and quality control in the factory.
Inlet hose
1. Connect inlet hose to the machine of water inlet valve.
2. Connect inlet hose to a water tap.
3. Tighten inlet hose connections and turn on water
supply. Check for any water leaks. Stop all water
leaks before continuing with in stallation.
Warning!
Appliance is only qualified for cold water supply!
Drain hose
Drainage could be installed in dif ferent ways.
of drain hose has to reach between
80-100 cm.
If possible always keep drain hose fixed to the clip at
the back of the appliance.
Fix the bracket securely to avoid dropping due to oper-
ational movements.
1. Drain hose to sink
2. Drain hose to sink siphon
Connection has to be securely sealed and fixed to corr-
esponding adapter above the siphoning part!
3. Adjust all feets to achieve a complete level
position.This will minimize vibrations and noise
during use. It will also reduce wear and tear. We
recommend to use a spirit level for adjustment. Floor
should be as stable and flat as possible.
80 - 100 cm
The drain hose should not be submerged in water and
should be securely fixed and leak-free. If the drain hose
is placed on the ground or if the pipe is at a height of
less than 80 cm, the washing machine will continuously
drain while being filled (self-siphoning).
Warning!
Note: Packaging disposal:
Keep all packaging material out of children’s reach and
dispose them in an e nvironmentally friendly manner.
Use the drain hose bracket to keep drain hose end
retained and out of any water level.
Regardless
OPTIONAL: Install noise reduction pads
1.
2.
3.
1.When opening the shrink package,you will find four
noise reduction pads.These are used for reducing
noise.(Fig. 1)
2. Lay the washing machine down to its side, port-
hole pointing upwards, bottom side towards op-
3.
Take out the noise reduction pads and remove the
double-sided adhesive protective film;Paste around
the bottom;The noise reduction pads under the
washing machine cabinet as shown in Fig3.(two
longer pads in position 1 and 3, two shorter pads in
position 2 and 4). Finally set the machine upright again.
erator.(Fig.2)
Removing the transportation bolts
The transportation bolts are designed for clamping
antivibration components inside the appliance during
transportation.
1. Remove all 4 bolts.
Keep the transportation bolts in a safe place for later
use. If the machine is to be moved to another location,
replace transportation bolts to prevent damage.
2. Fill the transportation bolt holes with blanking plugs.
General information and tips:
1011
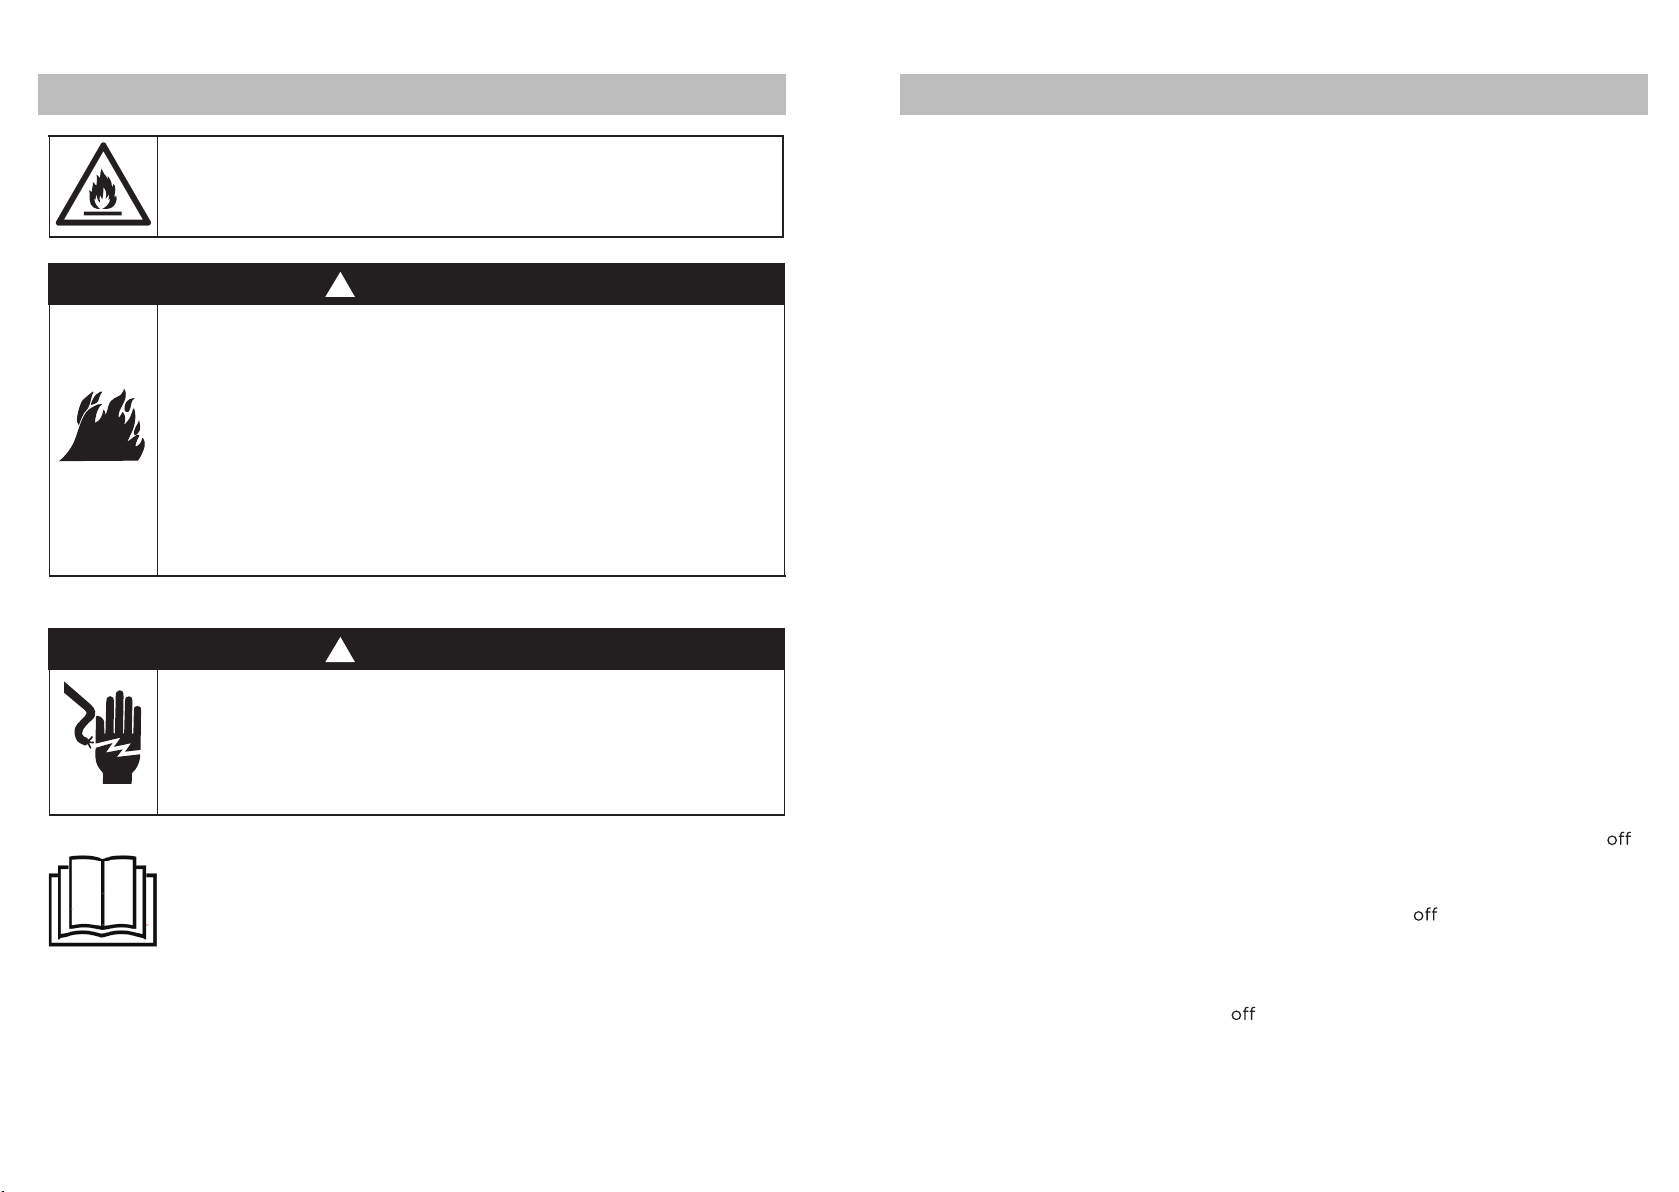
1. Door
2. Detergent/Softener drawer
3. Wor ktop
4. Control panel
5. Service flap
6. Adjustable feet
Product description
Control Panel
Accessories
Check the accessories and literatu
re in a ccordance with this list.
2. Display
3. programme selector
4. Power button
5. Function buttons (a-g)
(a-g)
1.2 Programme selector
1. Transportation bolts (T1-T4)
2. Back cover
3. Back cover screws(S1-S6)
4. Power cord
5. Water inlet valve
6. Drain hose
This drawing may be slightly different from the layout of the washing machine you have
just purchased.
S5 S6
Inlet hose
assembly
Warranty-card
5 blanking plugs
User manual
Drain hose
bracket
1. De
tergent/Softener drawer
a. Delay
c. Wash Temp
d. Spin Speed
e. Extra Rinse
f. Time/Air Dry
g. Start/Pause
Time/Air
Dry
Dry Spin
Speed
Extra
Rinse
Delay Start/PauseWash
Temp
8kg / 4kg
Wash + Dry
Dry
Wash
On / Off
Wash
Dry
Time/Air
Dry
Dry Spin
Speed
Extra
Rinse
Delay Start/PauseWash
Temp
8kg / 4kg
Wash + Dry
Dry
Wash
On / Off
Wash
Dry
1.1 Detergent drawer
Open the drawer, three compartments can be
seen :
1
Compartment : Liquid detergent for programme
2
Compartment : Softener, Conditioning agent etc.
3
Compartment : Powder detergent for programme
By turning the knob , one of 16 programmes can be selected,
be displayed.
Touch this button gently to switch on, the display is shining.
a while, the machine will shut down automatically.
Touch it again for
its default settings will
1-1
1
2
3
1.3 Power button
about 2 seconds to switch off. If no panel element or
prog
r
amme is
activated after
Noise reduction pads
2x
2x
1011
1. Door
2. Detergent/Softener drawer
3. Wor ktop
4. Control panel
5. Service flap
6. Adjustable feet
Product description
Control Panel
Accessories
Check the accessories and literatu
re in a ccordance with this list.
2. Display
3. programme selector
4. Power button
5. Function buttons (a-g)
(a-g)
1.2 Programme selector
1. Transportation bolts (T1-T4)
2. Back cover
3. Back cover screws(S1-S6)
4. Power cord
5. Water inlet valve
6. Drain hose
This drawing may be slightly different from the layout of the washing machine you have
just purchased.
S5 S6
Inlet hose
assembly
Warranty-card
5 blanking plugs
User manual
Drain hose
bracket
1. De
tergent/Softener drawer
a. Delay
c. Wash Temp
d. Spin Speed
e. Extra Rinse
f. Time/Air Dry
g. Start/Pause
Time/Air
Dry
Dry Spin
Speed
Extra
Rinse
Delay Start/PauseWash
Temp
8kg / 4kg
Wash + Dry
Dry
Wash
On / Off
Wash
Dry
Time/Air
Dry
Dry Spin
Speed
Extra
Rinse
Delay Start/PauseWash
Temp
8kg / 4kg
Wash + Dry
Dry
Wash
On / Off
Wash
Dry
1.1 Detergent drawer
Open the drawer, three compartments can be
seen :
1
Compartment : Liquid detergent for programme
2
Compartment : Softener, Conditioning agent etc.
3
Compartment : Powder detergent for programme
By turning the knob , one of 16 programmes can be selected,
be displayed.
Touch this button gently to switch on, the display is shining.
a while, the machine will shut down automatically.
Touch it again for
its default settings will
1-1
1
2
3
1.3 Power button
about 2 seconds to switch off. If no panel element or
prog
r
amme is
activated after
Noise reduction pads
2x
2x
1213Control panel-function buttons
Display symbolsControl panel-
Note: Liquid detergent
If using liquid detergent, it is not recommended to activate the end time delay.
1.4.2 Function “Time/Air Dry”
1-3
1-5
1.4 Function buttons
The function buttons (Fig. 1-2) enable additional op-
tions in the selected programme before programme
start. The related indicators are displayed.
If a button has multiple options, the desired option can
be selected by touching the button sequentially.
To delete the setting or to cancel the setting process,
press the function button,
Not all functions are available for all programmes.
1-2
Note: Factory settings
there is no special requirement default settings are recommended.
Touch this button (Fig. 1-4) in order to activate /de-
activate the “Time/Air Dry” function.
By touching button sequentially, drying time can be seen
In combination with programme
function
sets
the drying time.
1-4
Time/Air
Dry
Dry Spin
Speed
Extra
Rinse
Delay Start/PauseWash
Temp
On / Off
1-6
Start/Pause
Time/Air
Dry
Extra
Rinse
Spin
Speed
1.4.1“Start/Pause“ button
Touch this button (Fig. 1-3) gently to start or inter-
rupt the currently displayed programme.
the displayed washing time is blinking.
During a pause also the time display is blinking.
1.4.3 Function button“Extra rinse“
Touch this button (Fig. 1-5) to rinse the laundry more
intense with fresh water. This is recommended for
people with sensitive skin.
By touching the button several times one to three ad-
ditional cycles can be selected. They appear in the dis-
play with P--0/ P--1 /P--2 /P--3 .
1.4.4 Function “Spin Speed”
Touch this button (Fig. 1-6) to change or deselect the
Spin Speed of the programme. If 0 is chosen ,then the
laundry will not spin.
1.4.8 Function “child lock”
This option blocks all panel elements against activa-
tion. After programme start press button “Delay” and
”Dry On/Off” (Fig. 1-10) for 3 seconds simultaneous-
ly; “cLok” is displayed. For unlocking press again the
two buttons.
1.4.6 Function “Dry On/Off”
Dry
On / Off
1-7
1-8
Wash
Temp
1-9
1-10
DryDelay
On / Off
1.4.5 Function “Wash Temp”
Touch this button (Fig. 1-7) to change the washing
temperature of the programme.
In conjunction with the “Delay”button,the child lock
function can be switched on/off (see child lock).
Delay
1.4.7 Function “Delay”
Touch this button (Fig. 1-9) to start the programme
with a delay. End time delay could be increased in steps
6:30
Touch “Start/Pause” button to activate
the time delay.
The time delay must be longer than the programme run
time. Otherwise the programme will start immediately.
For deactivating the time delay; rotate programme se-
lector.
In conjunction with the “Dry On/Off”button,the child lock
function can be switched on/off (see child lock).
Knob is in the "Dry+Wash" area, Perform default settings;
Touch "Dry On/Off " button (Fig. 1-8),dry function will be
switched off and only perform wash function.
1.5 Display
If the appliance is on display will light up the actual
washing time, spin speed, tempe rature, etc will appear
(Fig. 1-11).
Time/Air
Dry
Dry Spin
Speed
Extra
Rinse
Delay Start/PauseWash
Temp
On / Off
Wash
Dry
1-11
“Time/Air Dry”, this
the LED switches off.
means the cycle will finish in 6 hours and 30 minutes
During ope-
ration,
.
By switching off the appliance, all options are disabled.
status on different sections. The information include

14
Detergent compartment for:
Liquid detergent
Softener, Conditioning agent etc.
Powder detergent
1
2
3
15 Consumption
General information and tips:
Eco, 40℃, 1400rpm is the program recommended for a normally soiled cotton load.
Auto Sense, Dry ON is the program recommended for cotton loads.
1
2
3
1.
Programme Wash
Temp.
℃
Preset
℃
1 2 Fibre Type Spin Speed
Preset Max
rpm rpm
14.
13.
2.
15.
6.
7.
8.
9.
11.
12.
16.
3.
4.
Cotton/Synth.
Cotton/Synth.
10.
Cotton/Synth.
3
5.
1400
1400
1400
800
1400
1000
1000
/
/
1000
1000
600
/
1000
600
1000
Cotton
Eco
Express 15
Allergy
Mix
Air Dry
Time Dry
Auto Sense
Duvet
Delicate
Sports
Drum Clean
Rinse
Spin
Synthetic
Daily Wash
30
30
30
30
40
/
/
/
30
60
0
30
30
/
/
90
0-90
0-60
/
0-60
0-30
/
0-90
0-90
0-60
0-40
0-40
0-40
/
/
/
90
Cotton fabrics
Chemical
fibre fabrics
Cotton fabrics
Duvet
Cotton
Cotton
Sports Wear
1400
1400
1400
800
1400
1400
1400
/
/
1400
1400
600
/
1400
600
1400
1
8
8
Programme
Wash
Temp
℃
Duration
time
h:min
1.
6.
7.
8.
9.
11.
4
8
2
2
4
1
8
8
2
2
8
8
Extra
Rinse
Times
0-3
0-1
0-3
0-1
0-3
0-1
0-3
/
/
0-2
0-2
0-3
/
0-3
/
/
2.
3.
4.
5.
10.
12.
13.
14.
15.
16.
30
40
30
60
30
30
30
30
/
90
/
0
Cotton
Eco
Express 15
Allergy
Mix
Air Dry
Time Dry
Auto Sense
Duvet
Delicate
Sports
Drum Clean
Rinse
Spin
Synthetic
Daily Wash
/
/
/
0
30
0:30
0:20
0:15
Auto
0:26
1:00
2:25
2:47
Auto
Auto
Auto
Auto
0:56
3:18
1:46
0:07
Programmes
Cot ton /Synth/
Underwear/Jeans
Cot ton /Synth/
Underwear/Jeans
Cot ton /Synth/
Underwear/Jeans
All fabrics
All fabrics
Preset
Dry
Dry
Wash
Wash
Wash
Wash
Wash+Dry
Wash+Dry
Dry
Wash+Dry
Wash
Wash+Dry
Wash
Wash+Dry
Wash
Wash
Dry
Max load
kg
/
/
4
4
2
2
1
/
/
/
/
/
/
/
/
/
Wash
Max load
kg
IMPORTANT!
Over loading the washer dryer with a dry load above this line on
any drying cycle can
lead to poor drying performance.
1716
Daily useDaily use
This appliance is only for domestic use inside the house. If it is used for
commercial, industrial or not intended purposes any Haier guarantee will not
be valid anymore. Consider instructions on each garment label and wash only
machine-washable laundry.
Power supply
Connect the washing machine to the power supply
(220V to 240V/50Hz).
Water connection
Turn on the tap. The water must be clean and clea r.
Warning!
Before use, check for leakage in the joints bet ween the tap and the inlet hose
by turning on the tap.
Open the door and put clothes in the washing machine piece by piece. Close the
door carefully.
Don‘t overload. Check if you can put a hand upright on top of load.
Loading the appliance
General information and tips:
After installation or long down time , run programme “Drum Clean“ with no
load and add detergent in washing agent compartment to remove possibly
corruptive residues.
General information and tips:
Remove detergent residues before next wash cycle. Please follow given
detergent dosage recommendation.
Slide out the detergent drawer and put the required
chemicals into corresponding compartments. Push
back the drawer gently.
Adding detergent
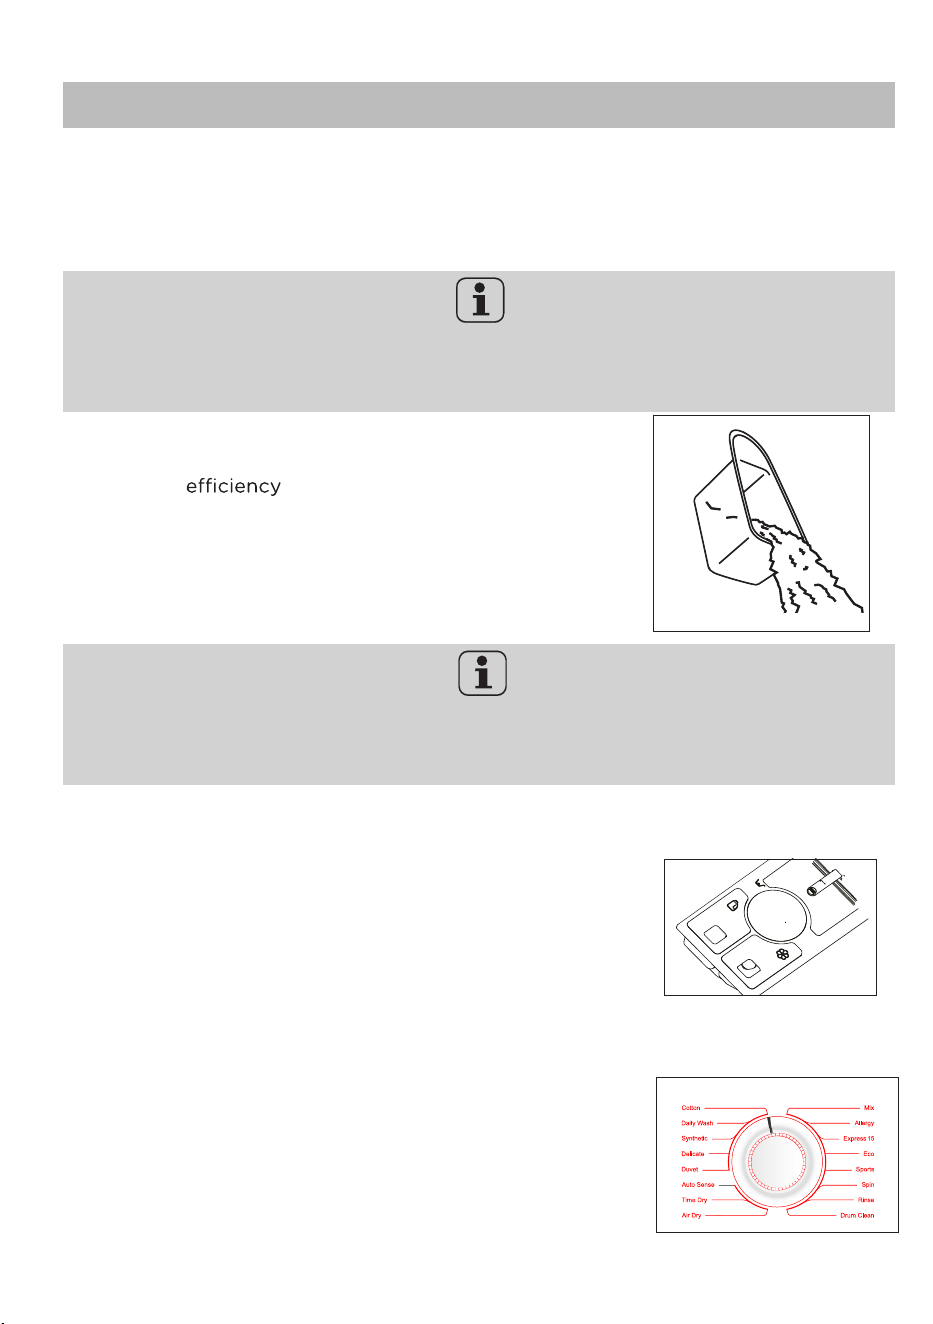
To get the best washing results, select the program
that is most suitable to the laundry type loaded.
Select program by turning the program selector dial.
Select a programme
Selecting detergent
Washing and performance will vary, de-
pending on detergent quality. Use only machine wash
approved detergent and if needed specific deter-
gents, e.g. for synthetic and woolen fabric.
Preparing laundry
Separate white clothes from coloured ones. Wash
coloured textiles first by hand to check if they fade
or run.
Empty pockets (keys, coins, etc.) and remove
harder decorative objects (e.g. brooches).
Garments without hems, delicate and finely woven
textile such as f ine curtains are to be put into a
wash bag (hand or dry cleaning would be better).
Close zippers and hooks, make sure the buttons are
sewn on tightly and place small items such as socks,
belts, bras, etc. in a wash bag.
Unfold large pieces of fabric such as bed sheets,
bedspreads etc.
Sort out clothes according to fabric (cotton, synthe-
tics, wool or silk) and to how dirty they are. Pay
attention to the care labelling of washing labels.
Turn jeans and printed, decorated or color-intensive
textiles inside out; If possible, wash them separately.
Warning!
Non-textile, as well as small, loose or sharp-edged items may cause malfunctions
and damage of clothes and appliance.
Wash + Dry
Dry
Wash
Pay attention
to the using suggestion of detergent manufacturer.
1716
Daily useDaily use
This appliance is only for domestic use inside the house. If it is used for
commercial, industrial or not intended purposes any Haier guarantee will not
be valid anymore. Consider instructions on each garment label and wash only
machine-washable laundry.
Power supply
Connect the washing machine to the power supply
(220V to 240V/50Hz).
Water connection
Turn on the tap. The water must be clean and clea r.
Warning!
Before use, check for leakage in the joints bet ween the tap and the inlet hose
by turning on the tap.
Open the door and put clothes in the washing machine piece by piece. Close the
door carefully.
Don‘t overload. Check if you can put a hand upright on top of load.
Loading the appliance
General information and tips:
After installation or long down time , run programme “Drum Clean“ with no
load and add detergent in washing agent compartment to remove possibly
corruptive residues.
General information and tips:
Remove detergent residues before next wash cycle. Please follow given
detergent dosage recommendation.
Slide out the detergent drawer and put the required
chemicals into corresponding compartments. Push
back the drawer gently.
Adding detergent
To get the best washing results, select the program
that is most suitable to the laundry type loaded.
Select program by turning the program selector dial.
Select a programme
Selecting detergent
Washing and performance will vary, de-
pending on detergent quality. Use only machine wash
approved detergent and if needed specific deter-
gents, e.g. for synthetic and woolen fabric.
Preparing laundry
Separate white clothes from coloured ones. Wash
coloured textiles first by hand to check if they fade
or run.
Empty pockets (keys, coins, etc.) and remove
harder decorative objects (e.g. brooches).
Garments without hems, delicate and finely woven
textile such as f ine curtains are to be put into a
wash bag (hand or dry cleaning would be better).
Close zippers and hooks, make sure the buttons are
sewn on tightly and place small items such as socks,
belts, bras, etc. in a wash bag.
Unfold large pieces of fabric such as bed sheets,
bedspreads etc.
Sort out clothes according to fabric (cotton, synthe-
tics, wool or silk) and to how dirty they are. Pay
attention to the care labelling of washing labels.
Turn jeans and printed, decorated or color-intensive
textiles inside out; If possible, wash them separately.
Warning!
Non-textile, as well as small, loose or sharp-edged items may cause malfunctions
and damage of clothes and appliance.
Wash + Dry
Dry
Wash
Pay attention
to the using suggestion of detergent manufacturer.
1819Daily useDaily use
Add individual selections
Select required options and settings refer to “Control
panel”.
Start wash programme
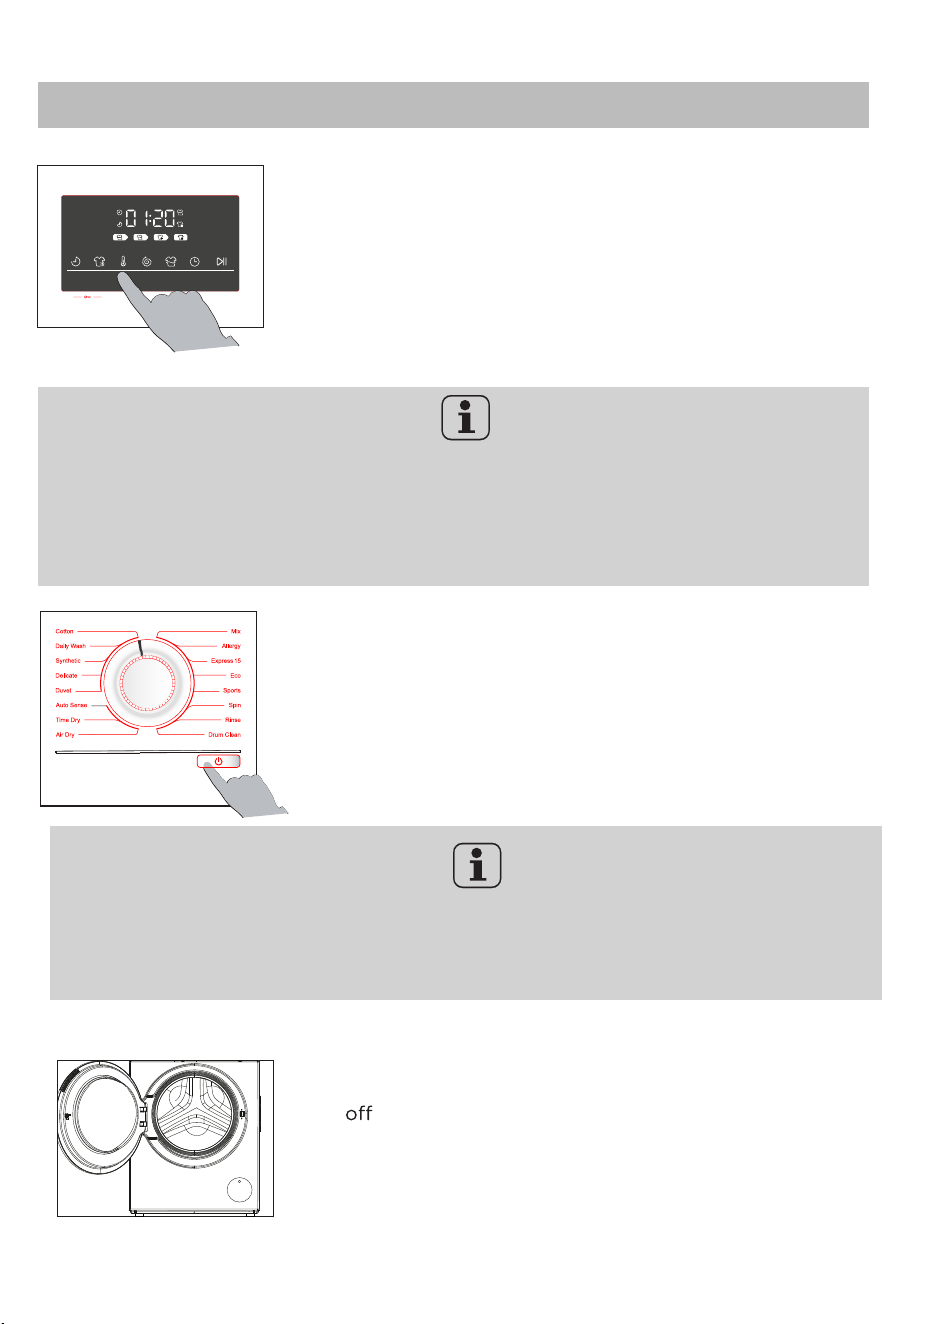
Touch “Start/ Pause” button to start. Appliance
operates according to selected settings. Changes are
only possible by cancelling wash programme.
General information and tips:
1. For safety reasons the door is locked during the running cycle. It is
only
possible to open the door at the end of the programme or after the
programme was cancelled correctly (see description below ).
2. In case of high water level, high water temperature and drum spinning,
Interrupt cancel wash programme
To interrupt a running programme touch gently
“Start /Pause” button. Touch it again to resume
operation.
To cancel a running programme and all its individual
settings, touch “Start/Pause” and then hold the
for about 3 seconds.
General information and tips:
Choose programme settings carefully refering to icons on each laundry label
and “Care chart”. Removing laundry promptly at the end of cycle will minimise
wrinkling.
After washing
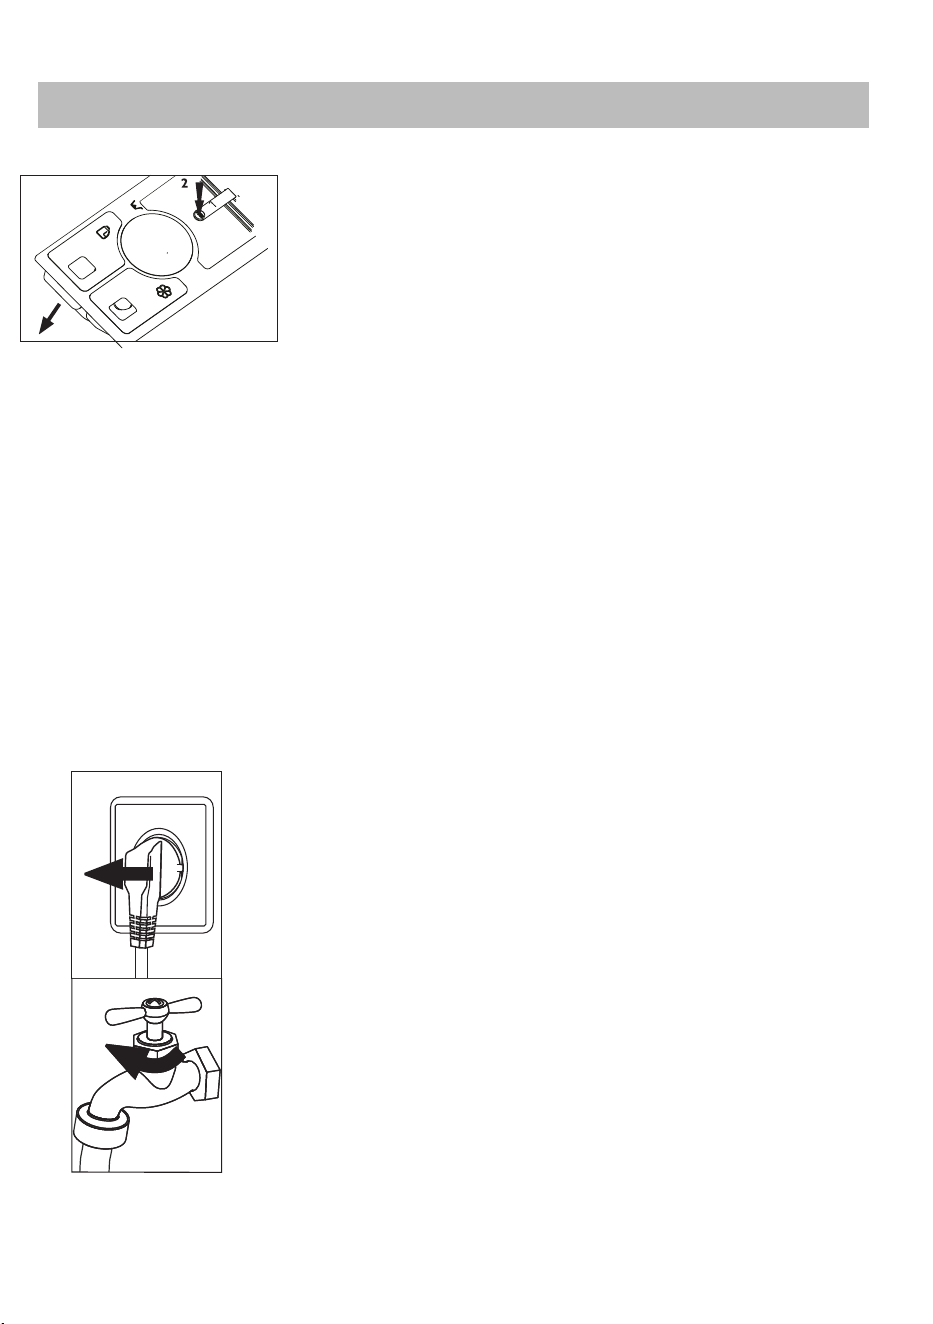
Turn
the water supply and unplug the power cord.
Open the door to prevent formation of moisture and
odours. Leave it open while not used.
Care chart
Time/Air
Dry
Dry Spin
Speed
Extra
Rinse
Delay Start/PauseWash
Temp
On / Off
Wash
Dry
Wash + Dry
Dry
Wash
power button
the door will be locked and 'cLok' will be displayed.
1819Daily useDaily use
Add individual selections
Select required options and settings refer to “Control
panel”.
Start wash programme
Touch “Start/ Pause” button to start. Appliance
operates according to selected settings. Changes are
only possible by cancelling wash programme.
General information and tips:
1. For safety reasons the door is locked during the running cycle. It is
only
possible to open the door at the end of the programme or after the
programme was cancelled correctly (see description below ).
2. In case of high water level, high water temperature and drum spinning,
Interrupt cancel wash programme
To interrupt a running programme touch gently
“Start /Pause” button. Touch it again to resume
operation.
To cancel a running programme and all its individual
settings, touch “Start/Pause” and then hold the
for about 3 seconds.
General information and tips:
Choose programme settings carefully refering to icons on each laundry label
and “Care chart”. Removing laundry promptly at the end of cycle will minimise
wrinkling.
After washing
Turn
the water supply and unplug the power cord.
Open the door to prevent formation of moisture and
odours. Leave it open while not used.
Care chart
Time/Air
Dry
Dry Spin
Speed
Extra
Rinse
Delay Start/PauseWash
Temp
On / Off
Wash
Dry
Wash + Dry
Dry
Wash
power button
the door will be locked and 'cLok' will be displayed.
2021
Care and cleaning Care and cleaning
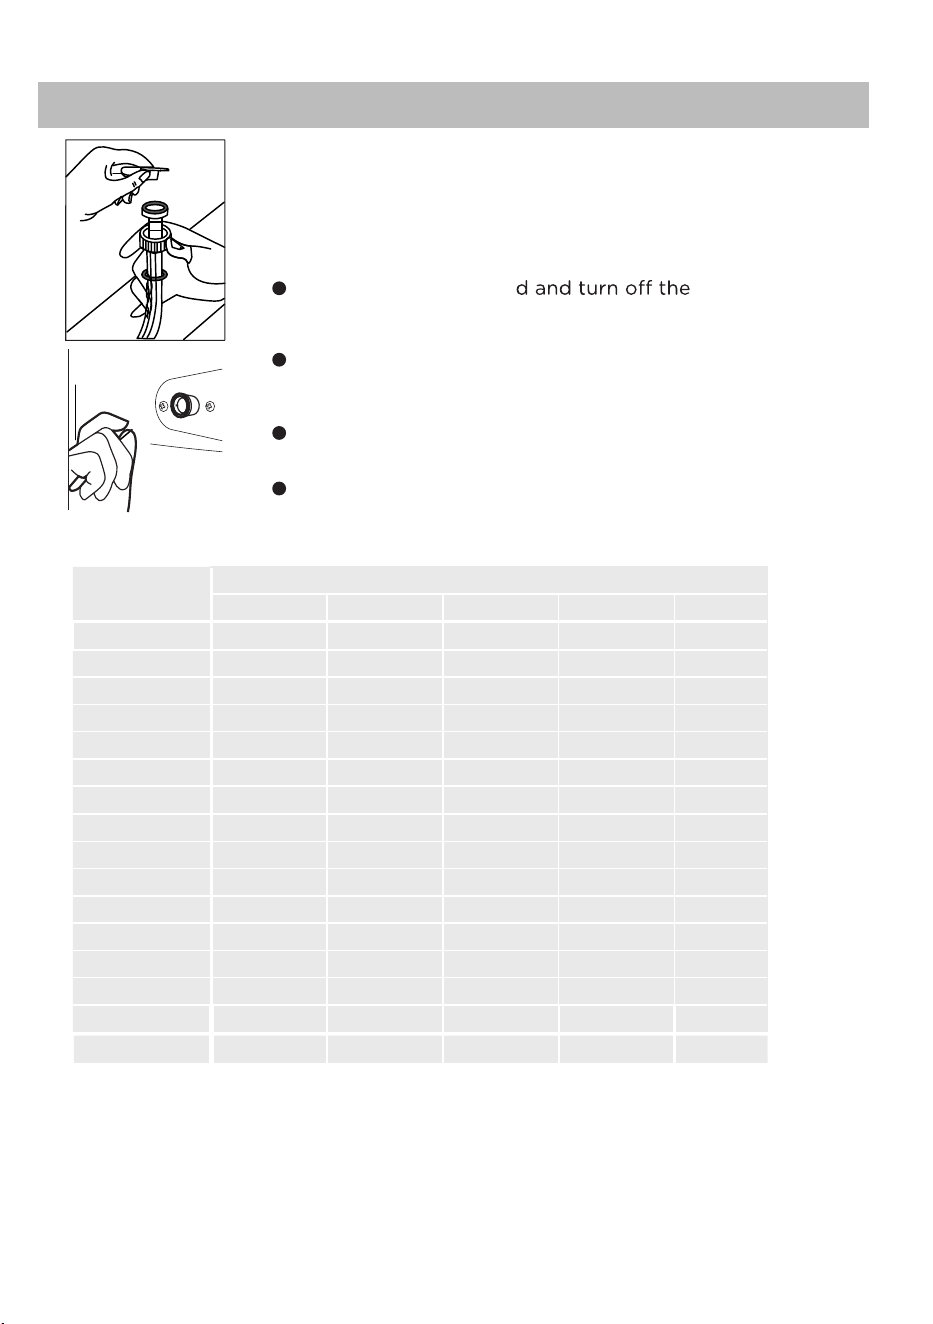
Cleaning the de tergent drawer
Clean the drawer from detergent residues regularly.
Pull out the drawer until it stops (1) and press the
release button (2) to remove the drawer. Then flush the
drawer with water until it is clean and insert the
drawer back in the appliance.
Cleaning the machine
Unplug the machine during cleaning and maintenance. Use a soft cloth with
soap liquid to clean the machine case and rubber components. Do not use
organic chemicals or corrosive solvents.
Cleaning the drum
Remove accidentally washed metal parts, such as pins, coins, etc. from the
drum because they cause rust stains and damage. Use a non-chloride cleaner
for removing rust stains. Observe the warning hints of the cleaning agent
manufacturer. Do not use any hard objects or steel wool for cleaning.
Cleaning the machine
If the appliance is left idle for a long period:
1. Pull out the power plug.
2. Unplug water supply.
3. Open the door to prevent formation of moisture and
odours.
4.
5. Empty, clean and dry the detergent drawer.
Before next usage check carefully power cord, water
inlet and drain hose. Make sure everything is properly
installed and no leakage..
Pump filter
Clean the filter once a month and check the pump filter
immediately if the appliance:
doesn´t drain the water.
General information and tips:
Pump filter sealing has to be clean and undamaged. If lid is
Warning!
Scalding Risk! Water in the pump filter can be very
hot! Before any action please ensure water has cooled down.
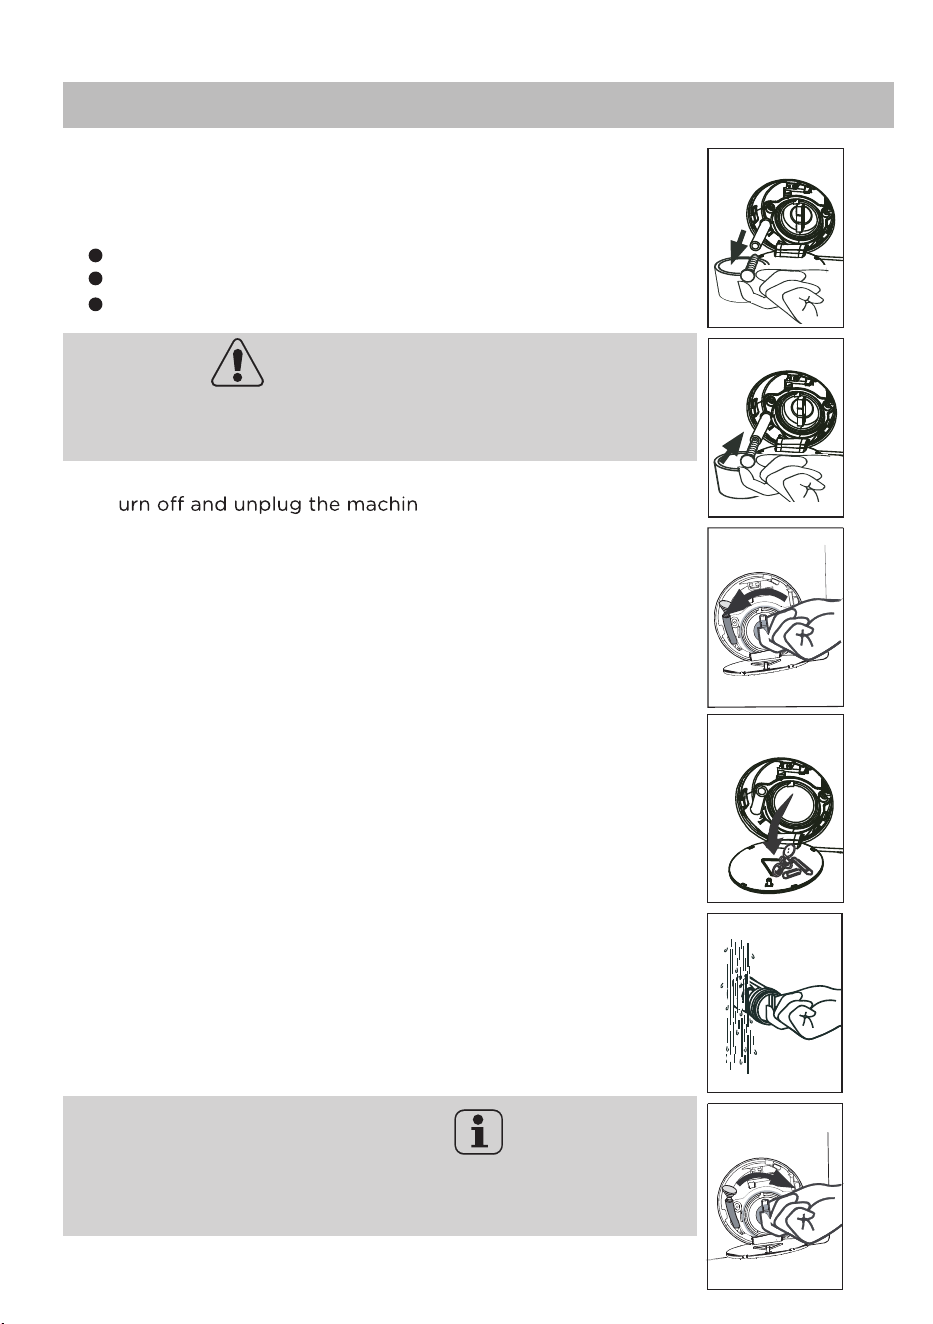
1. T
(Fig.2-2).
2. Open service flap at the right corner of appliance front.
3. Provide a flat container to catch leach water
4. Pull the drain hose out and hold its end above the
container
5. Take the sealing plug out of the drain hose
6. After complete drainage close drainhose and push it
back into the machine (Fig.2-3).
7. Unscrew and remove counter clockwise the pump filter
8. Remove contaminants and dirt
9. Clean pump fil ter carefully
10. Refix it thoroughly
11. Close service flap.
doesn´t spin.
does unmanual noise while running.
1
Do not leave the dispenser lids open for a long period of
time, to prevent drying out.
not full totally tightened,water will escape. The filter must be
in place, or it may lead to leakage.
2-2
2-3
2-4
2-5
2-6
2-7
2-1
e (Fig.2-1).
(Fig.2-2).
(Fig.2-2).
(Fig.2-4).
(Fig.2-5).
(Fig.2-6).
(Fig.2-7).
2021
Care and cleaning Care and cleaning
Cleaning the de tergent drawer
Clean the drawer from detergent residues regularly.
Pull out the drawer until it stops (1) and press the
release button (2) to remove the drawer. Then flush the
drawer with water until it is clean and insert the
drawer back in the appliance.
Cleaning the machine
Unplug the machine during cleaning and maintenance. Use a soft cloth with
soap liquid to clean the machine case and rubber components. Do not use
organic chemicals or corrosive solvents.
Cleaning the drum
Remove accidentally washed metal parts, such as pins, coins, etc. from the
drum because they cause rust stains and damage. Use a non-chloride cleaner
for removing rust stains. Observe the warning hints of the cleaning agent
manufacturer. Do not use any hard objects or steel wool for cleaning.
Cleaning the machine
If the appliance is left idle for a long period:
1. Pull out the power plug.
2. Unplug water supply.
3. Open the door to prevent formation of moisture and
odours.
4.
5. Empty, clean and dry the detergent drawer.
Before next usage check carefully power cord, water
inlet and drain hose. Make sure everything is properly
installed and no leakage..
Pump filter
Clean the filter once a month and check the pump filter
immediately if the appliance:
doesn´t drain the water.
General information and tips:
Pump filter sealing has to be clean and undamaged. If lid is
Warning!
Scalding Risk! Water in the pump filter can be very
hot! Before any action please ensure water has cooled down.
1. T
(Fig.2-2).
2. Open service flap at the right corner of appliance front.
3. Provide a flat container to catch leach water
4. Pull the drain hose out and hold its end above the
container
5. Take the sealing plug out of the drain hose
6. After complete drainage close drainhose and push it
back into the machine (Fig.2-3).
7. Unscrew and remove counter clockwise the pump filter
8. Remove contaminants and dirt
9. Clean pump fil ter carefully
10. Refix it thoroughly
11. Close service flap.
doesn´t spin.
does unmanual noise while running.
1
Do not leave the dispenser lids open for a long period of
time, to prevent drying out.
not full totally tightened,water will escape. The filter must be
in place, or it may lead to leakage.
2-2
2-3
2-4
2-5
2-6
2-7
2-1
e (Fig.2-1).
(Fig.2-2).
(Fig.2-2).
(Fig.2-4).
(Fig.2-5).
(Fig.2-6).
(Fig.2-7).
Door cannot be opened due
to water level or hot water
in the drum,or if the drum is
still moving,wait for it to stop
before attempting to open
the door.
Auto
1:25
19:30 Remaining delay end time
Likely showing the delay end operation.
LocI-
End
E2
Lock – error with door.
Shut the door properly.
E4
E8
F3
F4
F7 Motor - error.
FA
FCx
(X=1,2,3)
Unb
Unbalanced load and not able
to spin.
22
23
Care and cleaning Troubleshooting
Display code
Code Cause
Solution
Remaining wash cycle time.
Automatic load detection
End of cycle.
Water level not reached the set
level in 8 minutes.
Water protective level-error.
Temperature sensor-error.
Heating error (Appears at the
end of a cycle).
Water level sensor error.
Electronic control - error.
This should allow the drum to cool down.
Check if water supply and water pressure
is normal.
Drain hose is self-syphoning.
Contact the after sales servi ce.
Contact the after sales servi ce.
Contact the after sales servi ce.
Contact the after sales service.
Contact the a fter sales service.
Check and balance the laundry load in
the drum. Also reduce the load if too
heavy. Restart with a spin program.
Water inlet valve and inlet valve filter
Unplug the power cor water
supply.
Unscrew the water inlet hose at the back of the
appliance as well as on the tap.
Remove the filters and flush them with water and a
brush.
Insert the filter and install the inlet hose.
To prevent blockage of water supply by solid substance
like lime clean regularly the inlet valve filter.
Laundry weight detection in process.
please wait until program cycle time is
displayed.
Drainage error, water not
emptied.
Check drain hose for block
age, and
ensure it is installed properly.
Clean pump filter.
Choose the best detergent
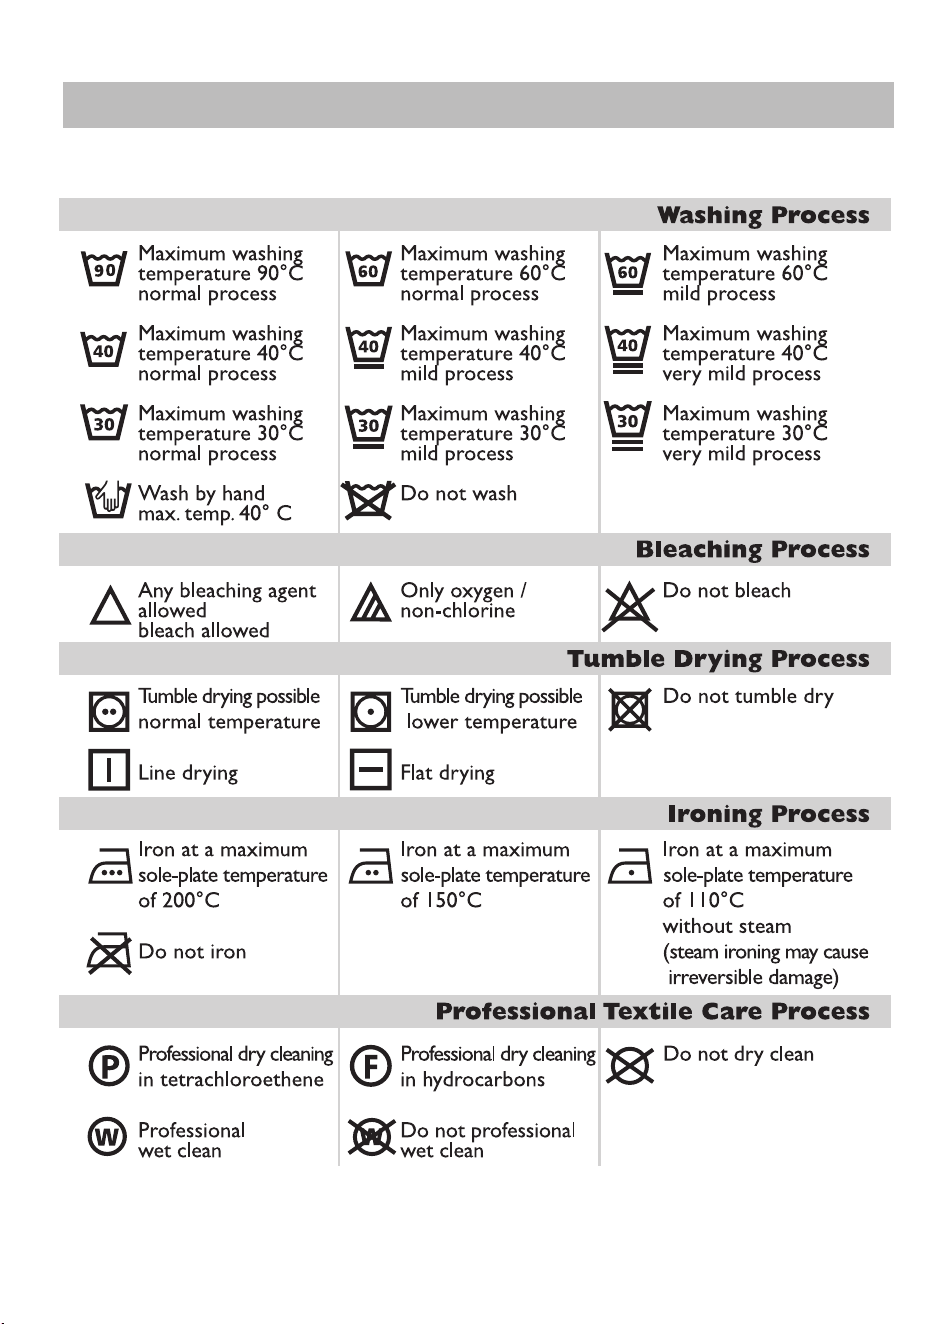
Programme
Kind of detergent
Universal Colour Delicate Special Softener
L/P L/P - -
L/P L/P - -
L/P -
- -
-
-
L/P L/P - -
- -
- -
- - - -
L = gel-/liquid detergent P = powder detergent O = optional
_
= no
If using liquid detergent, it is not recommended to activate the time delay.
We recomment by using:
▶ Laundry powder: 20°C to 90°C* (best use: 40-60°C)
▶ Color detergent: 20°C to 60°C (best use: 30-60°C)
▶ Wool/delicate detergent: 20°C to 30°C (= best use)
* Choose 90 °C wash temperature only for special hygienic requirements.
- - -
-
Cotton
Eco
Express 15
Allergy
Mix
Air Dry
Time Dry
Auto Sense
Duvet
Delicate
Sports
Drum Clean
Rinse
Spin
Synthetic
Daily Wash
L/P
L/P
L/P- -
L/P L/P L/P- -
L/P L/P -
- - -
-
-
- - -
-
-
- - -
L/P
L/P L/P - - L/P
L/P L/P - - L/P
L/P L/P - - L/P
L/P L/P L/P
- -
-
L/P
L/P
H
F9
Dry temperature sensor error.
Fd
Dry heating element error.
FE
Dry motor error.
Tmperature in the drum is over 60℃therefore
it is not safe to open door.Wait until it drops
below 60℃ then the machine will open door.
Temperature in drum is
higher than 80℃.
Contact the After sales services.
Contact the After sales services.
Contact the After sales services.
Wait for the program to end or cancel,
and select “Spin” programme, in case
that there is still hot water in the drum to
avoid scalding; select the “Rinse” programme
and leave it to wash, or several minutes later,
do “Spin” programme.
Contact the after sales servi ce.

Door cannot be opened due
to water level or hot water
in the drum,or if the drum is
still moving,wait for it to stop
before attempting to open
the door.
Auto
1:25
19:30 Remaining delay end time
Likely showing the delay end operation.
LocI-
End
E2
Lock – error with door.
Shut the door properly.
E4
E8
F3
F4
F7 Motor - error.
FA
FCx
(X=1,2,3)
Unb
Unbalanced load and not able
to spin.
22
23
Care and cleaning Troubleshooting
Display code
Code Cause
Solution
Remaining wash cycle time.
Automatic load detection
End of cycle.
Water level not reached the set
level in 8 minutes.
Water protective level-error.
Temperature sensor-error.
Heating error (Appears at the
end of a cycle).
Water level sensor error.
Electronic control - error.
This should allow the drum to cool down.
Check if water supply and water pressure
is normal.
Drain hose is self-syphoning.
Contact the after sales servi ce.
Contact the after sales servi ce.
Contact the after sales servi ce.
Contact the after sales service.
Contact the a fter sales service.
Check and balance the laundry load in
the drum. Also reduce the load if too
heavy. Restart with a spin program.
Water inlet valve and inlet valve filter
Unplug the power cor water
supply.
Unscrew the water inlet hose at the back of the
appliance as well as on the tap.
Remove the filters and flush them with water and a
brush.
Insert the filter and install the inlet hose.
To prevent blockage of water supply by solid substance
like lime clean regularly the inlet valve filter.
Laundry weight detection in process.
please wait until program cycle time is
displayed.
Drainage error, water not
emptied.
Check drain hose for block
age, and
ensure it is installed properly.
Clean pump filter.
Choose the best detergent
Programme
Kind of detergent
Universal Colour Delicate Special Softener
L/P L/P - -
L/P L/P - -
L/P -
- -
-
-
L/P L/P - -
- -
- -
- - - -
L = gel-/liquid detergent P = powder detergent O = optional
_
= no
If using liquid detergent, it is not recommended to activate the time delay.
We recomment by using:
▶ Laundry powder: 20°C to 90°C* (best use: 40-60°C)
▶ Color detergent: 20°C to 60°C (best use: 30-60°C)
▶ Wool/delicate detergent: 20°C to 30°C (= best use)
* Choose 90 °C wash temperature only for special hygienic requirements.
- - -
-
Cotton
Eco
Express 15
Allergy
Mix
Air Dry
Time Dry
Auto Sense
Duvet
Delicate
Sports
Drum Clean
Rinse
Spin
Synthetic
Daily Wash
L/P
L/P
L/P- -
L/P L/P L/P- -
L/P L/P -
- - -
-
-
- - -
-
-
- - -
L/P
L/P L/P - - L/P
L/P L/P - - L/P
L/P L/P - - L/P
L/P L/P L/P
- -
-
L/P
L/P
H
F9
Dry temperature sensor error.
Fd
Dry heating element error.
FE
Dry motor error.
Tmperature in the drum is over 60℃therefore
it is not safe to open door.Wait until it drops
below 60℃ then the machine will open door.
Temperature in drum is
higher than 80℃.
Contact the After sales services.
Contact the After sales services.
Contact the After sales services.
Wait for the program to end or cancel,
and select “Spin” programme, in case
that there is still hot water in the drum to
avoid scalding; select the “Rinse” programme
and leave it to wash, or several minutes later,
do “Spin” programme.
Contact the after sales servi ce.

2524
Troubleshooting Troubleshooting
In case of power failure
The current programme and its setting
will be saved.
Troubleshooting without display code
Problem Cause Solution
Washing machine
fails to operate
1. Power failure
2. Machine hasn’t been switched
on.
3. Door is not properly closed.
4. Programme is not yet. started
1. Check power supply.
2. Switch the machine on.
3. Close the door properly.
4. Touch “ Start /Pause”
button.
Washing machine
will not fill with
water.
1. No water inlet.
2. Inlet hose is kinked.
3. Inlet hose filter is blocked.
4. Water pressure is less than
0.03MPa.
5. Door is not properly closed.
6. Water supply failure.
1. Check water tap.
2. Check inlet hose.
3. Unblock inlet hose filter.
4. Check water pressure.
5. Close the door properly.
6. Ensure the water supply.
Machine is
draining while
being filled.
1. Height of drain hose is bel ow
80cm.
2. Drain hose end is submerged
1. Make sure that drain hose is
properly installed.
2. Make sure the drain hose is
not in water.
Drainage failure.
1. Drain hose is blocked.
2. Pump filter is blocked.
3. Drain hose end is higher than
100cm above floor level.
1. Unblock drain hose.
2. Clean pump filter.
3. Make sure that drain hose is
properly installed.
Problem Cause Solution
Strong vibration
while spinning.
1. Not all transportation bolts
have been removed.
2. Appliance has no solid
position.
3. Machine load is not balanced.
1. Remove all transportation
bolts.
2. Ensure solid ground and
a levelled position.
3. Check load weight and
balance.
Operation stops
for a period of
time.
1. Appliance displays error code.
2. Problem due to load pattern.
1. Consider display codes.
2. Reduce or adjust load.
3. Cancel programme and
restart.
Operation stops
before completi-
ng wash cycle.
Water or electric failure.
Check power and water
supply.
Excessive foam
floats drum and/or
detergent drawer.
1. Detergent is not a appropriate.
2. Excessive use of detergent in
manually dosage.
1. Check detergent recom-
mendations.
2. Reduce amount of dete-
rgent.
Spinning fails Unbalance of laundry. Check machine load.Run the
Spin programme again.
General information and tips:
If too much foam is visible during spin cycle, the motor will stop and drain
pump will activate for 90 seconds. If that elimination of foam fails up to 3
times, programme ends without spinning.
Automatic adjust-
ment
Washing programme
This is normal and doesn‘t
of washing
duration will be adjusted. affect functionality.
time
When power supply is restored, operation will be
resumed.
If a power failure cuts an operating wash programme,
door opening is mechanically blocked. To get out any
laundry,water level should not be seen in the glassy
porthole of the door. Danger of burns! Water level has
to be lowered as described in “Pump filter”. Not till then
pull level(A) beneath service flap until door as unlocked
by a gentle click. Afterwards refix all parts.
in water?

Basic technical information regarding the appliance
Power source
Max working current (A)
Water pressure (MPa)
Nominal load (kg)-Wash
Max spinning speed (rpm)
Washing programmes
Max power (W)-Wash
Dimensions (HxDxW mm)
Net weight (kg)
220-240V/50Hz
10
0.03 P 1
8
1400
16
1850
850*550*595
76
26
Technical data
Nominal load (kg)-Dry
4
Max power (W)-Dry 1900

