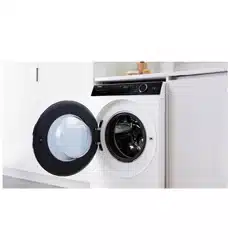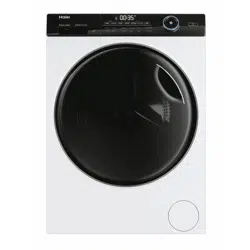

HWF75DW1
HWF85DW1
User Manual
Washing Machine
M
M
M
负载
夜 洗
防皱浸泡
1400
不甩干
400
600
800
1000
1200
常温
90
20
30
60
40
70
预约时间剩余时间
加速洗
超净洗
加漂洗
高水位
1 2 3
Rinse
Anti crease
Time save
Eco
Soak
Temp. M emoFunction Selection Spin Delay
Cotton Daily Wash
direct drive
Shirts
Express 15'
Baby Care
Delicate
Hand Wash
Spin/Drain
Drum Clean
Synthetic
Mix
Wool
Under-
wear
Sport
Jeans
Hygien
lock
e

2
Yes
No
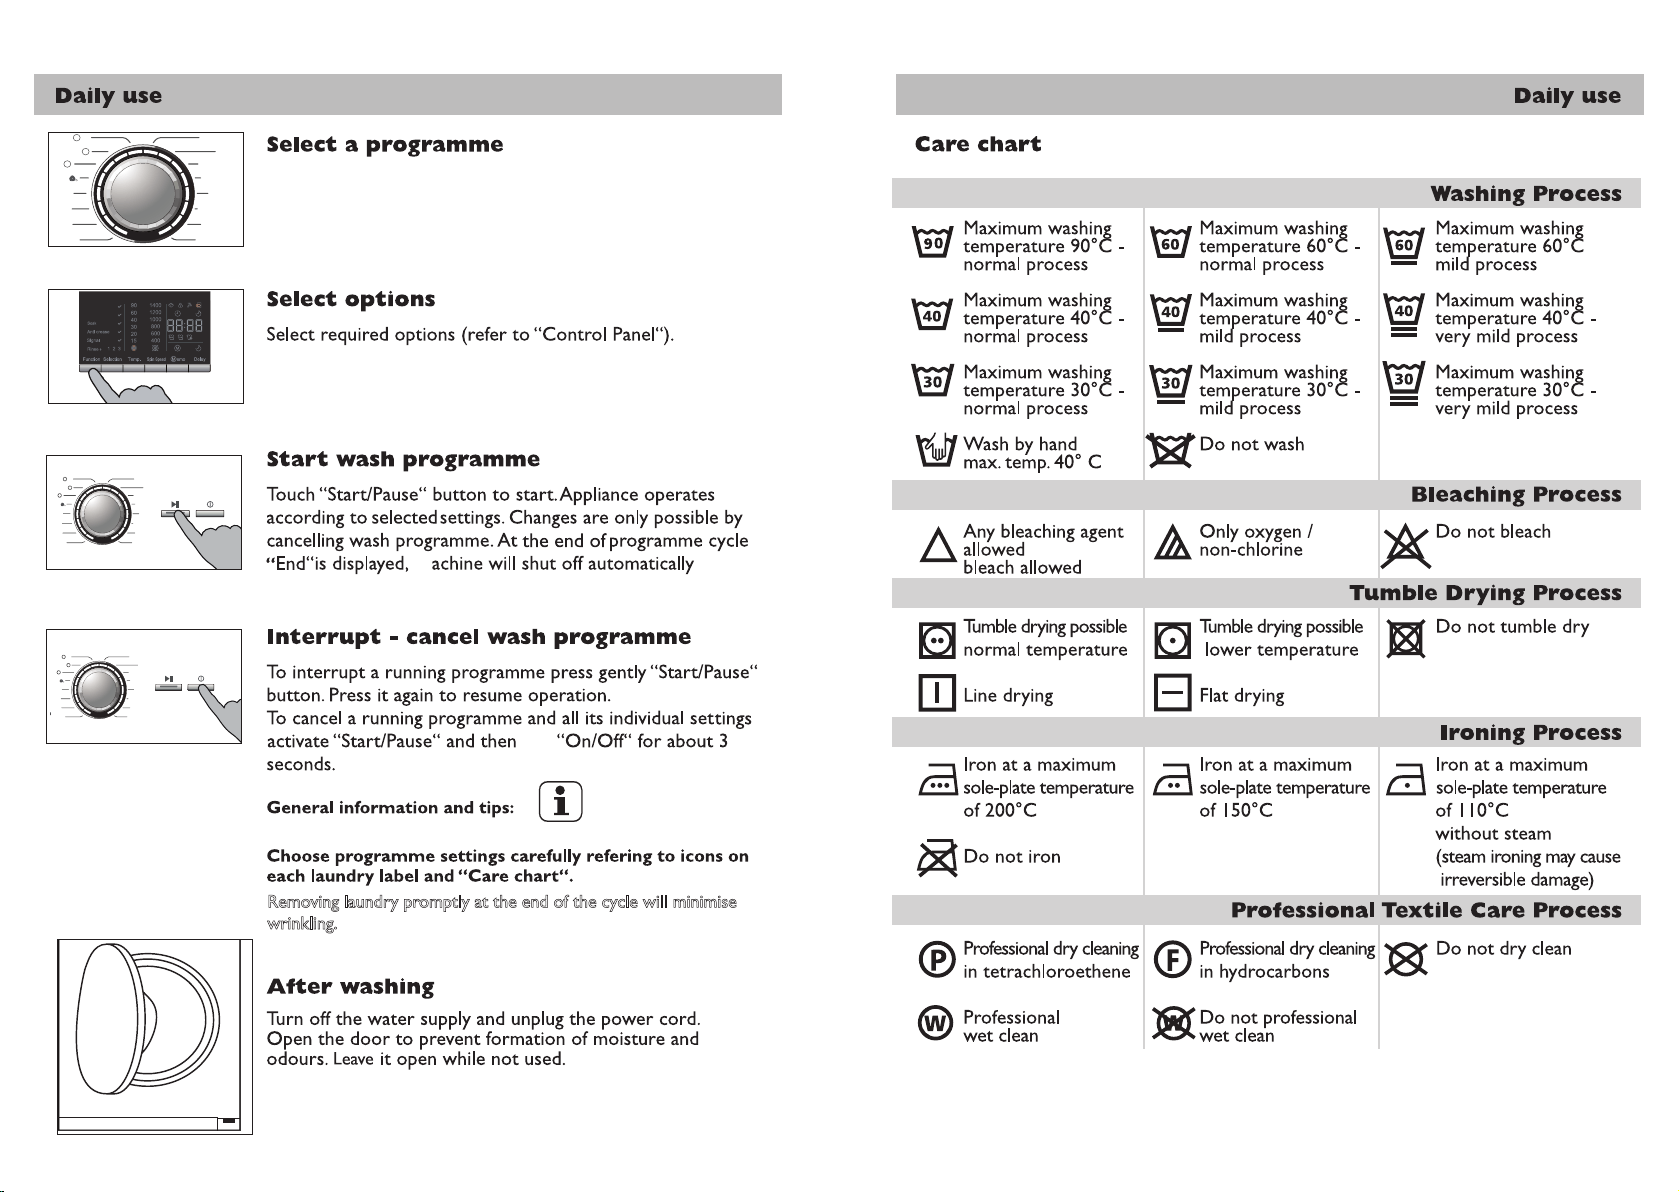
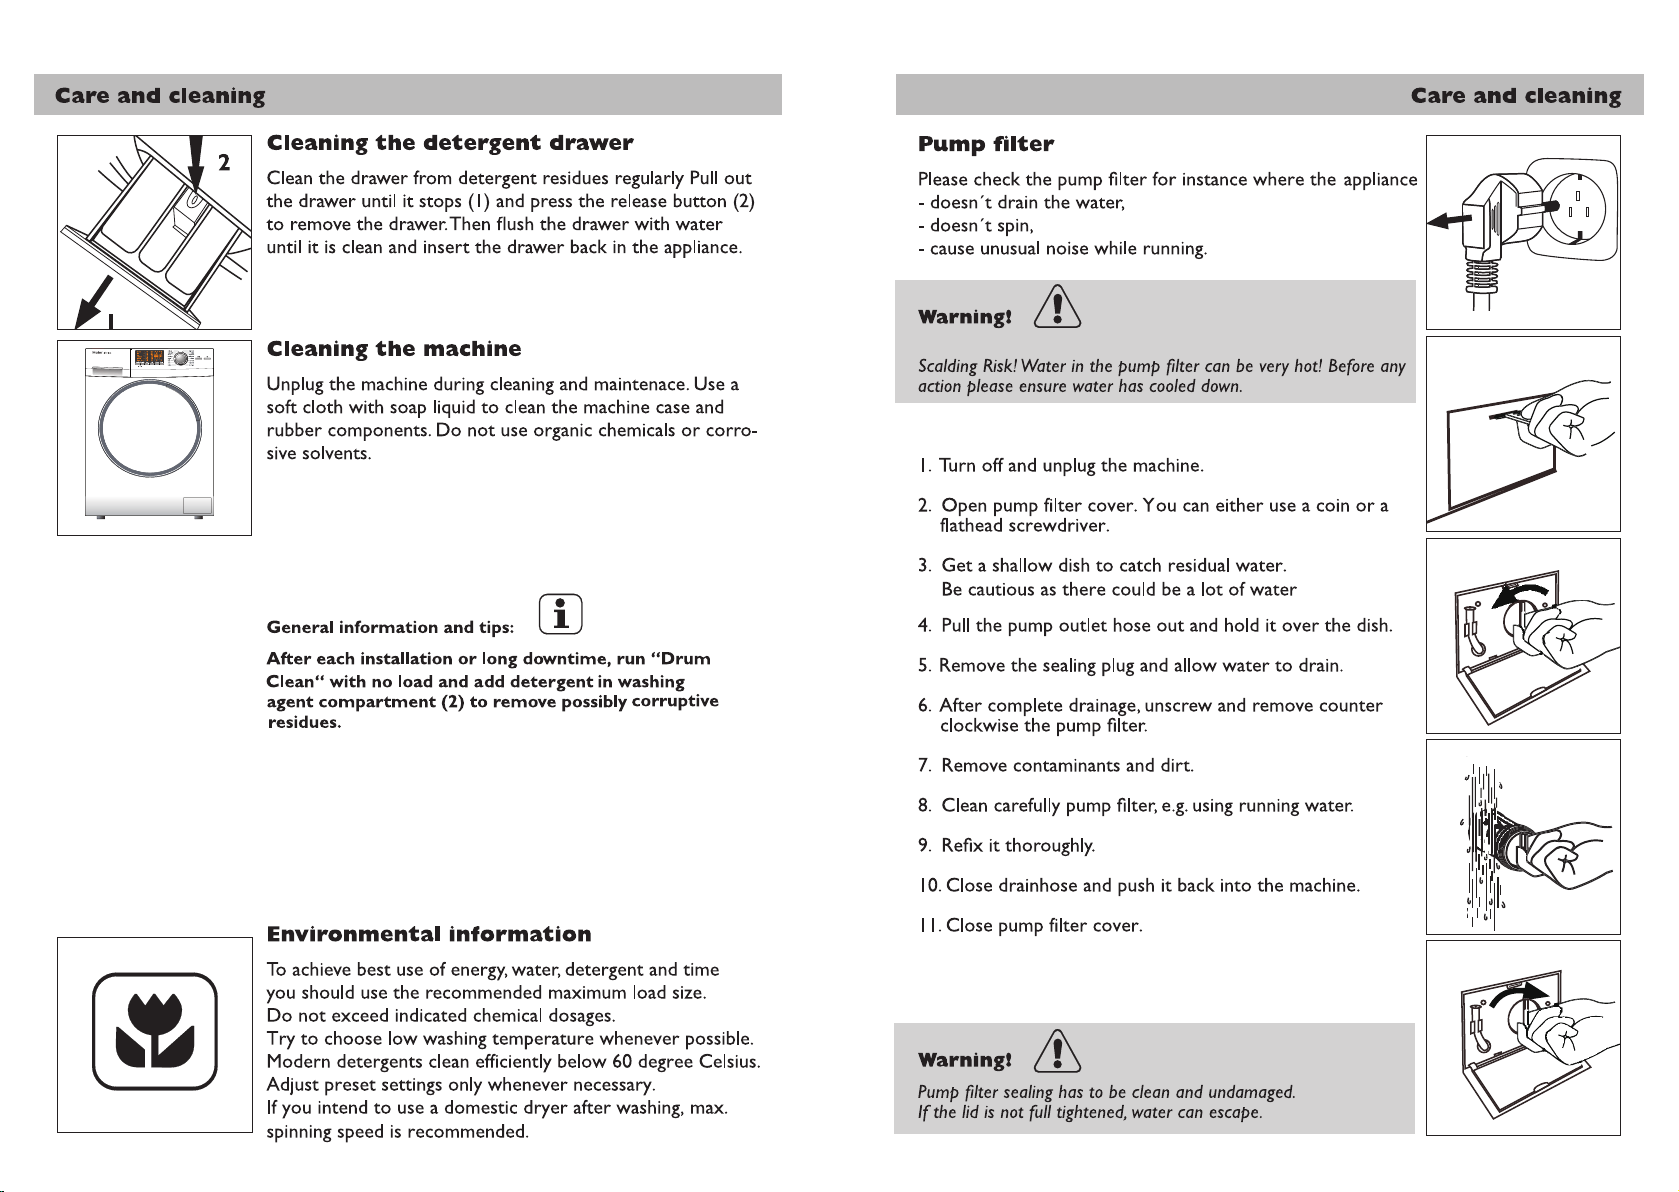
General information and tips
Warning! Important safety information!
Environmental information
The presence of this symbol on the product,
accessories or materials that goes with this in-
formation indicates that at the end of its useful
life the product or its electronic accessories
(e.g. cable, Aqua Stop hose) should not be dis-
posed with other household waste. To prevent
possible damage to the environment or human
health from uncontrolled waste disposal, please
separate these items from other types of was-
te and recycle them. This will promote the sus-
tainable reuse of material resources. Household
users should contact either the retailer where
they purchased the product or relevant local
authorities to find out how they can take this
item for environmentally safe recycling and safety.
Business users should contact their supplier and
check the conditions of the purchase. This pro-
duct and its electronic accessories should not
be mixed with other commercial waste.
Disposal
Legend
Thank you for purchasing a Haier product
Please read these instructions carefully before using this appliance. It contains impor-
tant information which will help you get the best out of your appliance and ensure safe
and proper installation, use, care and cleaning.
Keep this manual in a convenient place so you can always refer to it for safe and
proper use.
If you sell the appliance, give it away, or leave it behind when you move, make sure you
also pass on this manual so that the new owner can become familiar with all features
and safety warnings.
3
Index
Safety........................................................................................... 4-5
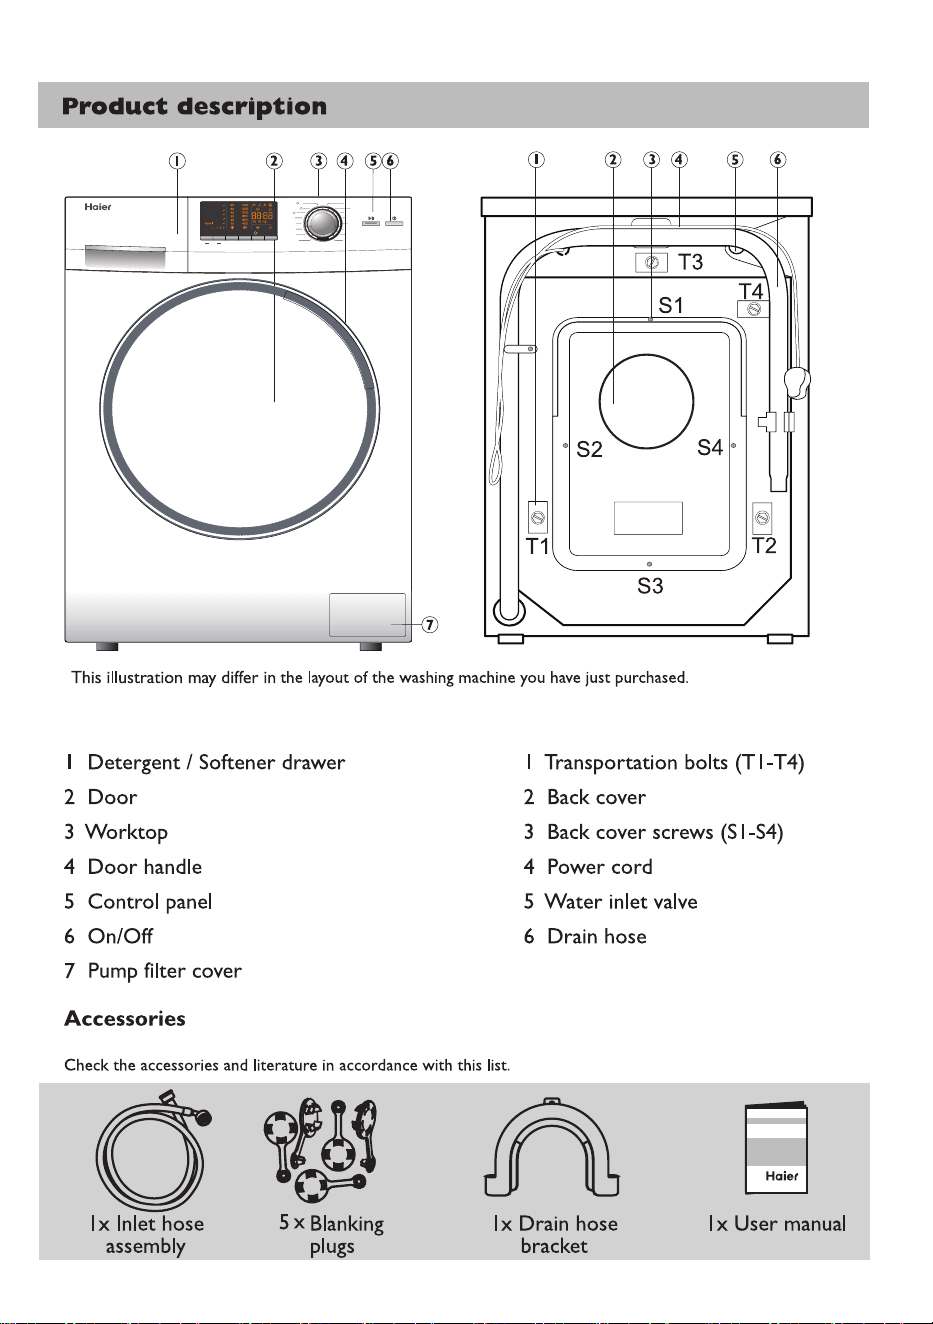
Product description....................................................................... 8
Control panel............................................................................ 9-11
Programmes............................................................................12-13
Consumption...........................................................................14-15
Daily use................................................................................... 16-19
Care and cleaning.................................................................. 20-22
Troubleshooting...................................................................... 23-25
Installation............................................................................... ....6-7
Technical data ........................................................................ 27-28
2
Yes
No
General information and tips
Warning! Important safety information!
Environmental information
The presence of this symbol on the product,
accessories or materials that goes with this in-
formation indicates that at the end of its useful
life the product or its electronic accessories
(e.g. cable, Aqua Stop hose) should not be dis-
posed with other household waste. To prevent
possible damage to the environment or human
health from uncontrolled waste disposal, please
separate these items from other types of was-
te and recycle them. This will promote the sus-
tainable reuse of material resources. Household
users should contact either the retailer where
they purchased the product or relevant local
authorities to find out how they can take this
item for environmentally safe recycling and safety.
Business users should contact their supplier and
check the conditions of the purchase. This pro-
duct and its electronic accessories should not
be mixed with other commercial waste.
Disposal
Legend
Thank you for purchasing a Haier product
Please read these instructions carefully before using this appliance. It contains impor-
tant information which will help you get the best out of your appliance and ensure safe
and proper installation, use, care and cleaning.
Keep this manual in a convenient place so you can always refer to it for safe and
proper use.
If you sell the appliance, give it away, or leave it behind when you move, make sure you
also pass on this manual so that the new owner can become familiar with all features
and safety warnings.
3
Index
Safety........................................................................................... 4-5
Product description....................................................................... 8
Control panel............................................................................ 9-11
Programmes............................................................................12-13
Consumption...........................................................................14-15
Daily use................................................................................... 16-19
Care and cleaning.................................................................. 20-22
Troubleshooting...................................................................... 23-25
Installation............................................................................... ....6-7
Technical data ........................................................................ 27-28

4
Safety
Before switching on the appliance for
the first time...
...make sure all transport bolts are removed.
...make sure the power cord is not caught under or in
the appliance and there is no damage or risk for damaging.
...make sure the power circuit fuse is rated for10A.
...use a separate earthed socket for the power supply.
...make sure the plug is always accessible.
...hold the plug and not the electric cable when unplugging
the power supply.
...check that hose joints and connections are firm and
by opening tap check for any water leaks.
...do not switch on the appliance until everything is properly
installed!
Do not …
...allow children or persons with reduced physical,sensory
or metal capabilities,or lack of experience and knowledge,
unless they are supervised or given instructions on how
to use the washer by someone responsible for the safety.
...install the appliance outdoors in a damp place, or in an
area which may be prone to water leaks
.
In the
event of
a water leak cut
power
supply and allow the machine to
dry naturally.
...expose machine to any frost, heat or direct sunlight.
...touch or use the appliance when barefoot or with wet or
damp hands or feet.
...use
flammable detergent or d
ry cleaning agent.
...use any
flammable spr
ays in close vicinity to the appliance
...remove or insert the plug in presence of flammable gas.
...place the appliance directly on a carpet.
5
Safety
During daily use of the appliance...
...supervise children.
Ensure that they don’t play with the appliance and its packaging.
...ensure that appliance is not used by people with
reduced physical, sensory or mental capabilities, lack of
experience and knowledge.
...pull up zips, fix loose threads and take care for small items
to prevent laundry from being entangled. If necessary, use
an appropriate bag or net.
...switch off at the wall socket after each wash programme
to save electricity and for safety.
...keep the lower part of the porthole clean and open door
and detergent drawer if appliance is not in use to prevent
odours.
...a damaged power cord is only to be replaced by the
manufacturer, service agent or other specifically
qualified people.
Do not ...
...touch the door during the washing process, as it may get hot.
...place heavy objects or sources of heat or damp on top of
the appliance.
...hot wash rubber or sponge-like materials.
...open detergent drawer during any wash cycle.
...force the door to open, it is fitted with a self-lock
device and will open shortly after wash cycle end.
...open the door if the water level is visible over the
porthole.
...cover or encase the appliance during operation or after
wards as it will restrict
an
y moistu
r
e or dampness to
evaporate
.
76
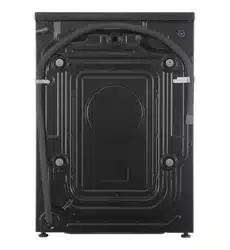
InstallationInstallation
Inlet hose
1. Connect inlet hose to the machines water inlet valve.
2. Connect inlet hose to a water tap.
3. Tighten inlet hose connections and turn on water supply.
Check for any water leaks. Stop all water leaks before
continuing with installation.
Warning!
Appliance is only qualified for cold water supply!
Use the hose-set supplied with the appliance.
Old hose-sets should not be reused.
Drain hose
Drainage could be installed in different ways. Nevertheless,
level of drain hose has to reach between 80-100 cm.
If possible alwa
ys keep drain hose
fixed to the clip at the
back of the appliance.
1. Drain hose to sink
Use the drain hose bracket to keep drain hose end retained
and out of any water level.
Fix the bracket securely to avoid dropping due to operational
movements.
2. Drain hose to sink siphon
Connection has to be securely sealed and fixed to corres-
ponding adapter above the siphoning part!
Preparation
Remove all packaging material including polystyrene base.
While opening the package, water drops may be seen on
plastic bag and po
water tests and quality control in the factory.
rthole. This is normal as a result from
Removing the transportation bolts
The transportation bolts are designed for clamping anti-
vibration components inside the appliance during transpor-
tation.
1. Remove the back cover.
2. Remove bolts on the rear side and take out
plastic spacers
from the inner side of the machine.
General information and tips:
Keep the transportation bolts in a safe place for later use.
If the machine is to be moved to another location, replace
transportation bolts to prevent damage.
3. Replace back cover by inserting it in the two gaps,its
convexity is facing outside.
4. Fill the transportation bolt holes with blanking plugs.
Adjusting the feet
Adjust all feets to achieve a complete level position.This will
minimize vibrations and thus noise during use. It will also
reduce wear and tear. We recommend to use a spirit level
for adjustment. Floor should be as stable and flat as possible.
1
.
3.
4
.
3.
4
.
3.
80 - 100 cm
2
.
2.
Location
Install the machine on a solid and level floor surface ensuring it
has at least 20 mm clearance on
each side. The washer must not
be installed on any textured floor coverings (eg carpet, rugs).
76
InstallationInstallation
Inlet hose
1. Connect inlet hose to the machines water inlet valve.
2. Connect inlet hose to a water tap.
3. Tighten inlet hose connections and turn on water supply.
Check for any water leaks. Stop all water leaks before
continuing with installation.
Warning!
Appliance is only qualified for cold water supply!
Use the hose-set supplied with the appliance.
Old hose-sets should not be reused.
Drain hose
Drainage could be installed in different ways. Nevertheless,
level of drain hose has to reach between 80-100 cm.
If possible alwa
ys keep drain hose
fixed to the clip at the
back of the appliance.
1. Drain hose to sink
Use the drain hose bracket to keep drain hose end retained
and out of any water level.
Fix the bracket securely to avoid dropping due to operational
movements.
2. Drain hose to sink siphon
Connection has to be securely sealed and fixed to corres-
ponding adapter above the siphoning part!
Preparation
Remove all packaging material including polystyrene base.
While opening the package, water drops may be seen on
plastic bag and po
water tests and quality control in the factory.
rthole. This is normal as a result from
Removing the transportation bolts
The transportation bolts are designed for clamping anti-
vibration components inside the appliance during transpor-
tation.
1. Remove the back cover.
2. Remove bolts on the rear side and take out
plastic spacers
from the inner side of the machine.
General information and tips:
Keep the transportation bolts in a safe place for later use.
If the machine is to be moved to another location, replace
transportation bolts to prevent damage.
3. Replace back cover by inserting it in the two gaps,its
convexity is facing outside.
4. Fill the transportation bolt holes with blanking plugs.
Adjusting the feet
Adjust all feets to achieve a complete level position.This will
minimize vibrations and thus noise during use. It will also
reduce wear and tear. We recommend to use a spirit level
for adjustment. Floor should be as stable and flat as possible.
1
.
3.
4
.
3.
4
.
3.
80 - 100 cm
2
.
2.
Location
Install the machine on a solid and level floor surface ensuring it
has at least 20 mm clearance on
each side. The washer must not
be installed on any textured floor coverings (eg carpet, rugs).
M
M
M
负载
夜 洗
防皱浸泡
1400
不甩干
400
600
800
1000
1200
常温
90
20
30
60
40
70
预约时间剩余时间
加速洗
超净洗
加漂洗
高水位
1 2 3
Rinse
Anti crease
Time save
Eco
Soak
Temp. M emoFunction Selection Spin Delay
Cotton Daily Wash direct drive
Shirts
Express 15'
Baby Care
Delicate
Hand Wash
Spin/Drain
Drum Clean
Synthetic
Mix
Wool
Under-
wear
Sport
Jeans
Hygien
lock
e
M
M
M
负载
夜 洗
防皱浸泡
1400
不甩干
400
600
800
1000
1200
常温
90
20
30
60
40
70
预约时间剩余时间
加速洗
超净洗
加漂洗
高水位
1 2 3
Rinse
Anti crease
Time save
Eco
Soak
Temp. M emoFunction Selection Spin Delay
Cotton Daily Wash direct drive
Shirts
Express 15'
Baby Care
Delicate
Hand Wash
Spin/Drain
Drum Clean
Synthetic
Mix
Wool
Under-
wear
Sport
Jeans
Hygiene
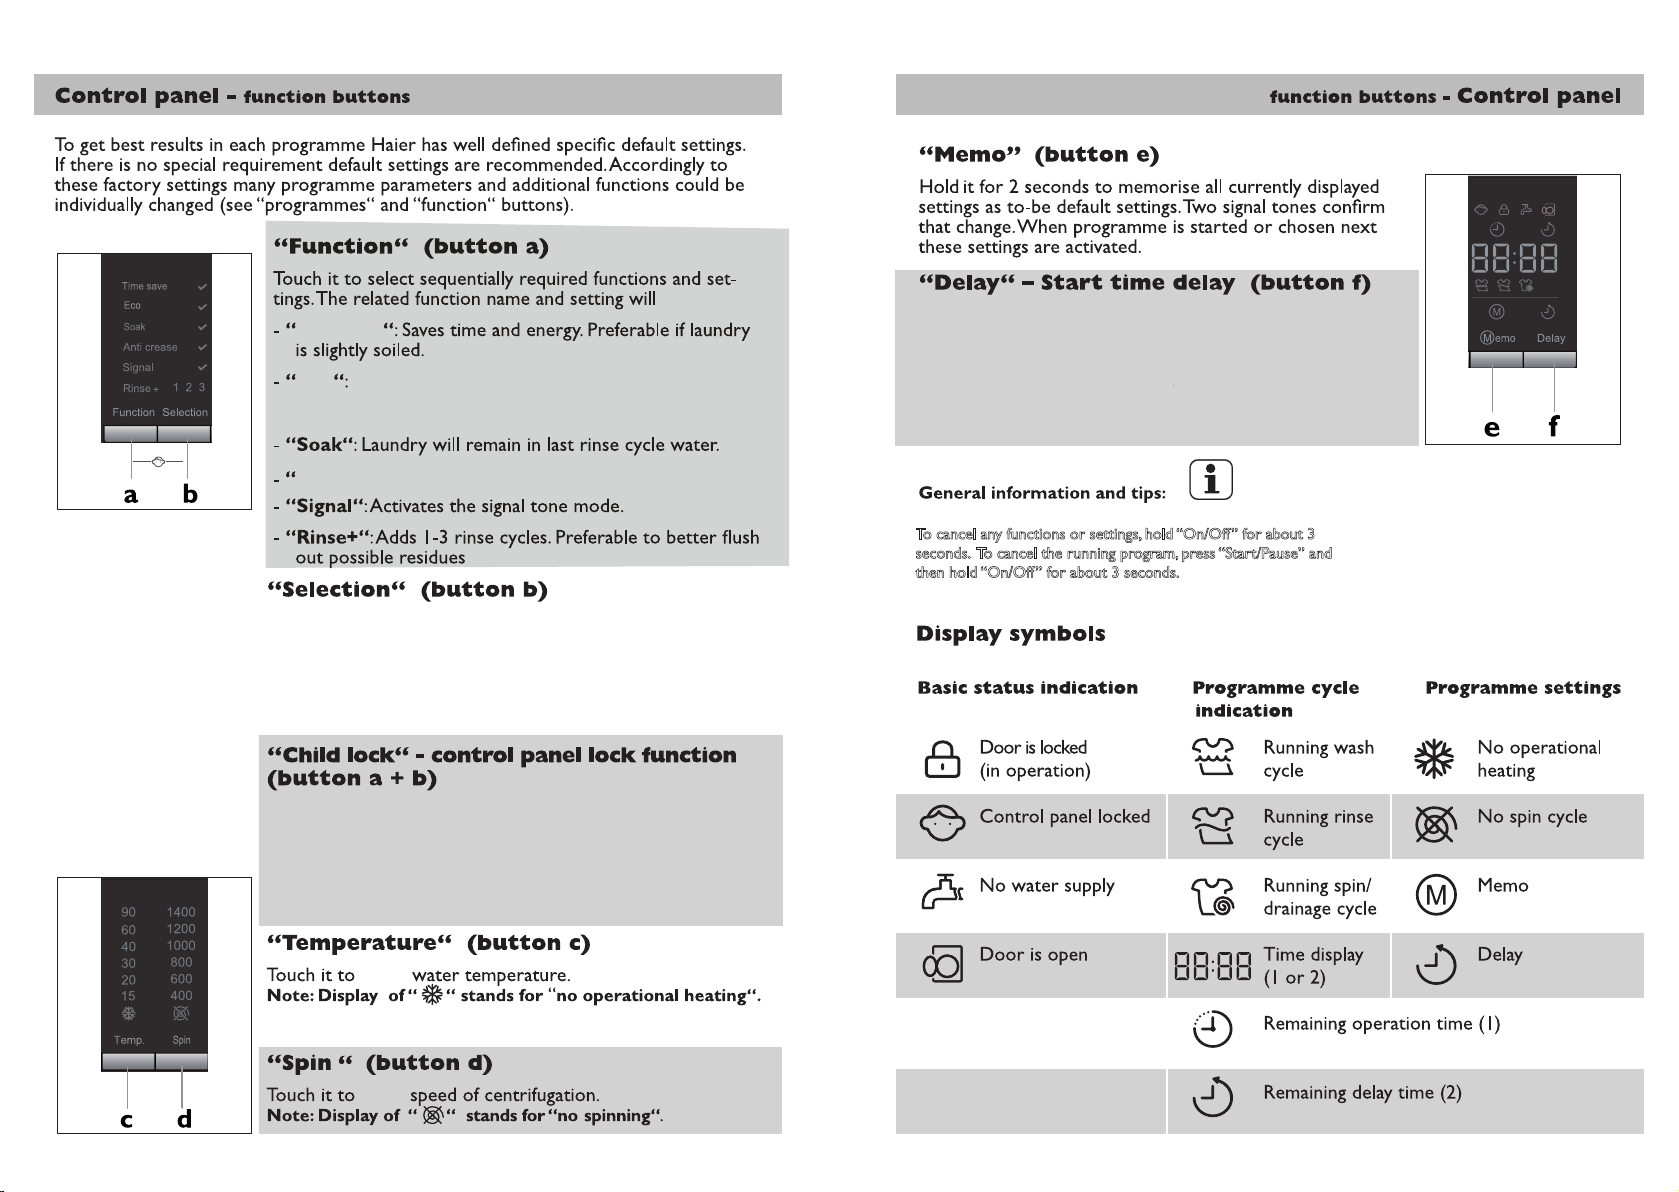
If the appliance is switched on, the display will illuminate and the current status icons
are visible. Refer the following pages for details. If no buttons or the program selector is
not touched the display will go dark after a short while to save energy. If the program
selector is turned the display will illuminate.
Touch this button gently to switch on. The display will illuminate.Touch it again for about
, the
8 9
lock
M
M
M
负载
夜 洗
防皱浸泡
1400
不甩干
400
600
800
1000
1200
常温
90
20
30
60
40
70
预约时间剩余时间
加速洗
超净洗
加漂洗
高水位
1 2 3
Rinse
Anti crease
Time save
Eco
Soak
Temp. M emoFunction Selection Spin Delay
Cotton Daily Wash direct drive
Shirts
Express 15'
Baby Care
Delicate
Hand Wash
Spin/Drain
Drum Clean
Synthetic
Mix
Wool
Under-
wear
Sport
Jeans
Hygien
lock
e
M
M
M
负载
夜 洗
防皱浸泡
1400
不甩干
400
600
800
1000
1200
常温
90
20
30
60
40
70
预约时间剩余时间
加速洗
超净洗
加漂洗
高水位
1 2 3
Rinse
Anti crease
Time save
Eco
Soak
Temp. M emoFunction Selection Spin Delay
Cotton Daily Wash direct drive
Shirts
Express 15'
Baby Care
Delicate
Hand Wash
Spin/Drain
Drum Clean
Synthetic
Mix
Wool
Under-
wear
Sport
Jeans
Hygiene
If the appliance is switched on, the display will illuminate and the current status icons
are visible. Refer the following pages for details. If no buttons or the program selector is
not touched the display will go dark after a short while to save energy. If the program
selector is turned the display will illuminate.
Touch this button gently to switch on. The display will illuminate.Touch it again for about
, the
8 9
lock
Time save
Eco
Anti crease“:Gently wash and spin to prevent creasing.
Touch the Selection button (button b) to confirm the flashing
“Function” icon. A tick or 1, 2 or 3 will illuminate confirming
your selection.
The “Child Lock“ function stops any further changes to the
set program. To active, hold the “Function“ and “Selection“
buttons at the same time for 3 seconds. The lock icon will
illuminate. To deactivate the “Child Lock“ hold the “Function“
and “Selection“ buttons at the same time
adjust
adjust
for 3 seconds.
illuminate.
Touch it to increase programme end time in increments of
30 minutes from 30 mins – 24hr.Press the Start/Pause button
once you are satisfied with the delayed end time. You will
note the countdown of the delay time commence and
subsequently the remaining programme cycle time will be
displayed. The related symbol to the operation will display.
To cancel any functions or settings, hold “On/Off” for about 3
seconds. To cancel the running program, press “Start/Pause” and
then hold “On/Off” for about 3 seconds.
10 11
Use the ECO option to save water and energy.
Selecting ECO will reduce the wash temperature slightly and
alter the wash time.
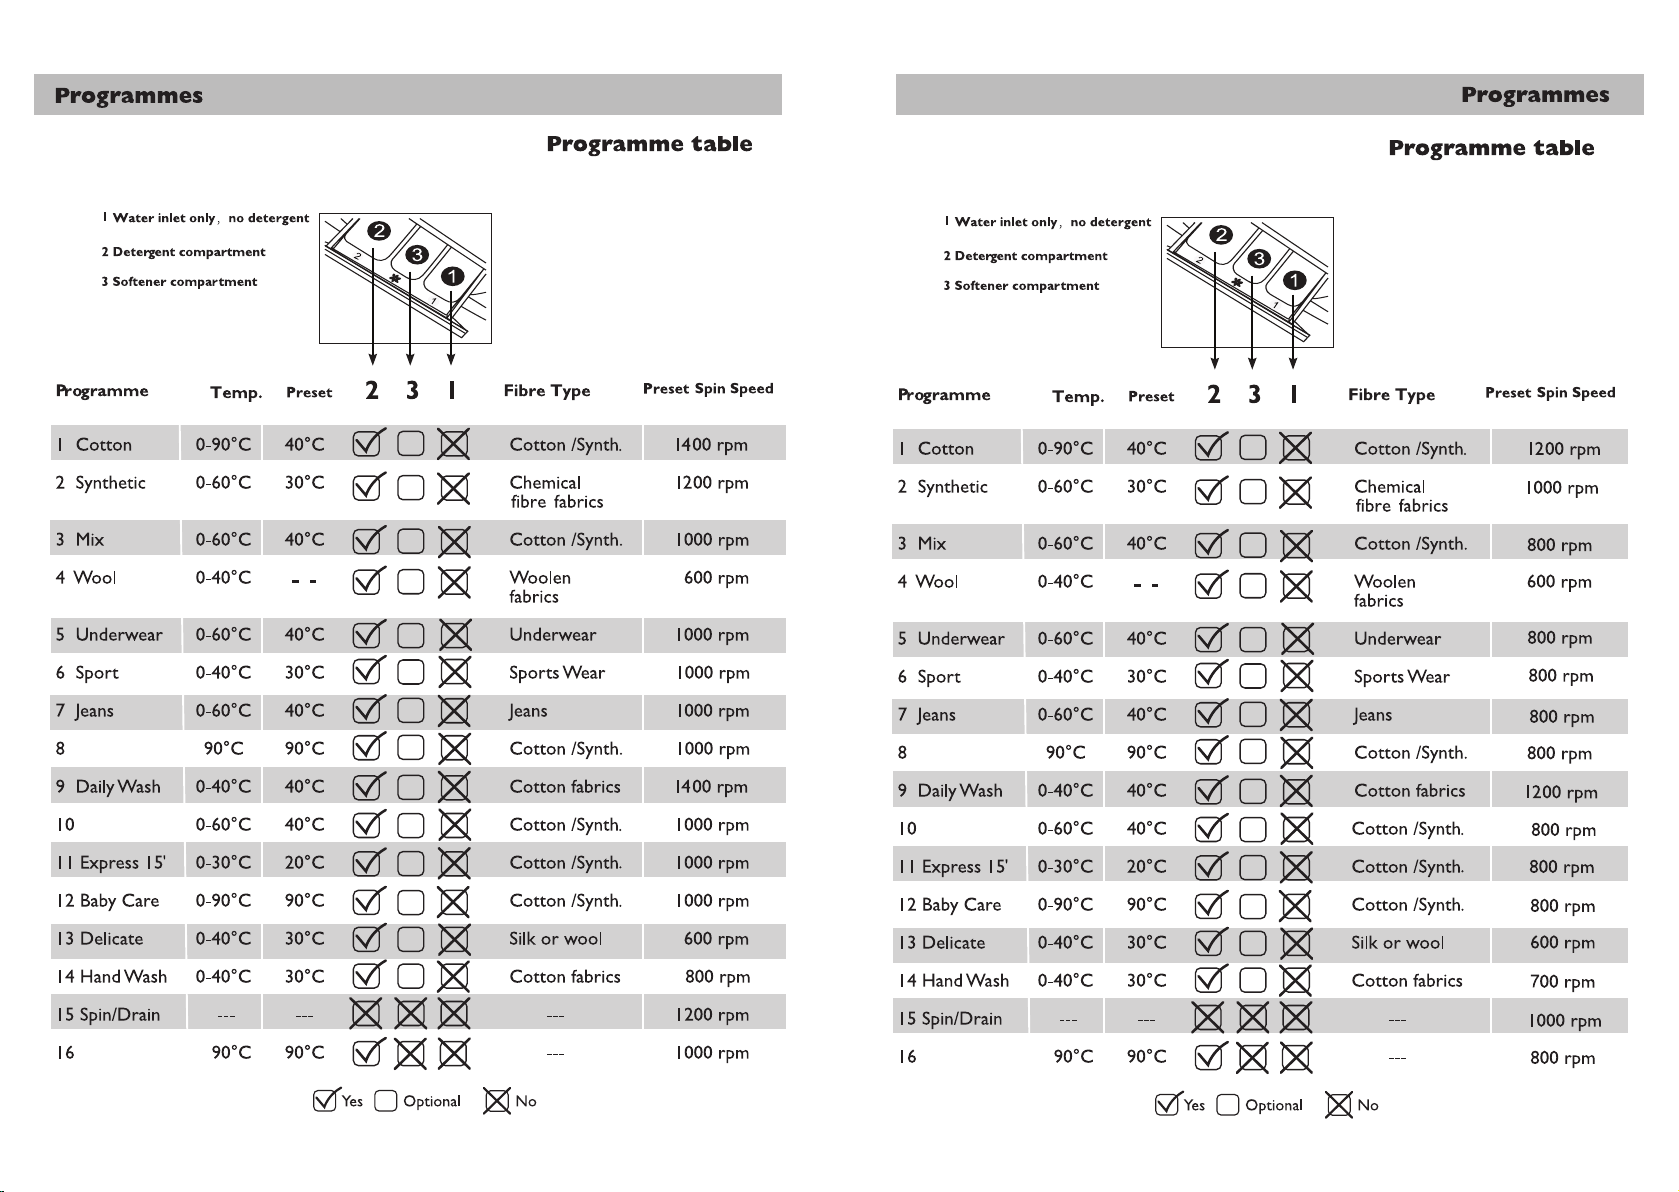
Hygiene
Shirts
Drum Clean
12 13
Hygiene
Shirts
Drum Clean
HWF85DW1 HWF75DW1
Hygiene
Shirts
Drum Clean
12 13
Hygiene
Shirts
Drum Clean
HWF85DW1 HWF75DW1
14 15
Hygiene
Shirts
Drum Clean
*General information and tips:
Standard programme for the Energy and Water Labelling according to
AS/NZS2040.1:2005:
4.0or3.5
4.0or3.5
4.0or3.5
4.0or3.5
4.0or3.5
4.0or3.5
8.5or7.5
The detergent dosage: rated capacity* 12.5g*75% and -foam aid is 15g.
Detergent dissolvent method: Dissolve the detergent fi
is the
kg
and the recommended
rst and pour the dissolved detergent into
the machine when the main wash starts.
The detergent dosage: rated capacity* 12.5g*75% and -foam aid is 17g.
Detergent dissolvent method: Dissolve the detergent first and pour the dissolved detergent into
the machine when the main wash starts.
HWF75DW1
HWF85DW1
The actual water temperature may differ from the declared cycle temperature.
If the machine is used for commercial purposes the warranty will be void. Do not use for
purposes other than that which the machine is designed for. Follow the instruc ons given
on the label of each garment and wash only machine -washable garments.
is the
and the recommended
kg
8.5or7.5
70,0