Documents: Go to download!
User Manual
- User Manual - (English)
- HWF85BW1 - - Specifications Sheet - (English)
- Before Use
- Functions
- Maintenance
- Display Codes
- Trouble-Shooting
Table of contents
User Manual Washing Machine
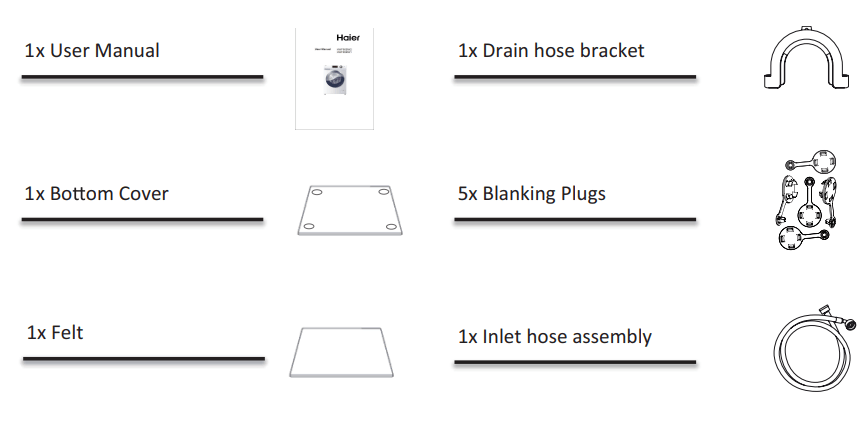
Accessories
Check the accessories and literature in accordance with this list:
Legend
Before Use
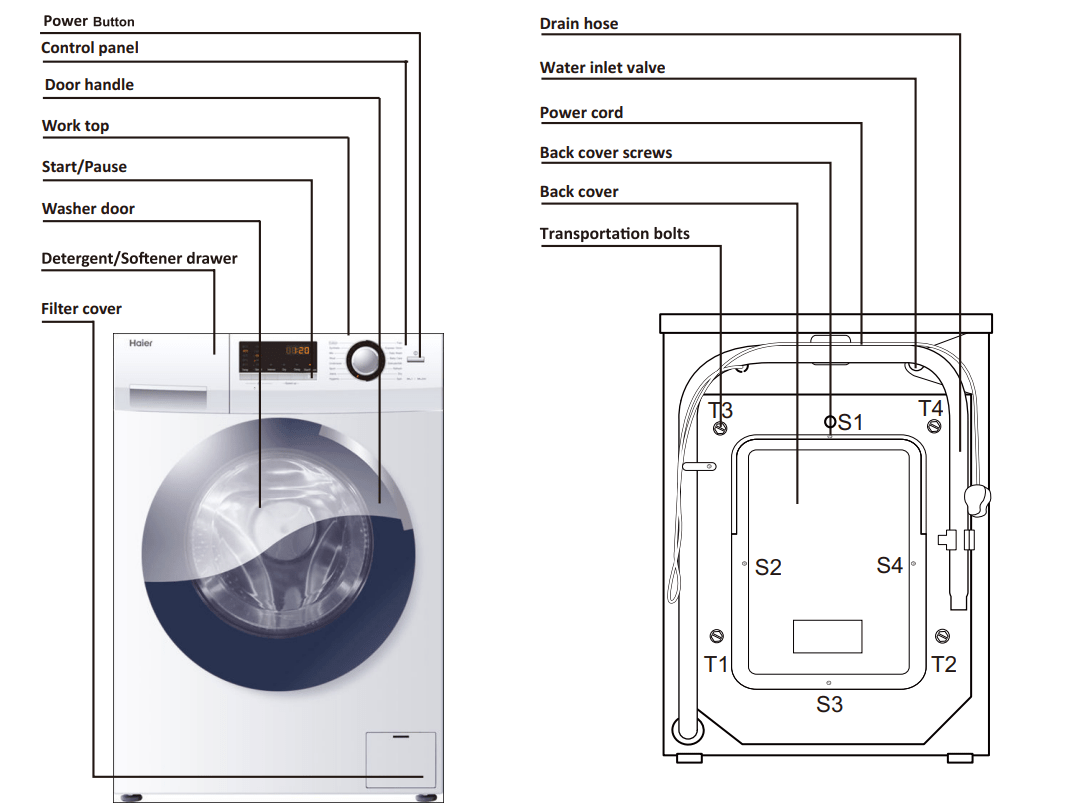
Description
This diagram may be slightly different from the layout of the washing machine you have just purchased.
Preparing the machine
Remove all the packing materials to prevent unsteadiness, including the polystyrene base. Upon opening the package, water drops may be seen on the plastic bag and the porthole. This is normal phenomenon resulting from water tests in the factory.
Functions
Control Panel
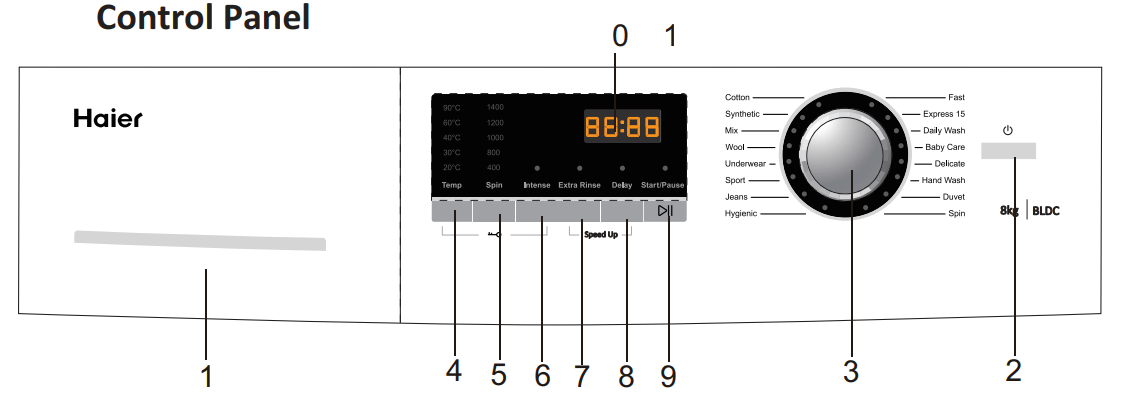
- Detergent/Softener Drawer
- Intense button
- On/Off Button
- Extra Rinse
- Program Dial
- Delay
- Wash Temp
- Start/Pause Button
- Spin Speed
- LED Display
Operational Functions
1. Detergent distribution drawer
Open the drawer, three compartments can be seen:
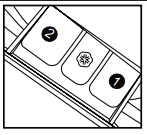
Compartment 1: Prewash detergent
Compartment 2: Detergent for programs 1 to 15.
Compartment  : Softener, conditioning agent.
The recommendation on the type of detergents is suitable for the various washing temperatures, please refer to the manual of detergent. Use Low Sudsing or Front Loader liquid or powder detergents. Alternatively use detergent pods.
2. On/Off Button
Press this button to switch on the washing machine. Press it again to switch it off.Press this button gently for 2 seconds to switch off the machine as buttons are soft touch sensitive.
3. Program Dial
By turning the knob clockwise/counterclockwise, the required program can be selected. There are 16 programs available. After a program is selected, the corresponding light will illuminate.
4. Wash Temp
Touch this button lightly, the washing temperature will be displayed on the indicator. Select a temperature according to the type of laundry.Note: If there is no indicator light displayed, this means cold wash.
5. Spin Speed
Touch this button lightly to select the desired speed. When a speed is set, it will be displayed on the indicator.Note: If there is no indicator light displayed, this means no spinning.
 Different water temperatures and spinning speeds can be set for different laundries. Wash using the default settings if there is no special requirement.
6. Intense button
If the laundry is very dirty, press this button before starting the program. When the button is pressed, the washing time increases.
7. Extra Rinse
Press this button, the washing machine will perform additional rinses. Press the button once to select one additional rinse. The display will show"P-l". Press the button repeatedly and the screen will display "P-2"or "P-3", indicating two or three additional selected rinses. The "extra rinse light" is activated and flashes during the performance. "P-l/2/3" is displayed alternating with the remaining time. The light turns off and the display disappears when the extra rinse ends.
 You can select if you require this function when programs 1-15 are used.
8. Delay
Touch this button lightly, the washing machine will start operation after a period of time and the corresponding indicator will go on. The range is 0.5-24 hours; each touch of this button increases a half hour. After the button is set, press the Start/Pause button to start countdown of the set time (the time is displayed on the screen until the program ends).
 The delay time must be longer than the program time otherwise the washing machine will start the wash program directly.
9. Start/Pause Button
When the washing machine is connected to the power socket and a program is selected, lightly touch this button to start operation. During a wash cycle, touch it lightly operation will stop and the digits on the screen start blinking. Touch it again to resume operation. To cancel a wash program during a wash cycle, touch this button, when the digits on the screen start blinking, press the Power switch, the program will be cancelled.
10. LED Display
Information as remaining wash time and error messages will be shown here.
 After a wash program is started the display will go on and the remaining wash time decreases. As the water pressure and temperature may differ, the remaining time may be adjusted accordingly. When the laundry is not balanced during spinning, the time may be automatically prolonged.
To cancel audible alarm
Alarm sound can be cancelled if it is required (not recommended)
Switch on the washing machine and turn the program knob to spin cycle, then press the "Delay" and "Extra rinse" button, hold on for 3 seconds.
The message "BEEP OFF" will be displayed on the screen, indicating that the alarm sound has been cancelled.
To reinstate audible alarm
Switch on the washing machine and turn the program knob to spin cycle, then press the "Delay" and "Extra rinse" button, hold on for 3 seconds.The "BEEP ON" message will be displayed on the screen, indicating that the alarm sound has been reinstated.
Speed Up
press extra rinse and delay at the same time for 3 seconds,then the display area shows " SPEEd uP " (display 3S circularly),this function be activated.press these two button again, this " SPEEd uP " function will be canceled.
Program Modes
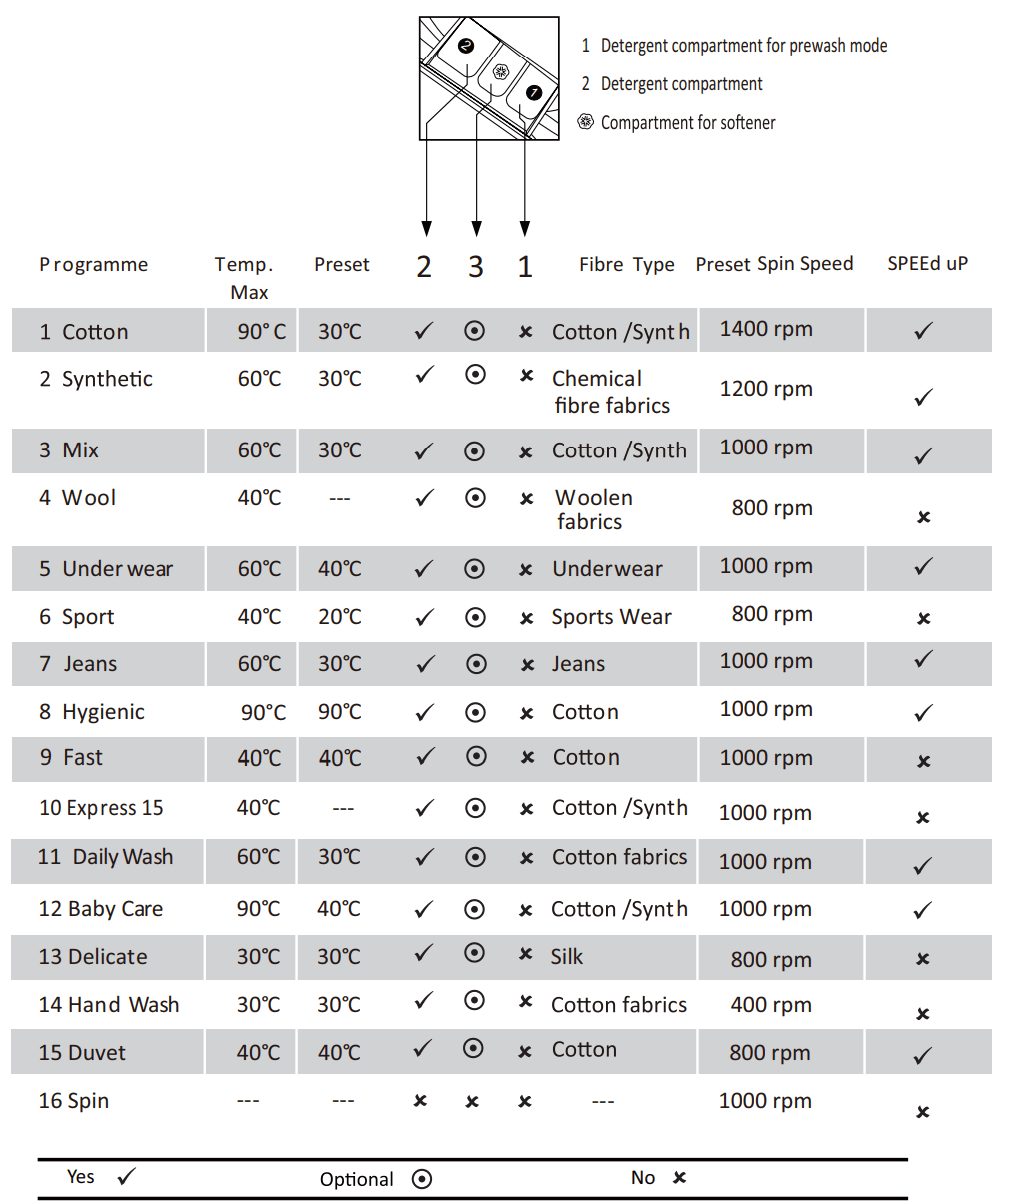
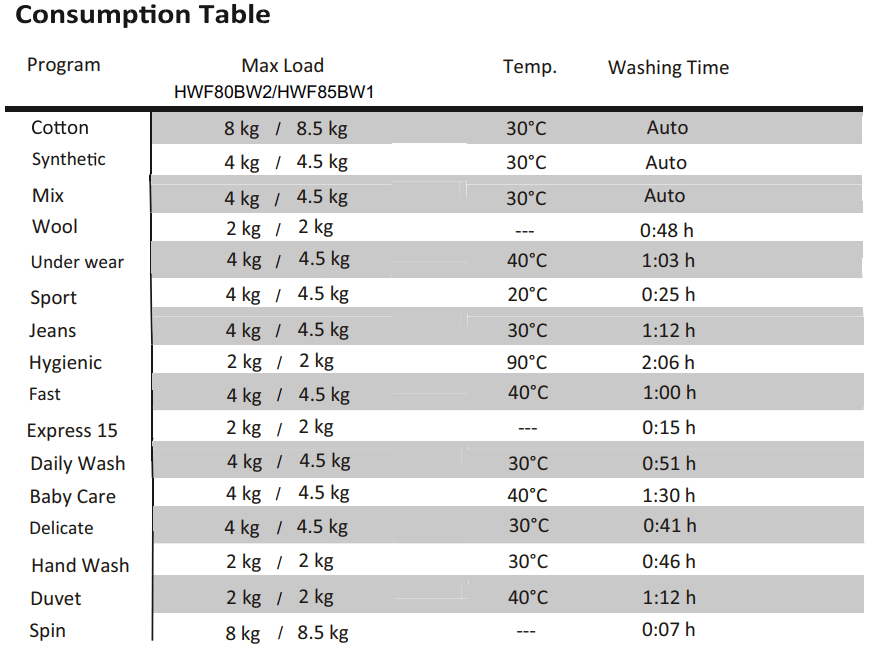
 The actual water temperature may differ from the declared cycle temperature.
If the machine is used for commercial purposes the warranty will be void. Do not use for purposes other than that which the machine is designed for. Follow the instructions given on the label of each garment and wash only machine -washable garments.
 Energy Label Program Settings:" Cotton, 40°C, Intense,1400rpm
 Detergent dissolvent method: Dissolve the detergent first and pour the dissolved detergent into the machine when the main wash starts.
Washing Methods
 This washing machine is for domestic use only. If the machine is use for commercial purpose the guarantee will not be valid anymore. Do not use it for purposes other than that for which it was designed. Follow the instructions given on the label of each garment and wash only machine-washable garments.
Power Supply
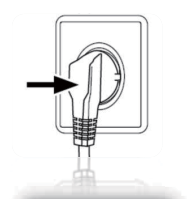
Connect the washing machine to the power supply (220V to 240V~/50Hz).
Water Connection
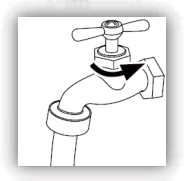
Turn on the tap. The water must be clean and clear.
 Before use, check for leaks in the joints between the tap and the inlet hose by turning on the tap.
Preparing the Laundry
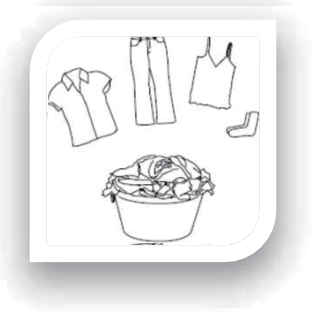
Sort out clothes according to fabric (cotton, synthetics, wool or silk) and to how dirty they are.
Separate white clothes from colored ones. Wash them first by hand to check if they fade or run.
Garments without hems, underwear, and finely woven textile such as fine curtains are to be put into wash bag (it is better not to wash them in a washing machine).
Close zippers and hooks, make sure the buttons are sewn on tightly and place small items such as socks, belts, bras, etc. in the wash bag.
Unfold large pieces of fabric such as bedsheets , bedspreads, etc.
Turn shirts inside out.
 Attention: Small parts (like buttons, etc) may lead to repair work which user has to pay by him and can cause damage in the machine. Empty pockets (keys, coins, etc.) and remove the harder decorative objects (e.g. brooches).

Loading the appliance
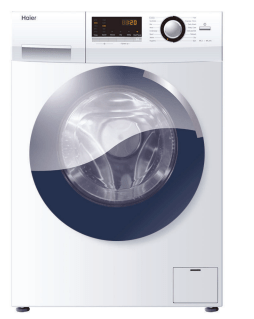
Open the washer door put in the laundry piece by piece. Close the door tightly.
When using the washing machine, let it run unloaded for one program to prevent the laundry from being tainted by oil or dirty water from the washing machine. Before washing you should run the machine, but with detergent, with 60°C program.
Do not overload the washing machine.Note the different maximum load according to programmes.Rule ofthumb for maximum load: Keep six inches between load and drum top.Close the door carefully. Make sure that no pieces of laundry are pinched.
Selecting Detergent
The washing efficiency and the performance is determined by the quality of detergent used. Special non-foaming detergent produces good washing results. Use specific detergents for synthetic and woollen goods. Do not use dry cleaning agents such as trichloroethylene and similar products.
- Do not add more detergent than needed; otherwise, it may cause the situations as following and washing machine malfunction impacting washing machine's life.
- Due to the increasing foam, the rinse time will be longer than normal;
- The foam may overflow from the detergent drawer because of the increasing pressure of the foam;
- It may remain foam without cleaning out after the final spinning cycle.
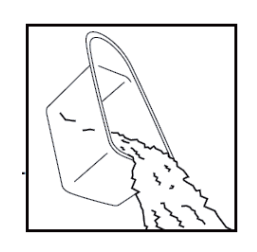
Recommendation:
- Clean the detergent drawer once a week.
- Please follow the dosage recommendation on the powder or liquid detergent package.
Adding Detergent
Slide out the detergent drawer and put the required detergent and softening agent into the corresponding compartments. Push back the drawer gently. (Refer to the instructions on the drawer)
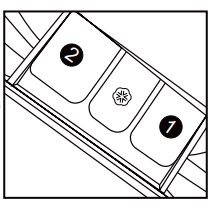
- For prewashing program, detergent should be added to both compartments 1 and 2.
- For other programs, do not add detergent to compartment 1.
- Use liquid detergent according to the instructions on its package. not use liquid detergent if the prewash mode or "Delay" is selected.
- Do not overuse softener; otherwise, it will damage the artificial fibers.
Selecting program

To get the best washing results, an appropriate washing program should be selected according to the laundry type. Please turn the program knob to select the right program.
Selecting function
Select the required options. (Refer to the "Control panel" pages 8,9 and 10)
Setting washing temperature
Press and hold down the temperature button until the desired temperature is selected.
Setting spin speed
Press and hold down the speed button until the desired speed is selected. See "Operational functions" on the "Control panel" pages (08 and 09) for selerting temperature and spin speed. It is advisable to select the recommended value.
Washing
Press the Start/Pause button. The washing machine will operate according to the preset programs. The washing machine will stop operation automatically when a washing cycle ends. The "End" sign will appear on the display. Open the washer door and take out the laundry.
After washing
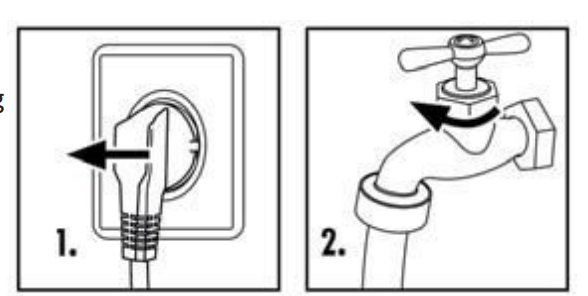
Turn off the water supply and unplug the power cord. Open the washer door to prevent formation of moisture and odors. Leave the doo r open while not used.
Care Chart
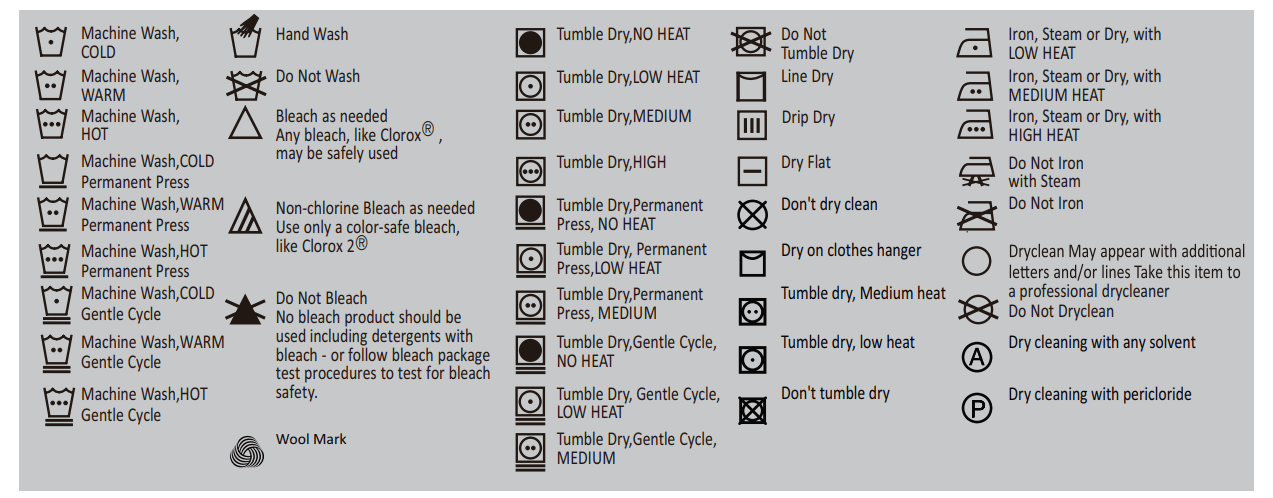
Load ReferenceLoad Reference
Material | Made of | Load in grams |
Bed Sheet | Cotton | Approximately 800 |
Blanket | Wool | Approximately 3000 |
Blended fabric clothes | / | Approximately 800 |
Jackets | Cotton | Approximately 800 |
Jeans | / | Approximately 800 |
Overalls | Cotton | Approximately 950 |
Ladies Pyjamas | / | Approximately 200 |
Shirts | / | Approximately 300 |
Socks | Blended fabrics | Approximately 50 |
T-Shirts | Cotton | Approximately 300 |
Underwear | Blended fabrics | Approximately 70 |
Maintenance
Cleaning and Care
After washing
Turn off the water supply and remove the elect rical plug after each wash. Open the washer door to prevent formation of moisture and odors. If the washing machine is left idle for a long period, drain the water in the machine and replace the drain hose.
Cleaning the detergent drawer
Take always care there are no detergent residues.
Clean the drawer regularly :
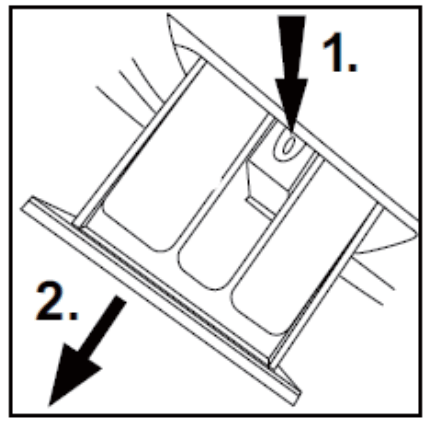
- Pull out the drawer until it stops.
- Press the release button and remove the drawer.
- Flush the drawer with water until it is clean and insert the drawer back in the appliance.
Cleaning the machine
Unplug the machine during cleaning and maintenance. Use a soft cloth dampened with soap liquid to clean the machine case and rubber components. Do not use organic chemicals or corrosive solvents.
Cleaning the filter
Clean the filter once a month:
- Turn off and unplugthe machine(Fig.1).
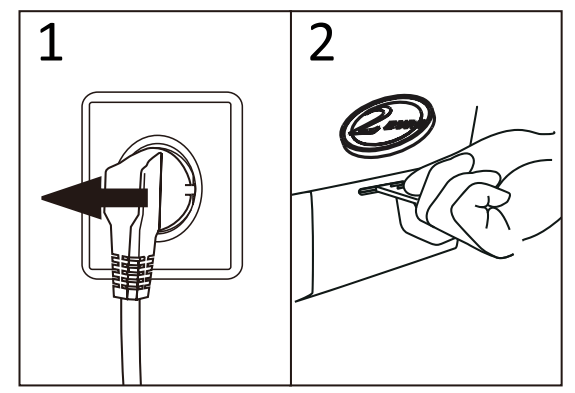
- Open service flap. You can either use a coin or a screwdriver(Fig.2) .
- Provide a flat container to catch leach water(Fig.3). There could be bigger amounts!
- Pull the drainhose out and hold its end above the container (Fig.3).
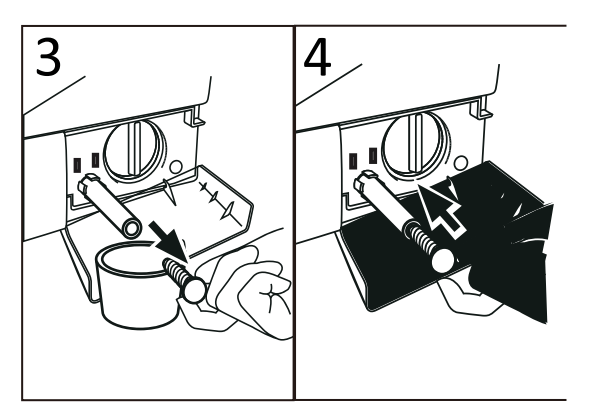
- Take the sealing plug out of the drainhose (Fig.3). and push it back into the machine(Fig.4).
- After complete drainage close drainhose, and push it back into the machine(Fig.4).
- Unscrew and remove counter clockwise the pump(Fig.5)
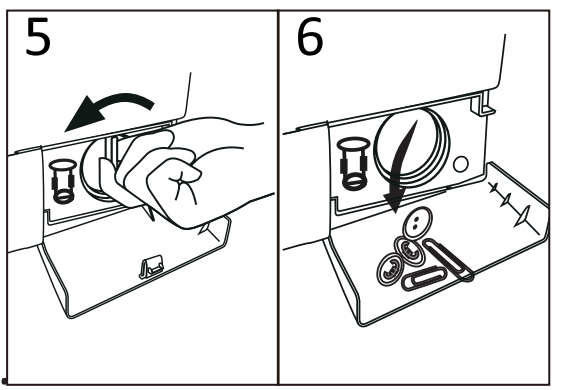
- Remove contaminants and dirt (Fig.6).
- Clean carefully pump filter, e.g. using running water((Fig.7).
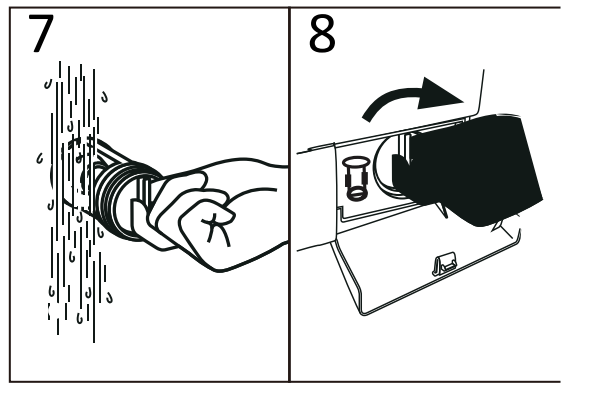
- Refix itthoroughly((Fig.8).
- Close service flap.
- The filter must be in place, or it may lead to leakage.
- Place a container under th ter, to collect any excess water that may come out of the drain pump
In case of power failure
The current programme and its setting will be saved. When power supply is restored operation will be resumed.
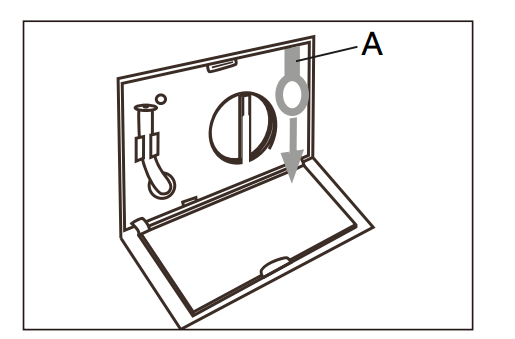
If a power failure cuts an operating wash programme door opening is mechanically blocked. To get out any laundry water level should not be seen in the glassy porthole of the door. - Danger of burns!
Not till then pull lever beneath service flap until door is unlocked by a gentle click.Afterwards refix all parts.
 Power-off memory function: In case of abrupt power failure or the need to cut off the power during a program cycle, the present settings will be saved and the preset operation will resume when the power is on again.
Water inlet valve and inlet valve filter
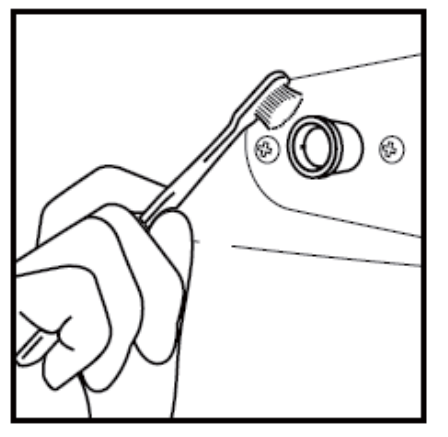
To prevent blockage to the water supply by ingress of foreign substances, clean the water inlet valve and inlet valve filter regularly.
Moving the machine
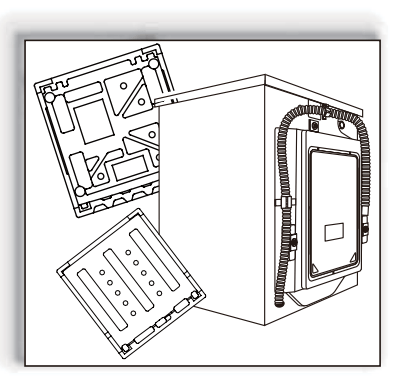
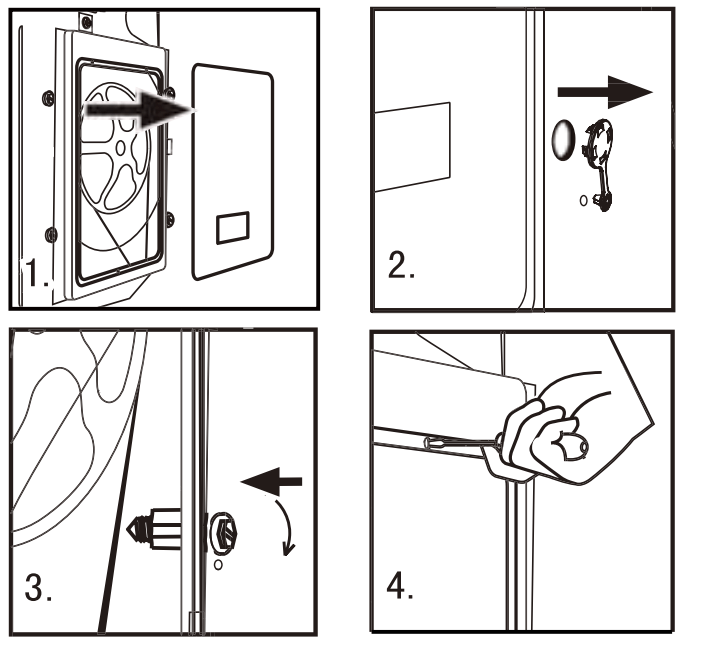
If the machine is to be moved to a distant location, replace the transportation bolts removed before installation to prevent damage as shown below.
Remove the back cover.
Remove the blanking plugs.
Insert the plastic stabilizers and the transportation bolts.
Tighten the bolts with a spanner.
Replace the back cover.
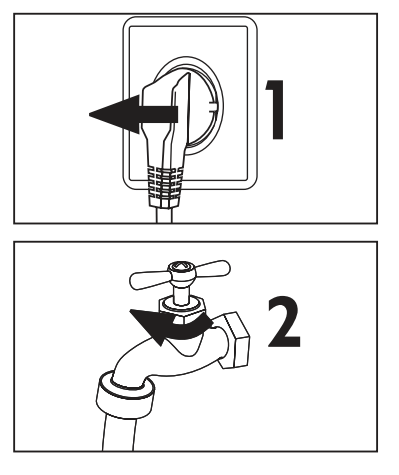
Long periods of disuse
If the appliance is left idle for a longer period, pull out the electrical plug (I) and turn off water supply (2).Open the door to prevent formation of moisture and odours.Let door open while not used.
Before next usage check carefully power cord, water inlet and drain hose. Make sure everything is properly installed and without leackage.
Display Codes
Display Codes and Special functions
| Codes | Causes | Solutions |
CLr FLtr | Drainage error, water not emptied within 6 minutes. |  Clean the pump filter and check the drain hose for blockage. If error still exists, please contact the maintenance personnel. Clean the pump filter and check the drain hose for blockage. If error still exists, please contact the maintenance personnel. |
| E2 | Door is not properly shut. | Shut the door properly, and then press the Start/Pause button. |
| F3 | Temperature sensor not properly connected or damaged. | Contact the maintenance personnel. |
| F4 | Heater error (Appears at the end of a cycle). | Contact the maintenance personnel. |
| E4 | Water level not met in 8 minutes . The height of the drain hose is below 80 cm. The drain hose is in water. | Make sure that tap is turned on, and water pressure is normal. If problem still exists, please contact the maintenance personnel. Install drain hose within 80-100 cm of height. Make sure the drain hose is not in water. |
| F7 | Motor Error | Contact the maintenance personnel |
| E8 | Water exceeds protective level. | Contact the maintenance personnel |
| FA | Water level sensor error. | Contact the maintenance personnel |
| FC1 | Abnormal communication error display board and motor | Contact the maintenance personnel |
| FC2 | Abnormal communication error display board and power board | Contact the maintenance personnel |
| End | End of wash cycle. | |
| 19:30 | Status information: Preset time for delayed operation. | |
1:25
| The remaining time is 1 hour 25 minutes. | |
| UNb | Washing machine has an unbalanced load protection function.When unbalanced weight is greater than allowable maximum, the washing machine will not spin and will run at a speed to avoid abnormal vibration and noise | 1.In case washing 1 piece of laundry(carpet, bed sheet,table sheet,ect) make it symmetrical inside the drum. 2. Lower the wet weight of laundry pieces by wringing manually and placing them back in the drum in symmetrical position. 3. Take out and then reposition the laundry piesces inside the washing machine in a more balanced position on the inner wall ofr the drum. 4. Add 1 or 2 pieces of laundry into the durm to reduce the unbalanced load effects. 5. Restart the spin cycle by cloosing spin programme.In case the failure persists, please ask a qualified technician to repair it. 6.Select a lower spin speed, and if OK then select Spin program and a higher spin speed.. |
 Control panel lock function: Press the " Temp." and the " Intense 11 buttons simultaneously for 3 seconds after starting a program. It show reveal bring "clot". It can no longer be changed by operating buttons or knobs. To unlock press the " Temp." and Intense buttons again for 3 seconds.
 Power-off memory function: In case of abrupt power failure or the need to cut off the power during a program cycle, the present settings will be saved and the preset operation will resume when the power is on again.
 To cancel a program. Press the "Start/Pause" button, then switch off the power and the program is automatically cancelled. Turn the program selector again to choose another program.
 During the spin process, if too much foam is inspected, in order to protect the motor, the washing machine will eliminate the foam automatically; the motor will stop and the drain pump will drain the water continuously for 90 seconds. If it happens more than 3 times, the motor will stop until the end of cycle without spinning.
Trouble-Shooting
Problem | Causes | Solutions |
Washing machine fails to operate. |
|
|
Washing machine cannot be filled with water. |
|
|
Machine is draining while being filled. |
|
|
Drainage failure. |
|
|
Strong vibration while spinning. |
|
|
Operation stops before completing wash cycle. |
|
|
Operation stops for a period of time. |
|
|
Excessive foam in the drum, which is spilled to the distribution drawer. |
|
|
Automatic adjustment of the washing time. |
|
|
Spinning fails |
|
|
See other models: HWO60S10TX1HCG604WFC HRF-335FW HTMR575WH HCF524W2 HWM75TL
