Loading ...
Loading ...
Loading ...
I /
i /
/
_L
i
4 I
Figure 24
Figure 25
8. Hold the board firmly against the rip fence with the left
hand and grasp the handle with the right hand.
9. The cut is then made by pulling the carriage forward
until saw blade cuts through the work. When the cut
is complete, the saw should be returned to the back of
the radial arm and the switch turned "OFF". When
more experience is gained by using the saw, it will
be noticed that when pulling the saw forward dur-
ing cross-cutting, the saw blade tends to feed itself
through the work due to the rotation of the blade
and the direction of feed. Therefore, the operator
should develop the habit of holding his right arm
straight from the shoulder to the wrist. After using
this method a few times, the operator will find that it is
necessary to rol! or rotate the body from the waist up.
h wil! soon become apparent that very little effort is
required to move the saw blade through the work, and
in most cases, the right arm is used merely to control
the rate of feed. It will also be discovered that when
cross-cutting a thick board, movement of the saw
through the work must be retarded. By holding the right
arm (right hand normally grips the saw handle) straight,
the operator can easily control the rate of feed, thus
preventing the saw blade from overfeeding and stalling
the saw motor, which must be avoided whenever pos-
sible. In some cases it may become necessary to cross-cut
boards that extend over the saw table on one, or both
sides. This can buckle the board and bind the saw during
the cut. To eliminate this condition the ends of the board
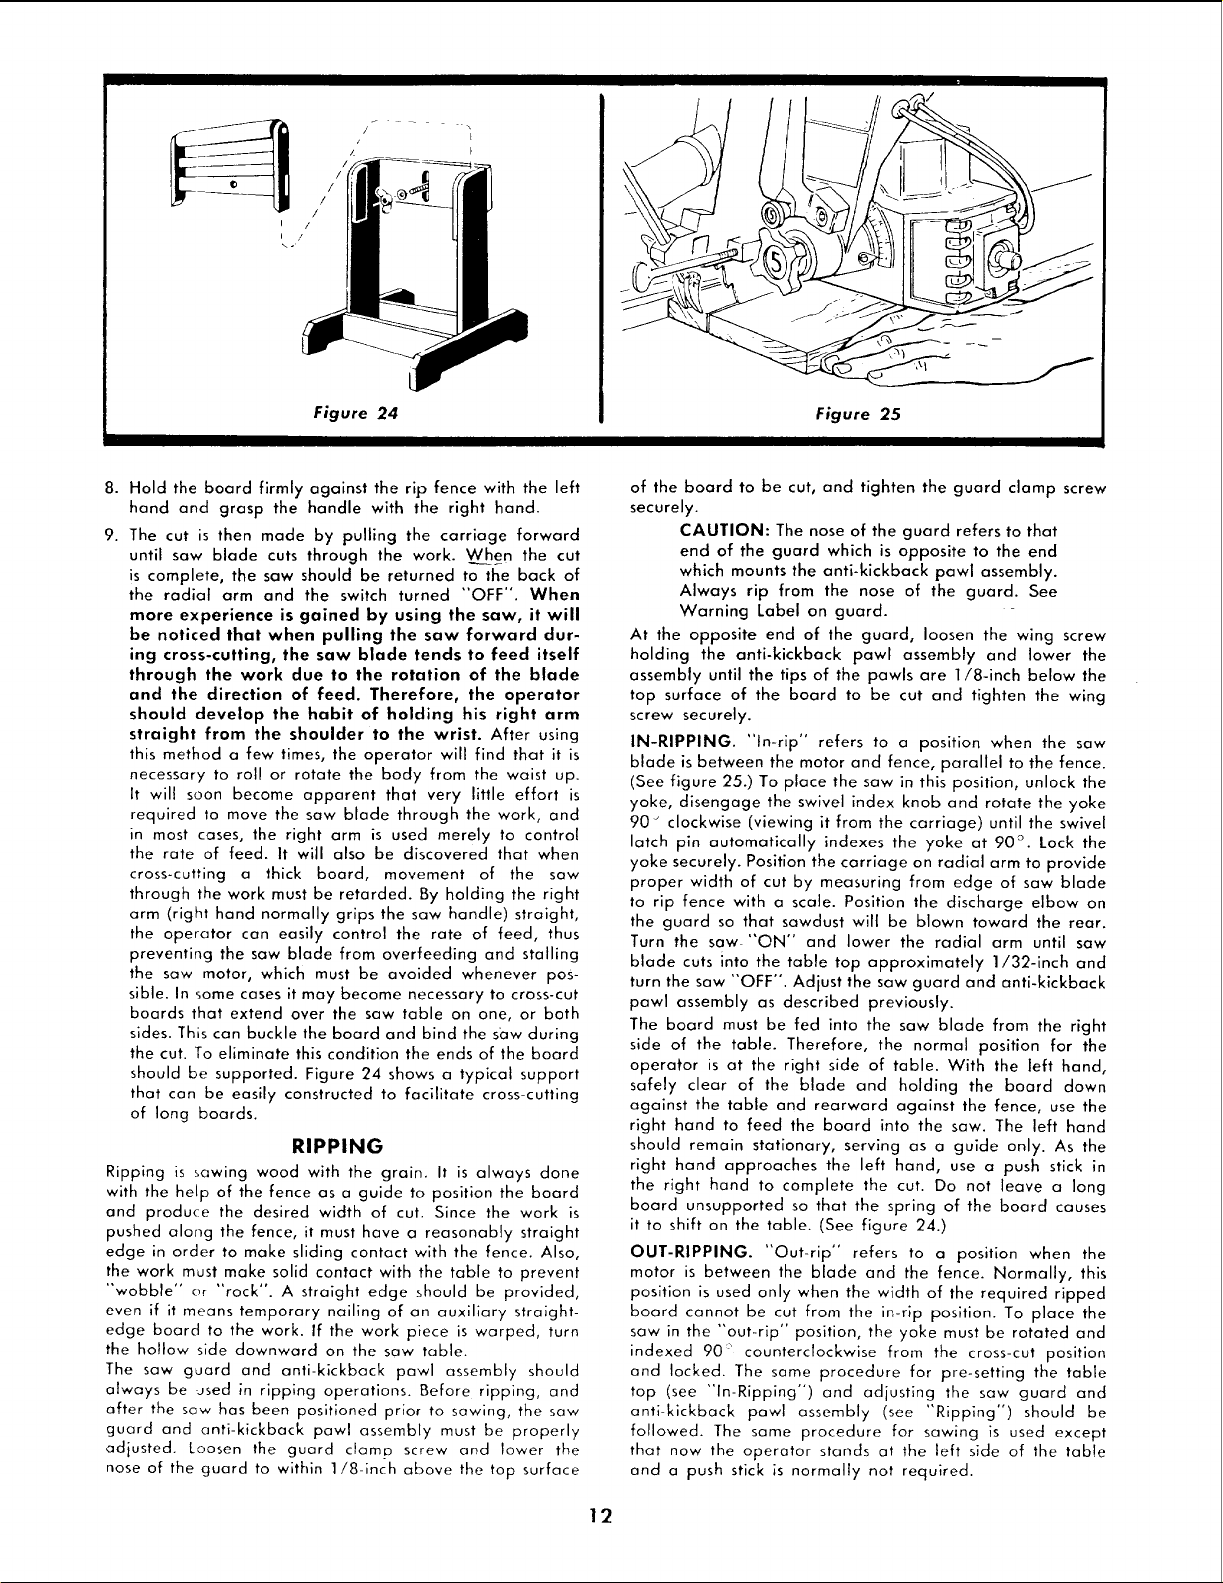
should be supported. Figure 24 shows a typical support
that can be easily constructed to facilitate cross-cutting
of long boards.
RIPPING
Ripping is sawing wood with the grain. It is always done
with the help of the fence as a guide to position the board
and produce the desired width of cut. Since the work is
pushed along the fence, it must have a reasanably straight
edge in order to make sliding contact with the fence. Also,
the work must make solid contact with the table to prevent
"wobble" or "rock". A straight edge should be provided,
even if it means temporary nailing of an auxiliary straight-
edge board to the work. If the work piece is warped, turn
the hollow side downward on the saw table.
The saw guard and anti-kickback pawl assembly should
always be Jsed in ripping operations. Before ripping, and
after the sow has been positioned prior to sawing, the saw
guard and anti-kickback pawl assembly must be properly
adjusted. Loosen the guard clamp screw and lower the
nose of the guard to within 1/8-inch above the top surface
of the board to be cut, and tighten the guard clamp screw
securely.
CAUTION: The nose of the guard refers to that
end of the guard which is opposite to the end
which mounts the anti-kickback pawl assembly.
Always rip from the nose of the guard. See
Warning Label on guard.
At the opposite end of the guard, loosen the wing screw
holding the anti-kickback pawl assembly and lower the
assembly until the tips of the pawls are 1/8-inch below the
top surface of the board to be cut and tighten the wing
screw securely.
IN-RIPPING. "In-rip" refers to a position when the saw
blade is between the motor and fence, parallel to the fence.
(See figure 25.) To place the saw in this position, unlock the
yoke, disengage the swivel index knob and rotate the yoke
90" clockwise (viewing it from the carriage) until the swivel
latch pin automatically indexes the yoke at 90 ° . Lock the
yoke securely. Position the carriage on radial arm to provide
proper width of cut by measuring from edge of saw blade
to rip fence with a scale. Position the discharge elbow on
the guard so that sawdust will be blown toward the rear.
Turn the saw_"ON" and lower the radial arm until saw
blade cuts into the table top approximately 1/32-inch and
turn the saw "OFF". Adjust the saw guard and anti-kickback
pawl assembly as described previously.
The board must be fed into the saw blade from the right
side of the table. Therefore, the normal position for the
operafor is at the right side of table. With the left hand,
safely clear of the blade and holding the board dawn
against the table and rearward against the fence, use the
right hand to feed the board into the saw. The left hand
should remain stationary, serving as a guide only. As the
right hand approaches the left hand, use a push stick in
the right hand to complete the cut. Do not leave a long
board unsupported so that the spring of the board causes
it to shift on the table. (See figure 24.)
OUT-RIPPING. "Out-rip" refers to a position when the
motor is between the blade and the fence. Normally, this
position is used only when the width of the required ripped
board cannot be cut from the in-rip position. To place the
saw in the "out-rip" position, the yoke must be rotated and
indexed 90 _ counterclockwise from the cross-cut position
and lacked. The same procedure for pre-setting the table
top (see "'In-Ripping") and adjusting the saw guard and
anti-kickback pawl assembly (see "Ripping") should be
followed. The same procedure for sawing is used except
that now the operator stands at the left side of the table
and a push stick is normally not required.
12
Loading ...
Loading ...
Loading ...