Loading ...
Loading ...
Loading ...
EN
29
Assembly
www.bora.com
1
L1 L2
L3
2 3 4
N
PE
220 - 240 V~
220 - 240 V~
220 - 240 V~
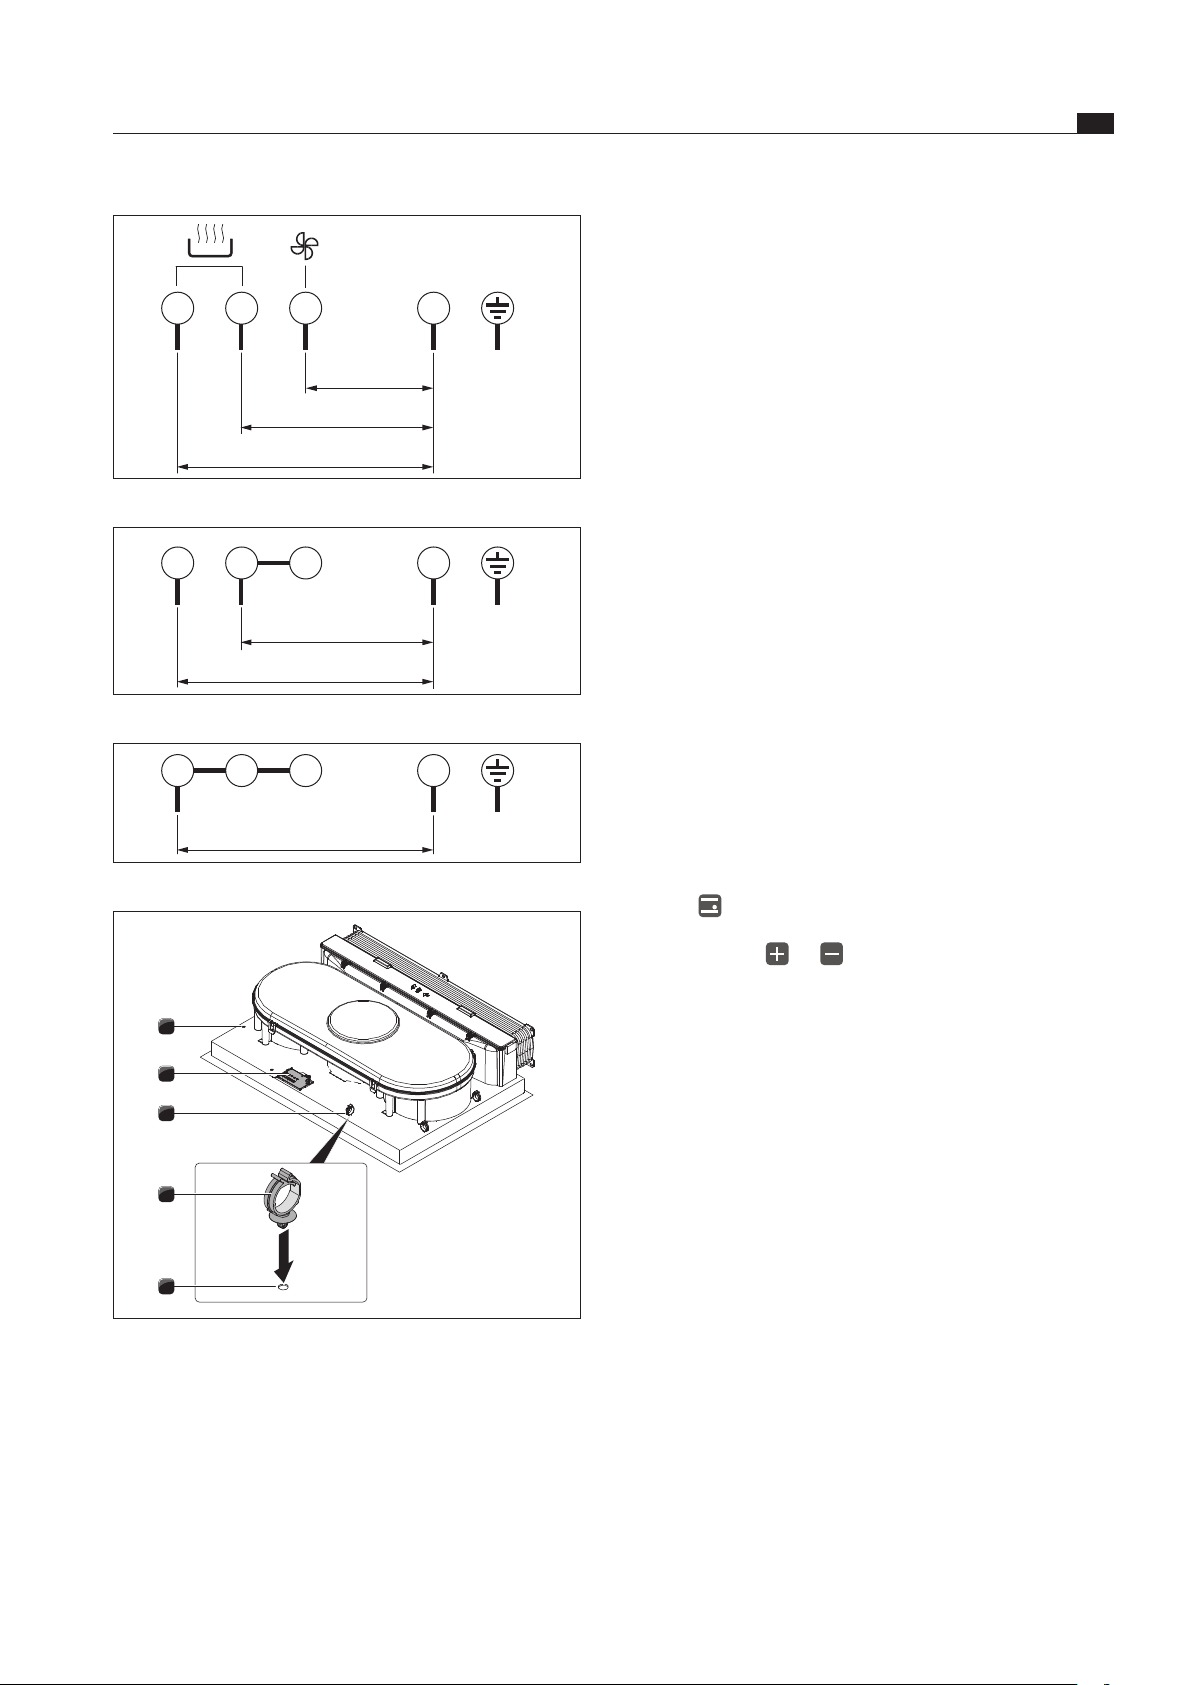
Fig. 6.36 Connection diagram 3-phase connection
1
L1 L2
2 3 4
N
PE
220 - 240 V~
220 - 240 V~
Fig. 6.37 Connection diagram 2-phase connection
1
L1
2 3 4
N
PE
220 - 240 V~
Fig. 6.38 Connection diagram 1-phase connection
3
3
1
1
2
Fig. 6.39 Electrical connections of the cooktop
[1] Bore holes
[2] Power supply
[3] Cable mounting clip
Based on the relevant connection diagram (see
Figs. Connection diagram), connect the power supply
line to the power connection [2] on the cooktop with
integrated cooktop extractor.
For one- or two-phase-connections install the relevant
contacts with the BKAS connector clip (included in the
scope of delivery).
Fasten the cable mounting clips [3] in the designated
bore holes (1) either on the left or right hand side for
the cable routing to the rear.
Make sure that the cable is not clamped or damaged
and cannot touch any hot parts of the cooktop.
Verify that the installation was done correctly.
Switch on the main switch/automatic circuit breaker.
Put the cooktop extractor into operation (see the
Operation chapter).
Check all the functions are working correctly.
Device power management
(total power reduction)
The total power of the device can be reduced to 4.4
KW for initial commissioning, if the required electrical
power cannot be provided at the site of installation.
The connection must always be equipped with a fuse
protection of at least 20 A.
Programming the device power management
For the programming process, the device must not be
switched on and the childproofing feature must not be
active. Program the cooktop within 2 minutes after the
cooktop is supplied with power.
For programming, press all 4 cooking zone selection
buttons at the same time for 3 seconds.
The display will show 7.4 (factory setting).
By pressing the or button, set the reduced
total power consumption to 4.4.
To save your settings, press all 4 cooking zone selec-
tion buttons at the same time for 3 seconds until an
acoustic signal sounds.
The acoustic signal indicates that the setting is saved
and the cooktop switches itself off.
If the cooktop is switched on again, it is ready for use.
6.9 Handover to user
Once installation is done:
Explain the important functions to the user.
Explain all safety-relevant aspects of operation and
handling to the user.
Provide the user with the accessories and operating
and installation instructions to be kept in a safe place.
Loading ...
Loading ...
Loading ...