Loading ...
Loading ...
Loading ...
EN
22
Assembly
www.bora.com
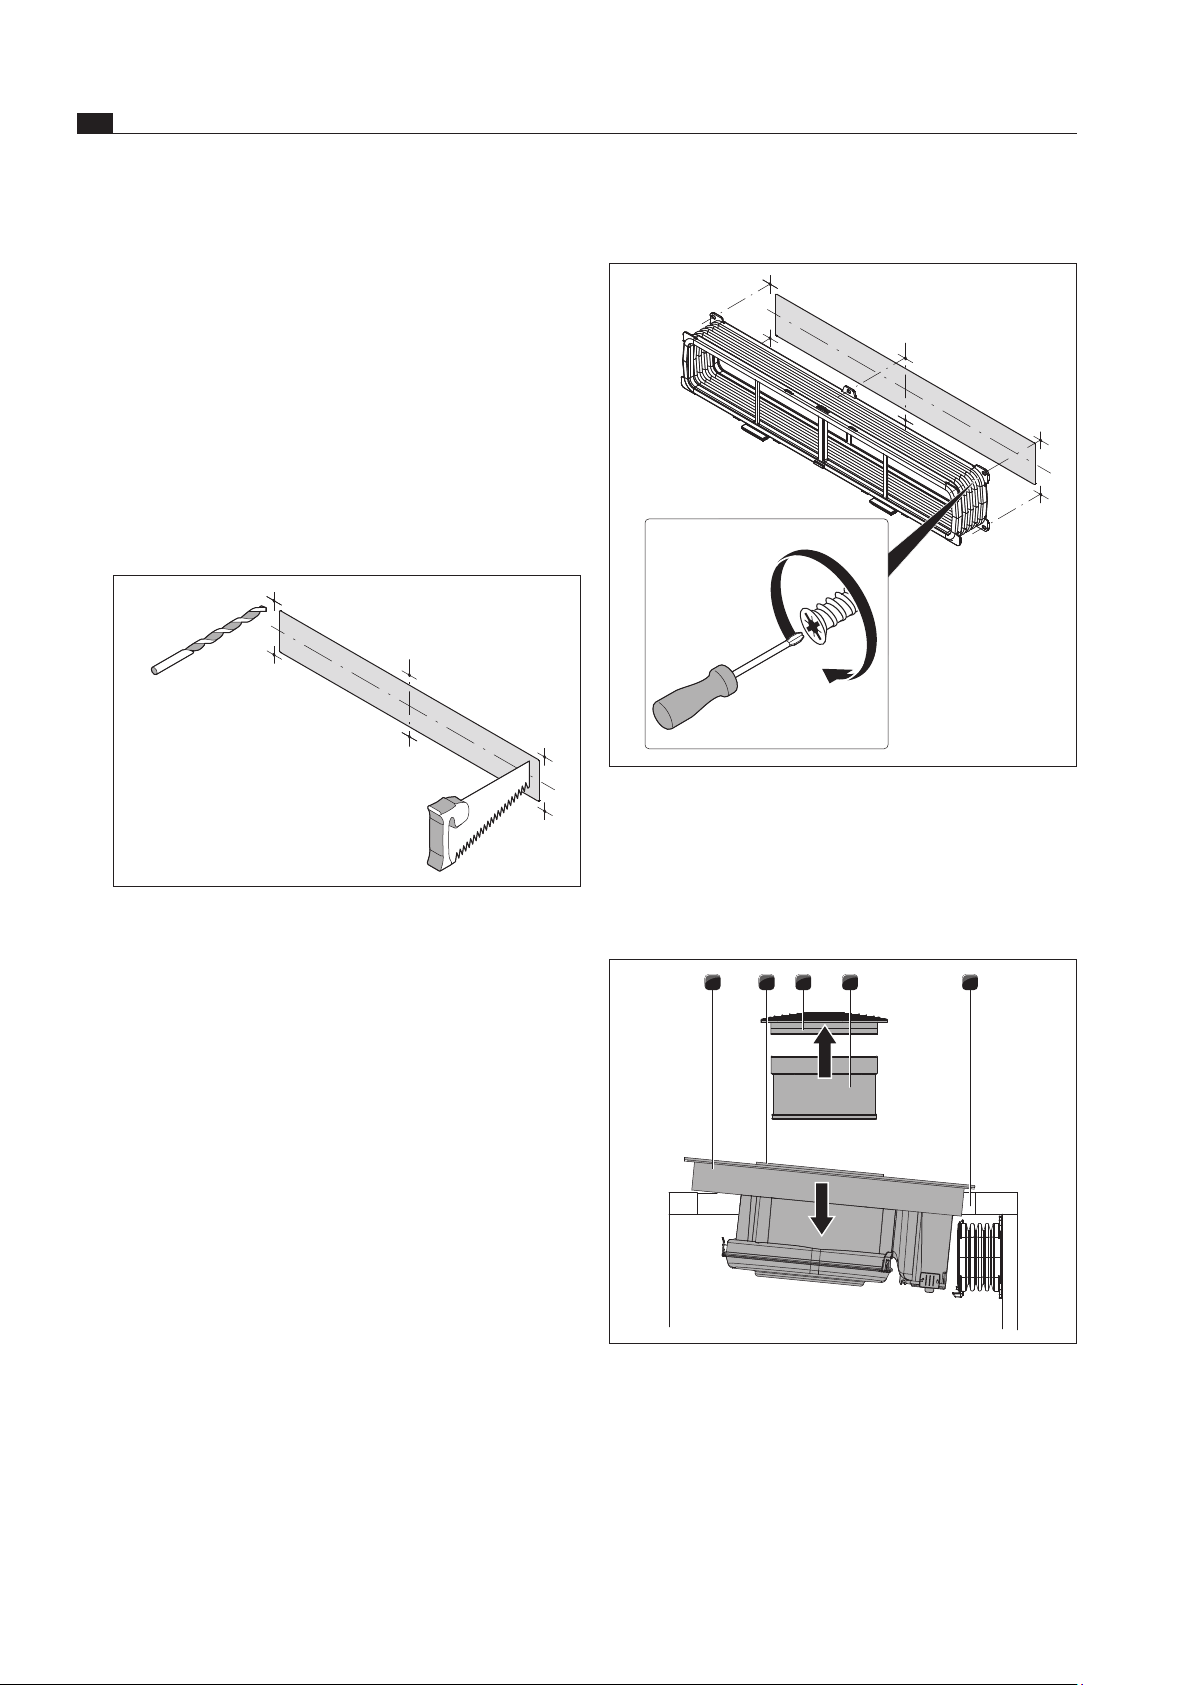
Screwing on the flexible duct
Fig. 6.12 Flexible duct with 6 EURO screws 6.3x10 mm
Using a screwdriver (not a cordless drill) screw the
flexible duct into the rear wall of the furniture until
hand-tight.
Inserting the cooktop
54321
Fig. 6.13 Insert the cooktop at an angle
[1] Cooktop
[2] Suction opening
[3] Air inlet nozzle
[4] Stainless steel grease filter
[5] Worktop cut-out
Before inserting, remove the air inlet nozzle [3] and the
stainless steel grease filter [4].
Use the suction opening [2] as a handle when inserting.
The floor unit must have a continuous rear wall so that
the returned recirculated air is not directed into the
front furniture body compartment.
There must be a cut-out in the rear wall.
A minimum clearance of 25 mm between the rear wall of
the furniture body and an adjacent piece of furniture or
room wall must be observed for the return flow aperture.
Preparing the rear wall of the furniture
Adjust the rear wall according to the required installa-
tion dimensions.
You may need to move the rear wall.
Where necessary, extend the height of the rear wall so
that the furniture body is closed to the front.
6 x ø5
Fig. 6.11 Cut-out and connection bores
Using the included drilling template, draw the return
flow aperture and the connection bores in the middle
of the cooktop based on the installation dimensions.
Saw out the return flow aperture.
Rough-drill the connection bores.
Decrease the height of the skirting boards or create
corresponding apertures in the base.
Loading ...
Loading ...
Loading ...