Loading ...
Loading ...
Loading ...
EN
23
Assembly
www.bora.com
1
2
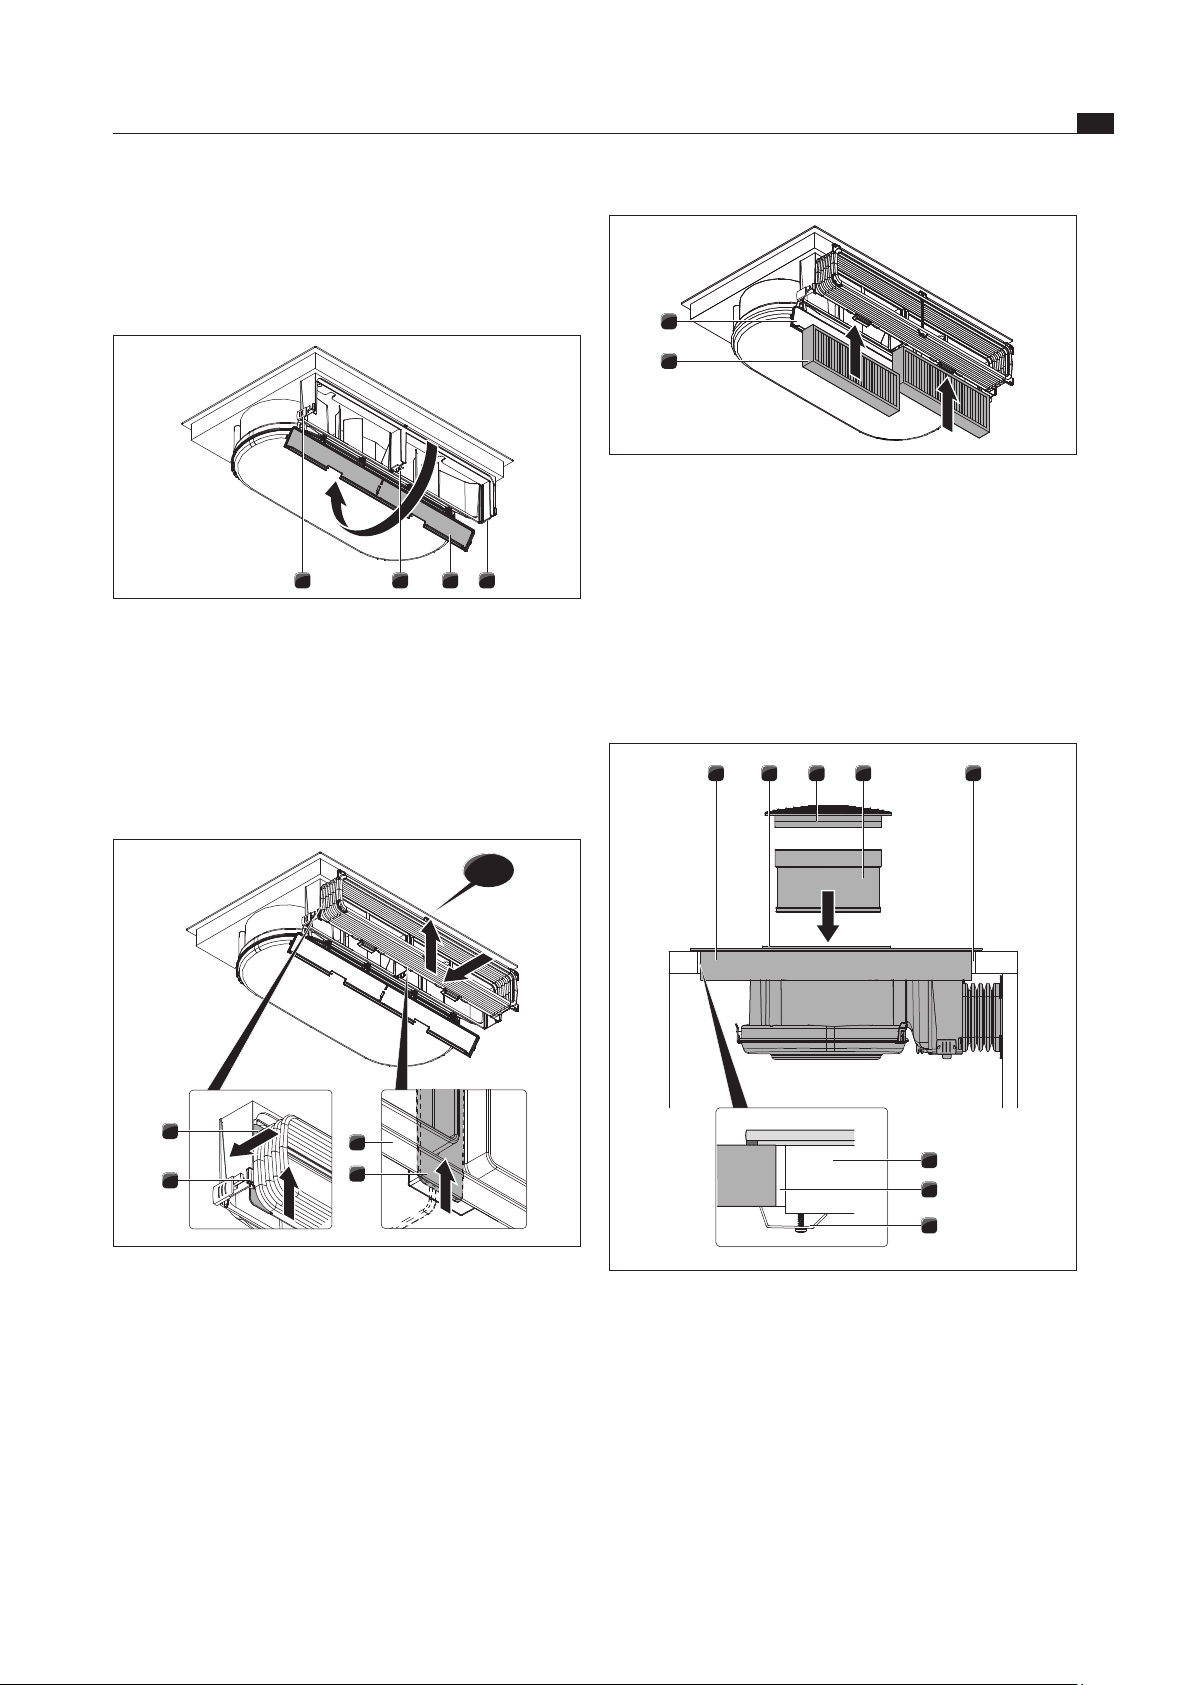
Fig. 6.16 Inserting the activated charcoal lter
[1] Housing cover of the activated charcoal filter
[2] Activated charcoal filter
Remove the packaging from the activated charcoal
filters.
Insert the two activated charcoal filters [2] from below.
Note the flow direction of the filter. This is indicated by
an arrow.
Close the cover to the housing [1].
54321
6
5
1
Fig. 6.17 Securing the cooktop in the middle
[1] Cooktop
[2] Suction opening
[3] Air inlet nozzle
[4] Stainless steel grease filter
[5] Worktop cut-out
[6] Mounting bracket
Lift the cooktop [1] diagonally into the worktop cut-out [5]
Place the cooktop [1] in the centre of the worktop cut-
out [5].
Align the cooktop precisely.
12 31
Fig. 6.14 Opening the housing cover
[1] Outer locks
[2] Middle lock
[3] Housing of the activated charcoal filter
Fold down the cover of the activated charcoal filter
housing [3] from below by opening the two outer locks
[1] and the middle lock [2].
click
2
4
3
1
Fig. 6.15 Hooking in the frame of the exible duct
[1] Position shackles
[2] Retaining groove on the activated charcoal filter housing
[3] Flexible duct frame
[4] Bottom lock
Hang the frame of the flexible duct into the retaining
groove on the activated charcoal filter housing [2].
Make sure that the two lateral position shackles [1] are
in the guide.
Slide the frame [3] up until the bottom lock [4] and the
upper lock engage in the middle.
Make sure that the frame is fitted all around in the
groove of the activated charcoal filter housing.
Loading ...
Loading ...
Loading ...