User ManualOperating Instructions
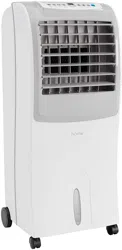
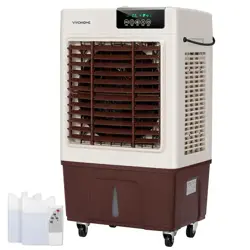
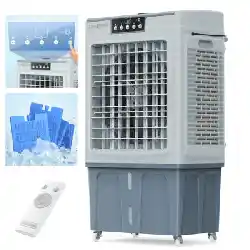
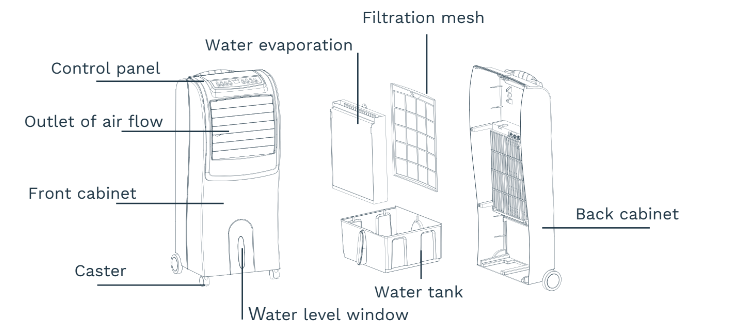
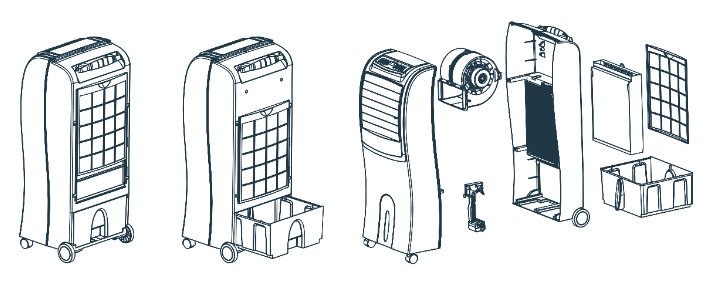
Component Description
Install the remote control batteries
Open the battery compartment cover and insert 2 AAA batteries into battery compartment of the remote control, making sure the battery polarities are correct. Close the battery compartment cover.
Note:
- Do not mix use of old and new batteries.
- Do not mix use of alkaline, standard (carbon-zinc), or rechargeable (ni-cad, ni-mh, etc) batteries.
Use the control panel and the remote control
Always ensure that there is another open window or door through which the air can exhaust from the room.
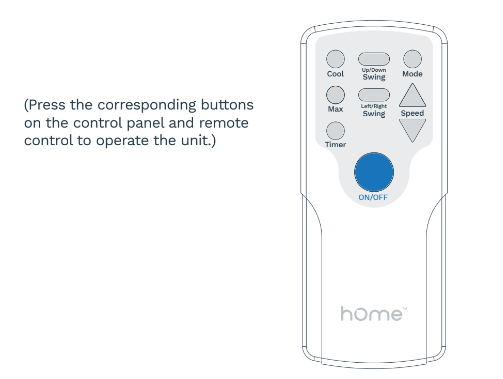
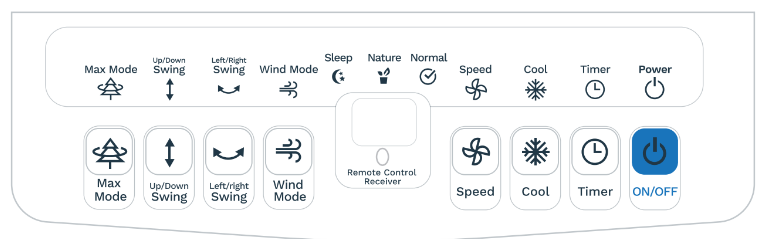
1. ON/OFF: Press this button to turn on or turn off the unit. For first time of use, the unit start up with middle fan speed within 3 seconds and then work under low fan speed.
2. Speed: Press this button to switch the fan speed in sequence of LOW, MID, HIGH and LOW. At the same time the display shows 1, 2, 3.
3. Wind Mode: Press Wind Mode button on the control panel or press Mode button on the remote control to switch the wind mode in sequence of NATURE, SLEEP, NORMAL and NATURE. The corresponding wind mode indicator will be displayed accordingly.
- NORMAL mode: It works as per the selected fan speed (HIGH, MID, LOW).
- NATURE mode: It works as per the preset computer program, imitating the natural irregularly wind.
- SLEEP mode: It works as per the preset computer program, imitating the natural irregularly wind.
- If it is selected HIGH wind speed, the unit will work under HIGH NATURE wind mode for half and hour and then revert to LOW NATURE wind mode.
- If it is selected MID wind speed, the unit will work under MID NATURE wind mode for half an hour, then revert to LOW NATURE wind mode.
- If it is selected LOW wind speed, the unit will work under LOW NATURE wind mode.
4. Left/Right Swing: Press this button to activate or disable the auto left and right swing.
5. Up/Down Swing: Press this button to activate or disable the auto up and down air swing.
6. Cool: Press this button to start the evaporative cooling function. After pressing this button, the pump will turn on and distribute water to wet out cooling pad at the rear of the unit. The Cool button will light up and the Cool symbol will appear on the display. After approximately three minutes, as the pad becomes saturated, the air from the outlet becomes cool.
7. Timer: Press this button repeatedly to set a timer between 1 to 24 hours. The timer increases 1 hour per each press until reaching to 24 hours. When reaching to 24 hours, press the TIMER button again, the timer will be canceled.
8. Max Mode: Press Max Mode button on the control panel or Max button on the remote control to activate MAX operating mode, in which the unit works with evaporative cooling function and the fan operates at high speed. The Max mode indicator lights up.
- In Max operating mode, press WIND SPEED button will switch the fan speed. The unit will exit Max operating mode without canceling the evaporative cooling function.
- In Max operating mode, press COOL button, the unit will stop the evaporative cooling and exit Max operating mode. The wind speed will not change.
- When Max operating mode is canceled, the Max mode indicator will light off.
Important Note:
At the end of each day run your cooler only with FAN working for 30 minutes to dry out the evaporator.
Cleaning and Maintenance
Always disconnect the unit before any cleaning or maintenance. Do not use petrol, toluol, etc to clean
the unit body. For slight dirt on the body, wipe it off with a soft damp cloth. For greasy dirt, squeeze
a little toothpaste or mild detergent on a soft damp cloth, and then wipe the dirt off.
Clean the housing
Clean the unit housing with a little mild detergent on a soft cloth. Do not let the control panel touch with water.
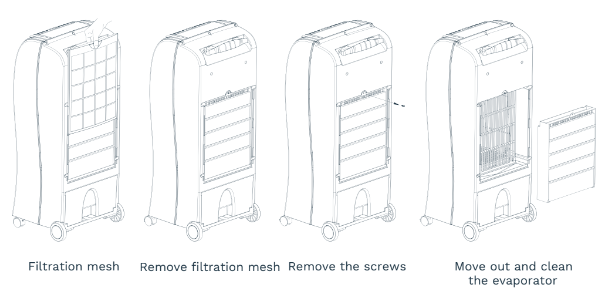
Clean the filtration mesh
After long period of operation, dust and dirt will accumulate on the filtration mesh and then affect theunit’s performance. It is recommended to clean the filtration mesh every week.
1. Pull out the plug from the wall outlet.
2. Catch the filtration mesh handle and move it out.
3. Clean the filtration mesh with mild detergent and soft brush.
4. Make sure the filtration mesh is completely dry before installing.

Clean the evaporator
1. Pull out the plug from the wall outlet.
2. Catch the filtration mesh handle and move it out.
3. Remove the screw and move out the evaporator.
4. Clean the evaporator with mild detergent and water.
5. Make sure evaporator is completely dry before installing.
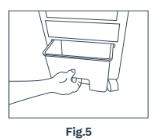
Clean the water tank
1. Pull out the plug from the wall outlet.
2. Pull out the water tank (See Fig.5).
3. Clean the water tank with a little mild detergent on a towel and then rinse it in water.
4. Replace the water tank after cleaning.
Note:
If the Air Cooler will not be used for a long time:
1. Switch off the cooler and unplug it from the power supply.
2. Empty/Drain all the water from the tank.
3. Make sure all parts are dry by running the Fan Only mode for about 1 to 2 hours before storing (Time depends on ambient humidity conditions).
4. Store this unit at room temperature in a dry location, away from direct sunlight and/or very hot, cold damp environments.
Troubleshooting
If there is something wrong during operation, it may not be the unit’s problem. You may check against the
following list before sending for repairing.
Not working
- The plug is not securely inserted into the outlet.
- Insert the plug pin into the outlet and make sure it is connected well.
- The “ON/OFF” button is not pressed.
- Press “ON/OFF” button after plugged.
Dedust effect is not good.
- The filtration mesh is clogged with dust and dirt.
- Clean the filtration mesh.
- The air vents are blocked.
Note:
1. If the problem cannot be found in the list and still persists, contact our service center or a qualified technician for further inspection.
2. Do not open or repair the unit by yourself.
Warranty
hOmeTM offers a limited two-year warranty (“warranty period”) on all of our products purchased new and unused from hOme Technologies, LLC or an authorized reseller, with an original proof of purchase and where a defect has arisen, wholly or substantially, as a result of faulty manufacture, parts or workmanship during the warranty period. The warranty does not apply where damage is caused by other factors, including without limitation: (a) normal wear and tear; (b) abuse, mishandling, accident, or failure to follow operating instructions; (c) exposure to liquid or infiltration of foreign particles; (d) servicing or modifications of the product other than by hOmeTM ; (e) commercial or non-household use.
The hOmeTM warranty covers all costs related to restoring the proven defective product through repair or replacement of any defective part and necessary labor so that it conforms to its original specifications. A replacement product may be provided instead of repairing a defective product. hOmeTM’s exclusive obligation under this warranty is limited to such repair or replacement.
A receipt indicating the purchase date is required for any claim, so please keep all receipts in a safe place. We recommend that you register your product on our website, homelabs.com/reg. Although greatly appreciated, the product registration is not required to activate any warranty and product registration does not eliminate the need for the original proof of purchase. The warranty becomes void if attempts at repair are made by non-authorized third parties and/or if spare parts, other than those provided by hOmeTM , are used. You may also arrange for service after the warranty expires at an additional cost.
These are our general terms for warranty service, but we always urge our customers to reach out to us with any issue, regardless of warranty terms. If you have an issue with a hOmeTM product, please contact us at 1-800-898-3002, and we will do our best to resolve it for you.This warranty gives you specific legal rights, and you may have other legal rights which vary from state to state, country to country or province to province. The customer may assert any such rights at their sole discretion.