Loading ...
Loading ...
Loading ...
28
The Dispenser Drip Tray
The drip tray can be removed to carry to the sink to empty
or clean.
■ Lift up on the front edge of the tray and pull forward to
remove.
■ The drip tray can also slide out to assist in Measured/
Favorite Fill.
!
Calibration
!
Door
Ajar
!
Replace
Filter
!
"#$#!
!
%&#'#(')!"#$#!
!
Order Filter
!
a1 oz = b1 L
!
a2 oz = b2 L
!
a3 oz = b3 L
!
Dispense
!
Ice Maker and Storage Bin
IMPORTANT: To avoid low ice production and poor quality ice,
ush the water system before turning on the ice maker. See the
“Water and Ice Dispensers” section.
■ Following installation, allow 24 hours to produce the rst
batch of ice. Discard the rst three batches of ice produced.
Allow 2 to 3 days to ll the ice storage bin.
■ The quality of your ice will be only as good as the quality
of the water supplied to your ice maker. Avoid connecting
the ice maker to a softened water supply. Water softener
chemicals (such as salt) can damage parts of the ice maker
and lead to poor quality ice. If a softened water supply
cannot be avoided, make sure the water softener is operating
properly and is well-maintained.
■ If the ice in the storage bin clumps together, break up ice
using a plastic utensil and discard. Do not use anything sharp
to break up the ice. This can cause damage to the ice bin and
the dispenser mechanism.
■ Do not store anything in the ice storage bin.
Ice Maker in the Refrigerator
The ice maker is located on the left door behind the bins. Ice
cubes are ejected into the ice storage bin located on the left-
hand refrigerator door.
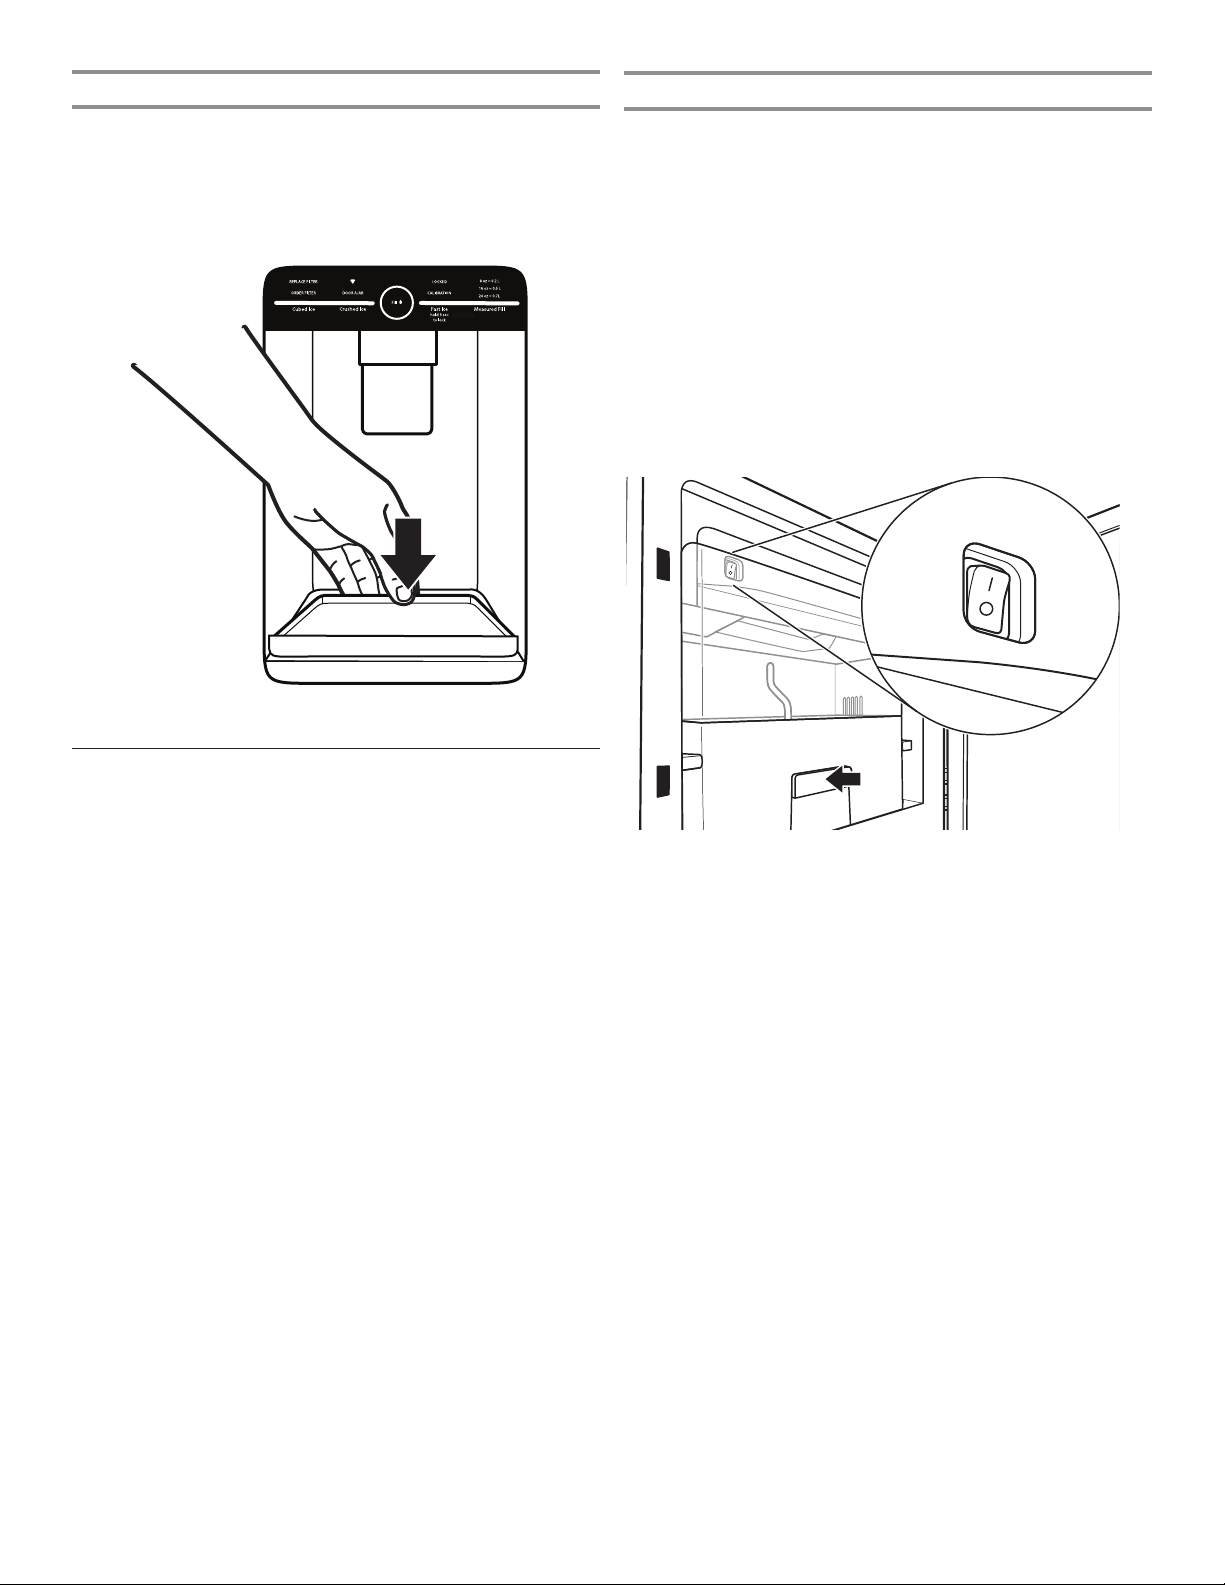
Turn the Ice Maker On/Off
1. Push up on the latch on the left-hand side of the ice
compartment to open the door.
2. Turn on the ice maker by moving the switch to the On (I)
position.
NOTES:
■ To manually turn off the ice maker, move the control to the
Off (O) position.
■ Your ice maker has an automatic shutoff. The sensor will
automatically stop ice production if the storage bin is full,
if the door is open or the storage bin is removed. The
control will remain in the On (I) position.
3. Close the ice compartment door.
Remove and Replace the Ice Storage Bin
■ Remove the ice storage bin by inserting your ngers into the
hole at the base of the bin and pulling the latch to release the
bin from the compartment. Lift the storage bin up and pull it
straight out.
■ Replace the storage bin inside the ice compartment and push
down to make sure it is rmly in place.
Ice Production Rate
■ The ice maker should produce approximately 3.2 lbs (1.5 kg)
of ice per day under normal operation.
■ To increase ice production, select the “Fast Ice” feature
from the control panel. The ice maker should produce
approximately 4.2 lbs (1.9 kg) of ice per day. See the “Tools”
section.
Loading ...
Loading ...
Loading ...