Loading ...
Loading ...
Loading ...
13
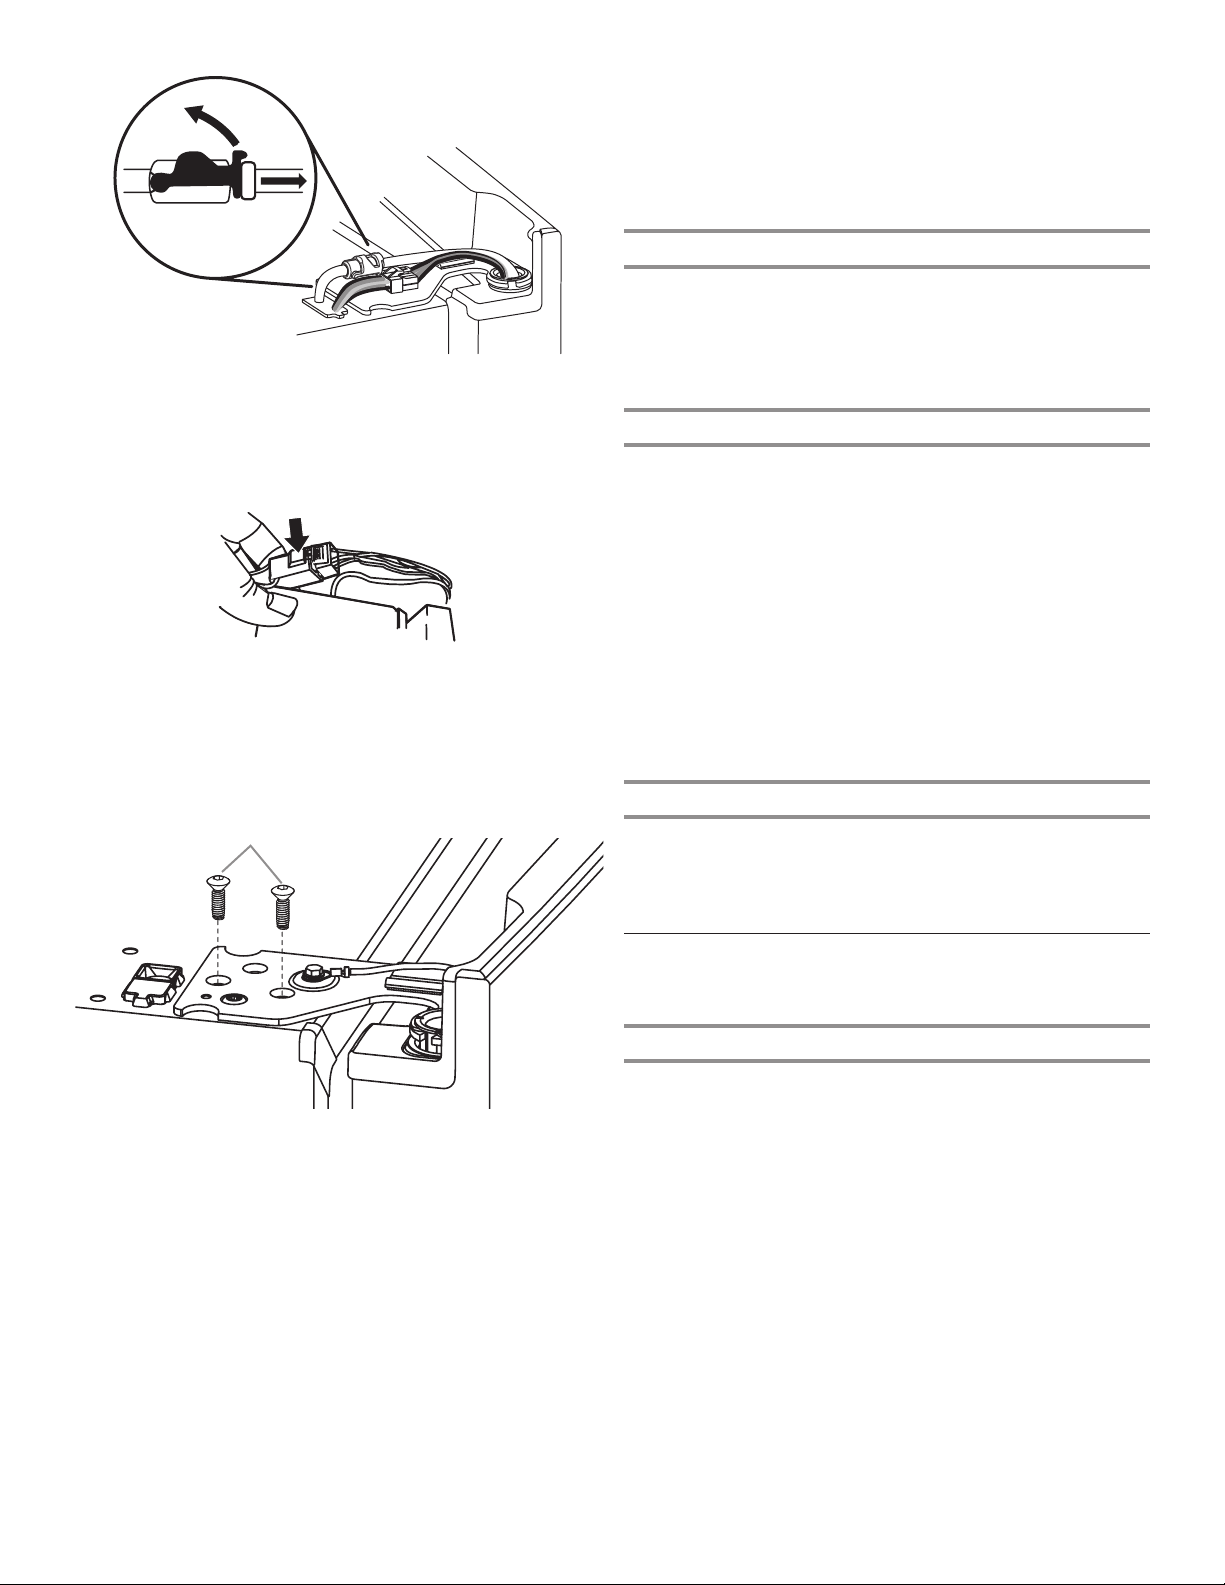
3. Disconnect the wiring plug located on top of the door hinge.
■ Grasp each side of the wiring plug. With your left thumb,
press down to release the catch and pull the sections of
the plug apart.
NOTE: Do not remove the green ground wire. It should
remain attached to the door hinge.
A. TORX
®
T25
®
screws
B. Ground wire (Do not remove.)
4. Using the TORX
®
T25
®
screwdriver, remove the two internal
screws from the top hinge and set aside.
NOTE:
Provide additional support for the refrigerator door while the
hinges are being removed. Do not depend on the door gasket
magnets to hold the door in place while you are working.
A
B
5. Lift the refrigerator door from the bottom hinge pin. The top
hinge will come away with the door.
NOTE: It may not be necessary to remove the bottom hinges
and brake feet assemblies to move the refrigerator through a
doorway.
■ Only if necessary, use a TORX
®
T25
®
screwdriver to
remove the bottom hinges and brake feet screws.
Replace Right-Hand Refrigerator Door
1. Set the right-hand door onto the bottom hinge pin.
2. Insert the top hinge pin into the open hole in the top
of the refrigerator door.
3. Using the three TORX T25
®
screws, fasten the hinge
to the cabinet. Do not tighten the screws completely.
Replace Left-Hand Refrigerator Door
IMPORTANT: Do not intertwine the water tubing and wiring
bundles when reconnecting them.
1. Set the left-hand door onto the bottom hinge pin.
2. Using the three TORX
®
T25
®
screws, fasten the hinge to the
cabinet. Do not tighten the screws completely.
3. Reconnect the water dispenser tubing.
Insert the tubing rmly into the tting until it stops. Close the
clasp around the tubing. The clasp snaps into place between
the tting and the collar. Connect blue female side with blue
male side and clasp. Repeat with gray female and gray male
side.
4. Reconnect the electrical wiring.
■ Push together the two sections of the wiring plug.
Final Steps
1. Completely tighten the six internal TORX
®
T25
®
screws (three
on the right-hand door hinge and three on the left-hand door
hinge).
2. Replace both top hinge covers.
Remove and Replace
Freezer Drawer Fronts
Freezer Drawer
Remove Drawer Front
1. Open the freezer drawer to its full extension.
2. Loosen the two top screws that fasten the drawer front to the
drawer glides. The two screws (one on the left-hand side and
one on the right-hand side) are located inside the drawer
front.
3. Remove the two screws at the bottom, inside the drawer front
that fasten the drawer front to the drawer glides.
4. Lift up on the drawer front to release the screws from the
drawer glide bracket slot.
Loading ...
Loading ...
Loading ...