Loading ...
Loading ...
Loading ...
39
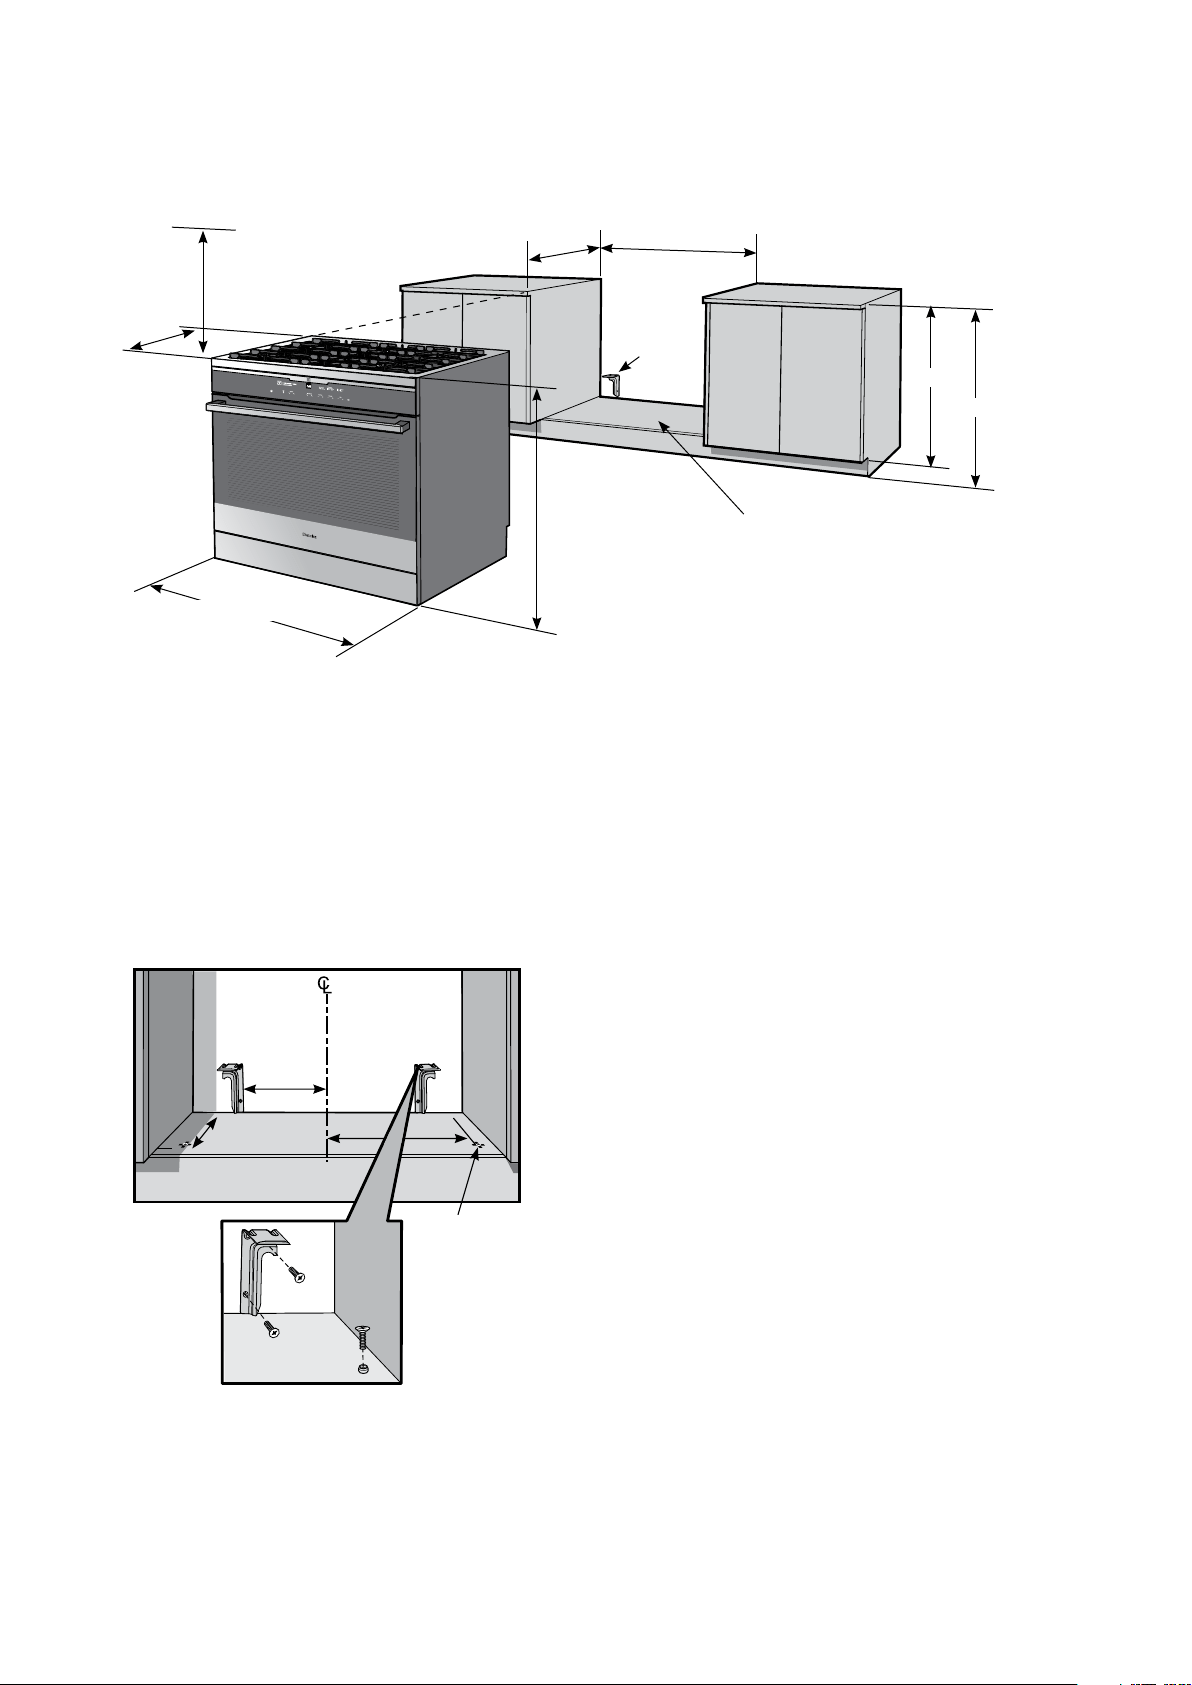
INSTALLATION OF THE EFEP955SB & EFEP915SB
Cabinet construction for slot in installation
To convert the freestanding appliance to a slot in
installation the kick panel provided on the appliance
is removed and the appliance is mounted on a plinth.
This enables a continuous cupboard kickboard to be
installed, giving a more integrated appearance. There is
no clearance requirement between oven and adjacent
side cabinets.
Installation of anti-tilt brackets and stops
Location of holes
for front stops
414
183
475
• The brackets are to be secured to the back wall with
appropriate fasteners.
• The bottom edge of the brackets rest on the
horizontal support surface.
• Two stops are to be screwed to the plinth in locations
as shown (stops provided). The stops locate into slots
in the base of the appliance to prevent the product
from being pulled forward when installed.
• Measurements from the rear wall are to be adjusted if
there are tiles etc, that come between the appliance
and the wall.
• Once services are connected, product can be lifted
onto the plinth and pushed back carefully, ensuring
the appliance engages into both brackets at the rear
and the front stops.
• If the product requires removal for service, it must be
lifted at the front approximately 5mm to clear the front
stops prior to being pulled forward.
Anti-tilt
brackets
755mm
900mm
600mm
900mm
minimum
This surface to be level with the top edge
of the kick board
600mm minimum vertical
clearance from combustible
surfaces
600mm
Gas Hob 765mm
Induction Hob 761mm
895mm
Loading ...
Loading ...
Loading ...