Loading ...
Loading ...
Loading ...
12
Preparations
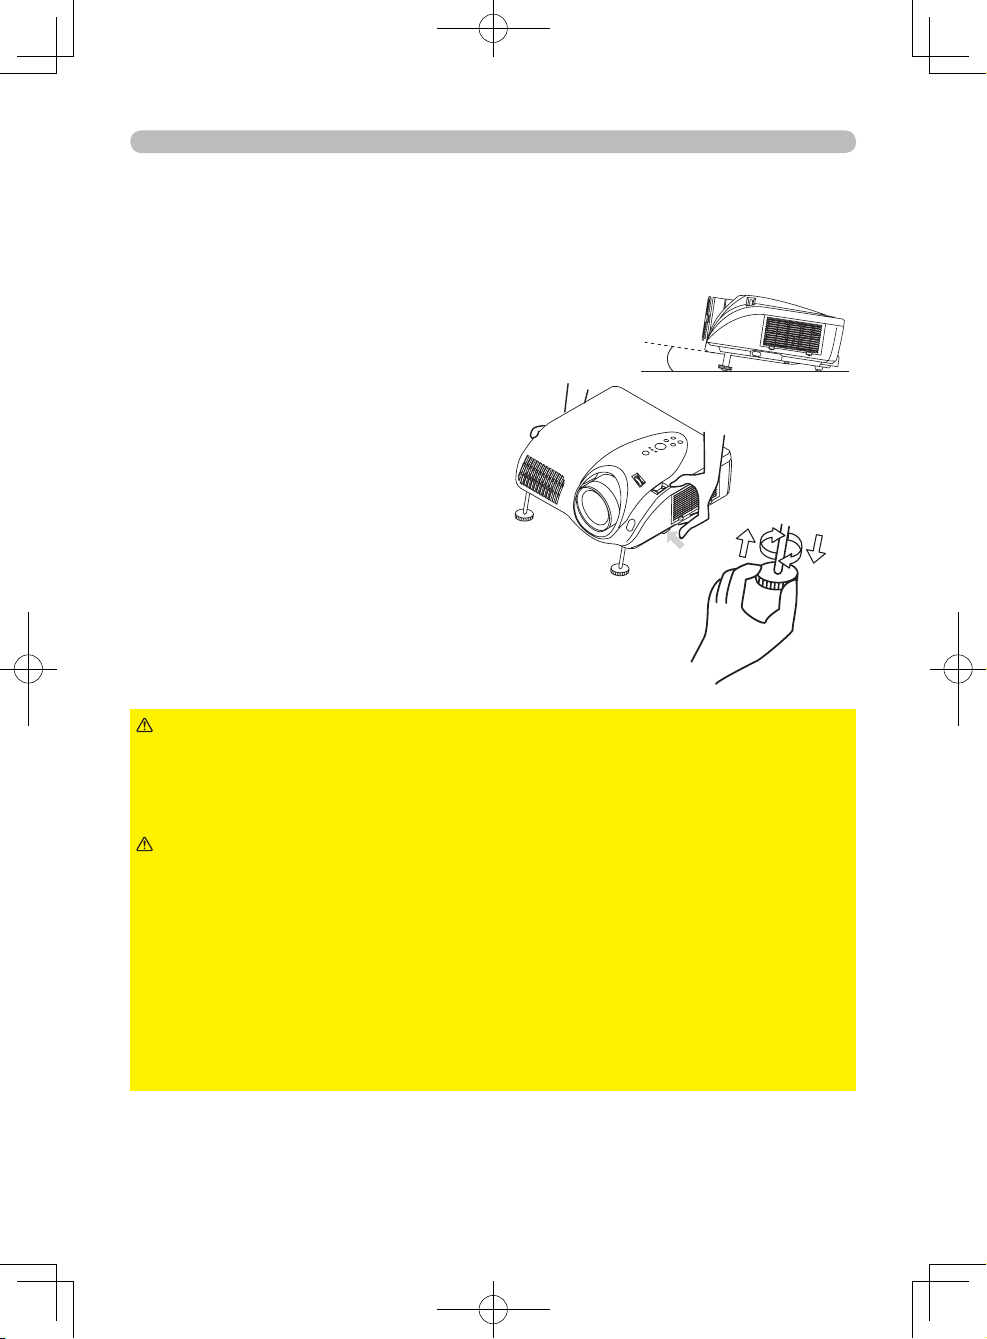
Adjusting the projector’s elevation
The elevator feet can be used to make adjustments if the surface on which the
projector is set is uneven or if the projection angle needs to be otherwise adjusted.
The adjustment range of the elevator feet is 0 to 7 degrees.
1.
Press and hold in the elevator
buttons while holding the projector.
There are elevator buttons and feet
on the both sides of the projector.
2.
Raise or lower the projector to the
desired height and release the
elevator buttons. When the elevator
buttons are released, the elevator
feet will lock into position.
3.
If necessary, the elevator feet can
be manually twisted to make more
precise adjustments.
► Do not adjust the elevation of the projector during or
immediately after use. Handling while the projector is hot could cause burn
and/or projector malfunction. Before adjusting the elevation, make sure that the
power switch is off, that the power cord is unplugged, and that the projector is
adequately cool.
WARNING
► Using the elevator buttons without holding the projector could
cause the projector to fall, overturn, or strike your fingers and possibly cause
projector malfunction. To prevent damaging the projector and injuring yourself,
always hold the projector whenever using the elevator buttons to adjust the
elevator feet.
► Do not tilt the projector to the right or left. Also be sure not to raise the
front or rear of the projector more than 7 degrees. Raising the projector more
than 7 degrees could cause projector malfunction or shorten the lifetime of
consumables.
► Other than raising the projector using the elevator feet, place the projector
horizontally.
CAUTION
7°
Loading ...
Loading ...
Loading ...