Loading ...
Loading ...
Loading ...
18
Remote control
BLANK LASER
FREEZE
LASER
INDICATOR
DIGITAL
STANDBY/ON COMPUTER
LENS SHIFT
KEYSTONE
ID 3
ID 4
ID 2
ID 1
VIDEO
AUTO
ASPECT
RESET
MENU
MAGNIFY
ON
OFF
3
4
ENTER
FOCUS
+
-
POSITION
PbyP
ZOOM
+
-
1
2
MY BUTTON
MY SOURCE
SHUTTER
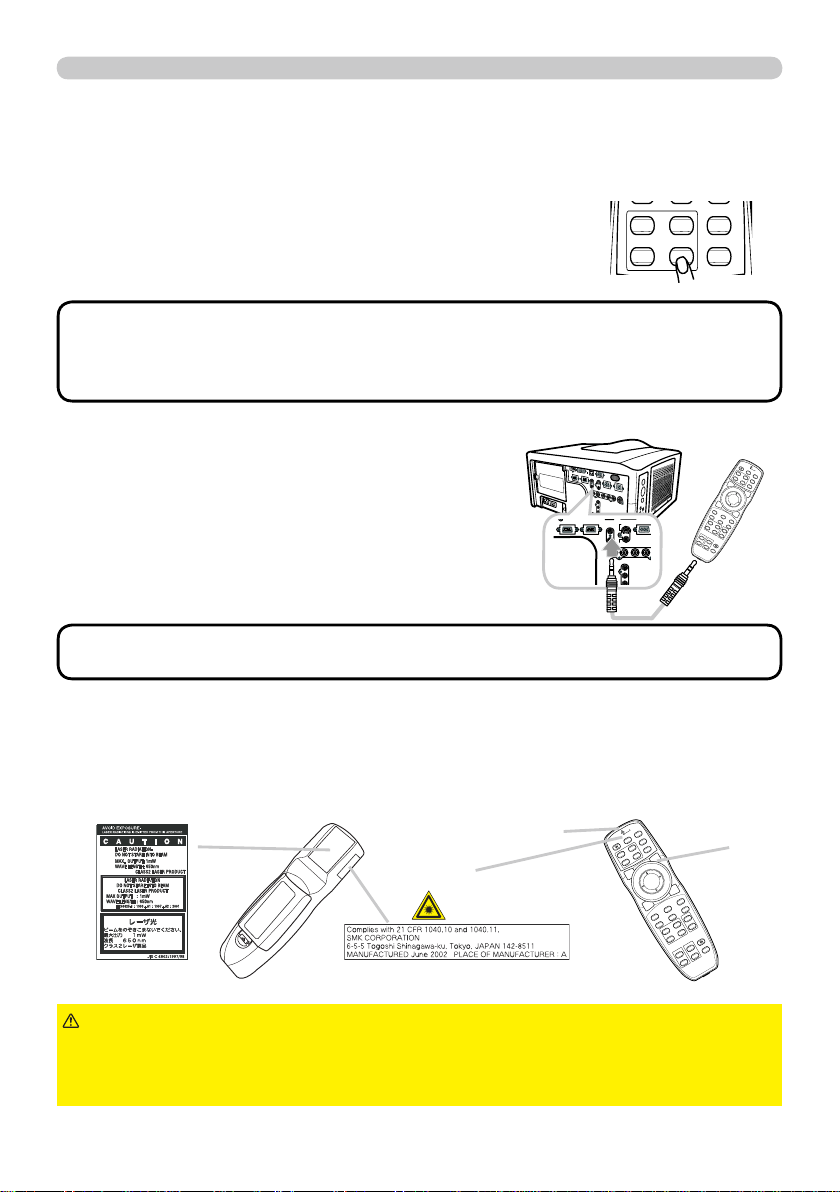
Using as a wired remote control
The accessory remote control works as a wired remote control,
when the wired control port at the bottom of the remote control
connects with the
REMOTE CONTROL
REMOTE CONTROL port on the back of the
projector via an audio cable with 3.5 diameter stereo mini plugs.
This function is useful when a wireless remote signal
may not reliably reach the projector.
• To connect the remote control with the projector, use an audio cable
with 3.5 diameter stereo mini plugs.
NOTE
MI DVI
-
D
CONTROL IN CONTROL OUT
REMOTE
CONTROL
IN
OUT
S-VIDEO
COMPUTER
VIDEO 1
BNC
R/Cr/Pr G/Y B/Cb/Pb H
Y
Cb/Pb
Cr/Pr
MONITOR
OUT
BLANK LASER
FREEZE
LASER
INDICATOR
DIGITAL
STANDBY/ON COMPUTER
LENS SHIFT
KEYSTONE
ID 3
ID 4
ID 2
ID 1
VIDEO
AUTO
ASPECT
RESET
MENU
MAGNIFY
ON
OFF
3
4
ENTER
FOCUS
+
-
POSITION
PbyP
ZOOM
+
-
1
2
MY BUTTON
MY SOURCE
SHUTTER
Laser pointer
This remote control has a laser pointer in place of a fi nger or rod. The laser beam
works and the
LASER INDICATOR
LASER INDICATOR lights while the
LASER
LASER button is pressed.
►Use the laser beam of the remote control only for the pointer
on the screen. Do not apply the laser beam to anything except the screen.
• Never hit eyes by the laser beam since the laser beam can injure eyes.
• Do not apply the laser beam to anything except the screen.
WARNING
LASER INDICATOR
LASER INDICATOR
LASER
LASER button
Laser aperture
Using the REMOTE ID function
This is the function to defi ne which projector is controlled by the remote control. Utilize
this function when you use some projectors of the same type at the same time.
1.
Set the ID number to the projector beforehand,
referring to the item “REMOTE ID” item (
52 ).
2.
Press a ID button on the remote control. The ID button
selected will light for 3 seconds.
• Each time you press any button (except ID buttons), the ID button of
current selected ID number will light.
• To confi rm the projector's current ID, press any ID button for 3 seconds. Its
number will be shown on each screen regardless of set ID of projector.
NOTE
DIGITAL
ID 3
ID 4
ID 2
ID 1
VIDEO
Loading ...
Loading ...
Loading ...