Loading ...
Loading ...
Loading ...
17
Remote control
BLANK LASER
FREEZE
LASER
INDICATO
R
DIGITAL
STANDBY/ON
COMPUTER
LENS SHIFT
KEYSTONE
ID 3
ID 4
ID 2
ID 1
VIDEO
AUTO
ASPECT
RESET
MENU
MAGNIFY
ON
OFF
3
4
ENTER
FOCUS
+
-
POSITION
PbyP
ZOOM
+
-
1
2
MY BUTTON
MY SOURCE
SHUTTER
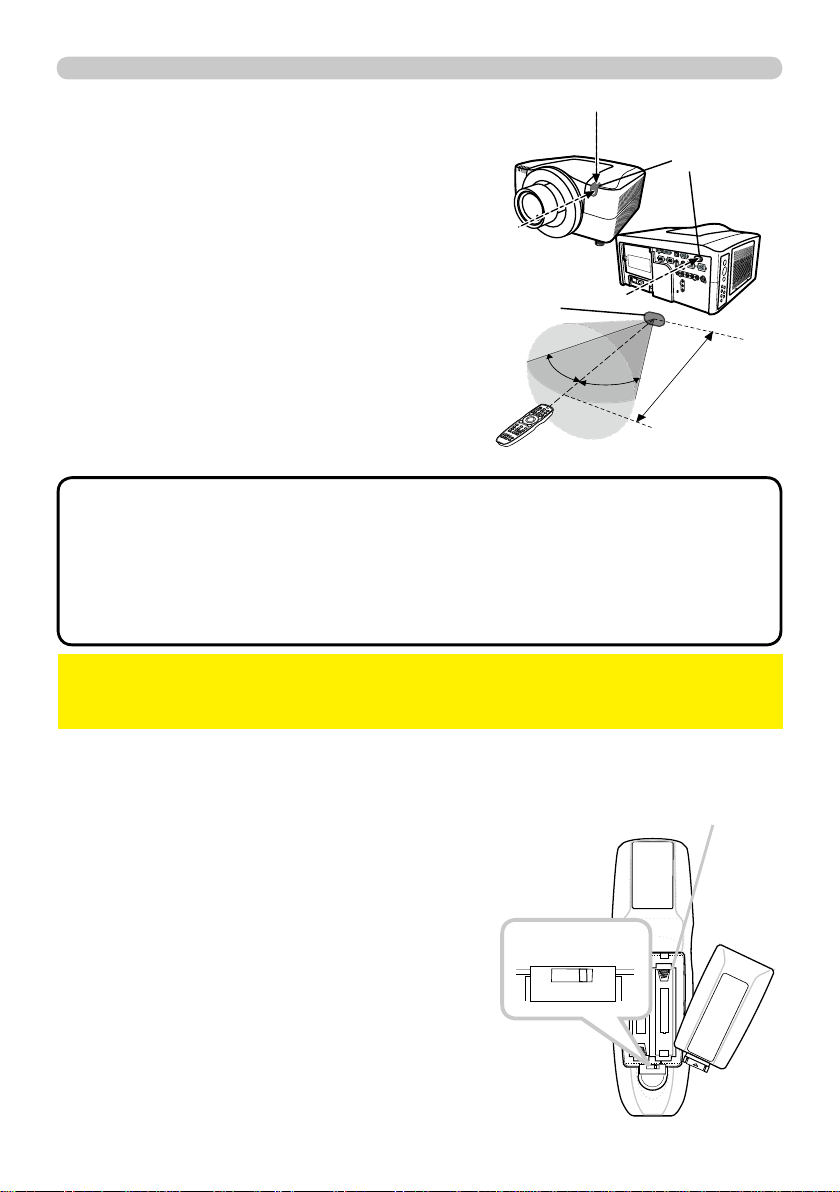
Transmitting condition
The remote control works with the remote
sensors on the projector using infrared light
(Class 1 LED). The remote sensor senses the
remote control signals reached into the range
within 60 degrees (to right and left) and 3 meters
about from the sensor.
30º
30º
Approx.
3 m
Remote
sensor
Remote
sensors
• You can inactivate one or two sensors from the three sensors using
the item REMOTE RECEIVE. of the SERVICE menu under the OPTION menu.
• When you want to use two or more projectors of this type at the same time
and the same place, utilize the REMOTE ID function. The buttons of
ID 1
ID 1,
ID 2
ID 2,
ID 3
ID 3 and
ID 4
ID 4 on the remote control can name the projector given the same ID
number as the button by the item REMOTE ID of the SERVICE menu under the
OPTION menu.
NOTE
►Avoid exposing directly the remote sensor to any strong lights.
►Do not put anything between the remote control and the remote sensor on the
projector, since it may interfere with transmission of the remote control signals.
NOTICE
Changing the frequency of remote control signal
The accessory remote control has the choice of
mode 1 or mode 2, in the frequency of its signal.
If the remote control does not function properly,
attempt to change the signal frequency.
Please remember that the “REMOTE FREQ.” in
SERVICE item of OPTION menu (
51 ) of the
projector to be controlled should be set to the
same mode as the remote control.
To set the mode of the remote control, slide the
knob of the frequency switch inside the battery
cover into the position indicated by the mode
number to choose.
2 1
Back of the
remote control
Inside of
the battery cover
Frequency switch
Loading ...
Loading ...
Loading ...