Loading ...
Loading ...
Loading ...
67
Maintenance
Maintenance
Maintenance
A worn out lamp bulb could burn or burst. It is recommended to keep a spare
lamp unit on hand and to replace the lamp unit when the projected image darkens
or color reproduction becomes poor.
To prepare the spare, contact your dealer and tell the following type number.
Lamp unit
Type number of the optional lamp unit: DT01001
•The value shown on the OPTION menu as the LAMP TIME is the use
time that is counted since the last time the LAMP TIME was reset. Refer to the
value for proper maintenance.
NOTE
If the projector is installed in a special state such as ceiling mount, or if the lamp
bulb has broken, also ask the dealer to replace the lamp unit. Otherwise, follow
the procedure shown below to replace the lamp.
Make sure that the projector is unplugged and
cooled down.
1.
6.
To display the ADVANCED MENU, press the
MENU
MENU button (on the control
panel or the remote control). On the EASY MENU, select the “ADVANCED
MENU” using the ▲/▼ cursor buttons, then press the ► cursor button.
To display the LAMP TIME dialog, select the
“LAMP TIME” using the ▲/▼ cursor buttons in
the right column, then press the ► cursor button.
Use the ► cursor button according to the dialog,
Selecting “OK” resets the LAMP TIME value.
(1)
(2)
(4)
(5)
Turn the projector on.
I O
HDMI DVI-D
CONTROL IN CONTROL OUT
REMOTE
CONTROL
IN
OUT
S-VIDEO
COMPUTER IN2
COMPUTER IN1
VIDEO 1
BNC
R/Cr/Pr G/Y B/Cb/Pb H V VIDEO 2
Y
Cb/Pb
Cr/Pr
AC IN
LAN
MONITOR
OUT
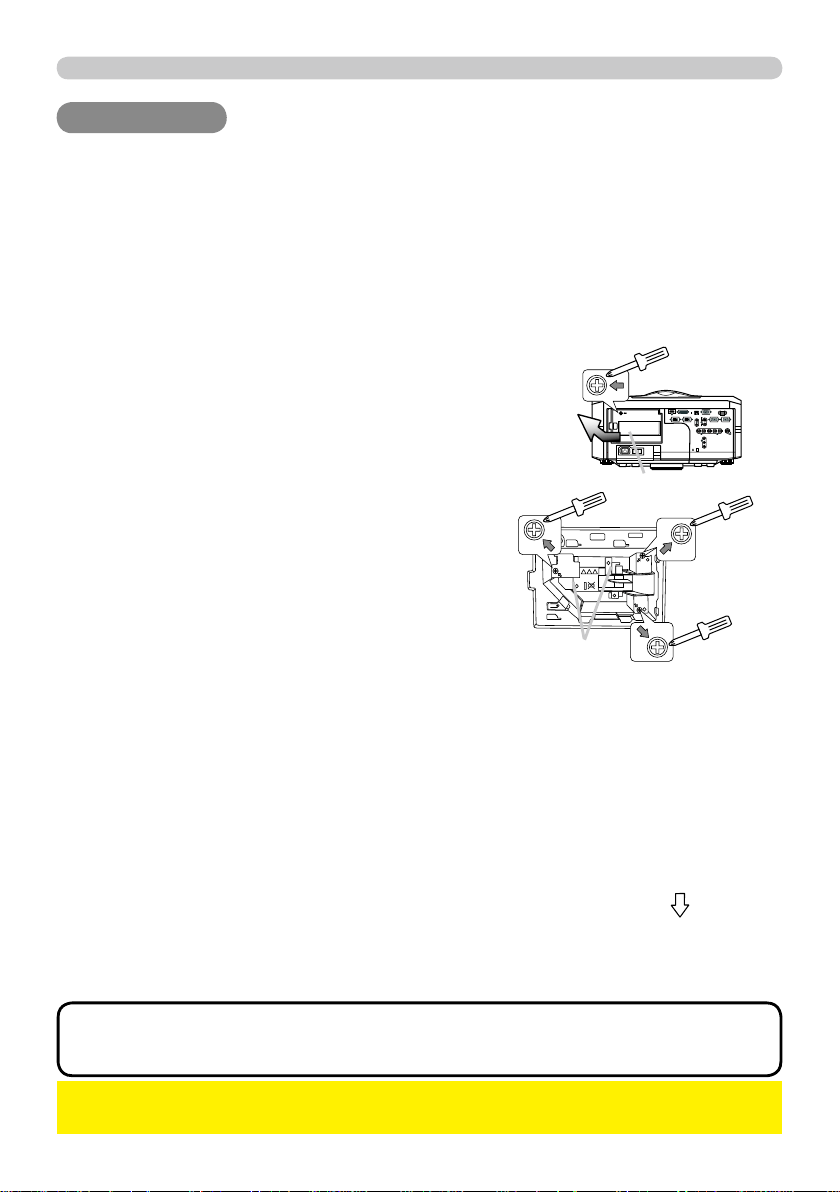
The lamp cover
The handles
Loosen the screw (marked by arrow) of the
lamp cover. Then slide and take it off.
2.
Loosen the 3 screws (marked by arrow) of the
lamp unit. Then picking the handles of the unit,
gently take it from the projector.
3.
Gently set the new lamp unit into place. Then
retighten the screws of the lamp unit.
4.
Put the lamp cover back into place, and
retighten the screw of the lamp cover.
5.
Reset the LAMP TIME value.
►Be sure to reset the LAMP TIME only when you have replaced the
lamp unit.
NOTICE
To select the OPTION menu, select the
“OPTION” using the ▲/▼ cursor buttons in the
left column, then press the ► cursor button.
(3)
Loading ...
Loading ...
Loading ...