Loading ...
Loading ...
Loading ...
Mavic 2 Pro/Zoom User Manual
10
©
2019 DJI All Rights Reserved.
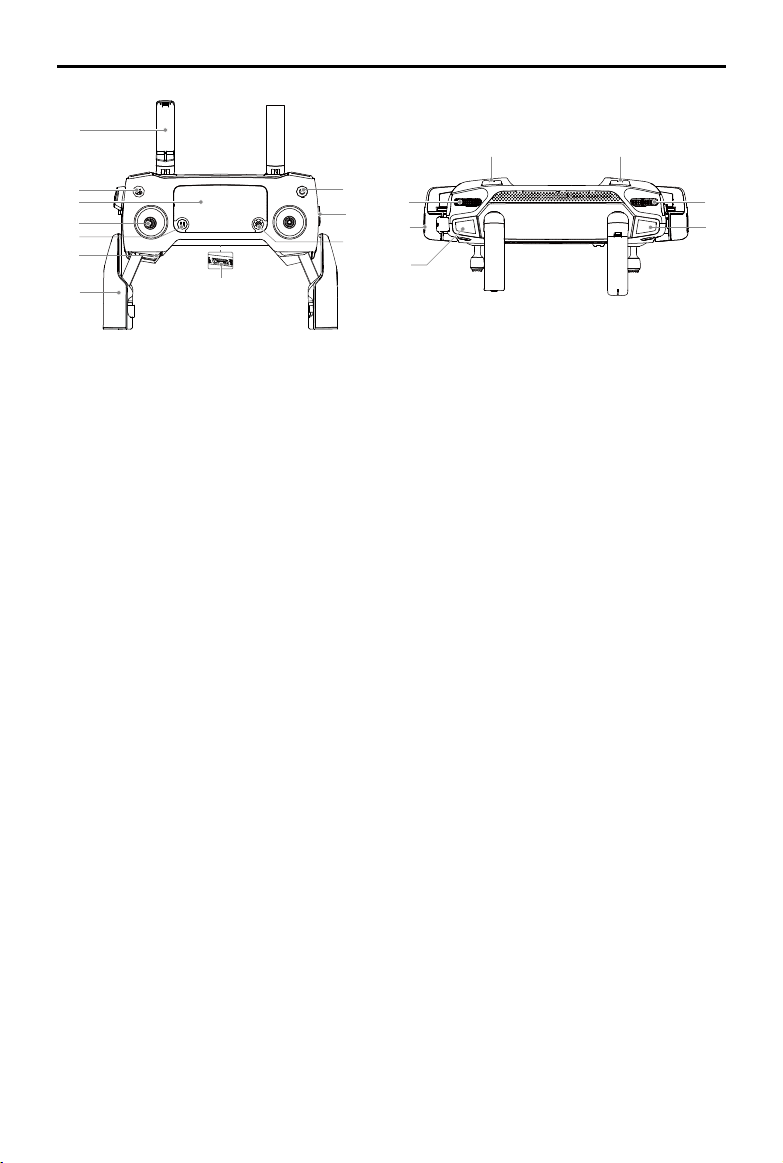
1. Antennas
Relay aircraft control and video wireless
signals.
2. Return to Home (RTH) Button
Press and hold the button to initiate RTH.
The aircraft returns to the last recorded Home
Point. Press again to cancel RTH.
3. LCD Screen
Displays the aircraft and remote controller
system status.
4. Removable Control Sticks
The removable control sticks are easy to
store. The default ight control is set to Mode
2. Set the ight control mode in DJI GO 4.
5. Flight Pause Button
Press to make the aircraft brake and hover
in place (only when GPS or Vision System
are available). The flight pause button has
dierent functions in dierent Intelligent Flight
Modes. For details, refer to the Intelligent
Flight Mode section.
6. Control Sticks Storage Slot
For storing the control sticks.
7. Mobile Device Clamps
Securely mount your mobile device onto the
remote controller.
8. Reserve Video-Downlink Port (USB)
Connect to a mobile device for video
downlink via a standard USB cable.
9. 5D Button
The default configuration is listed below.
The conguration can be adjusted based on
your preferences in DJI GO 4.
Left: Decrease EV value.
Right: Increase EV value.
Up: Recenter gimbal/gimbal downward.
Down: Recenter gimbal/gimbal downward.
Press down: Bring up DJI GO 4 Intelligent
Flight menu.
10. Flight Mode Switch
Switch between S-mode, P-mode, and
T-mode.
11. Power Button
Press once to check the current battery
level. Press once, then again, and hold to
turn on/o the remote controller.
12. C1 Button (Customizable)
The default configuration is center focus.
Adjust the conguration in DJI GO 4 based
on your preferences.
13. Gimbal Dial
Controls the camera's tilt.
14. Video-Downlink/Power Port (micro USB)
Connect to a mobile device for video
linking via the RC cable. Connect to the
AC Power Adapter to charge the remote
controller battery.
12
13
14
15
17
16
18
1
2
11
10
9
3
4
5
6
7
8
Loading ...
Loading ...
Loading ...