Loading ...
Loading ...
Loading ...
14 operating sequence – electronic control oven electrolux e:line ovens electrolux e:line ovenscookingwiththetimer–electroniccontroloven15
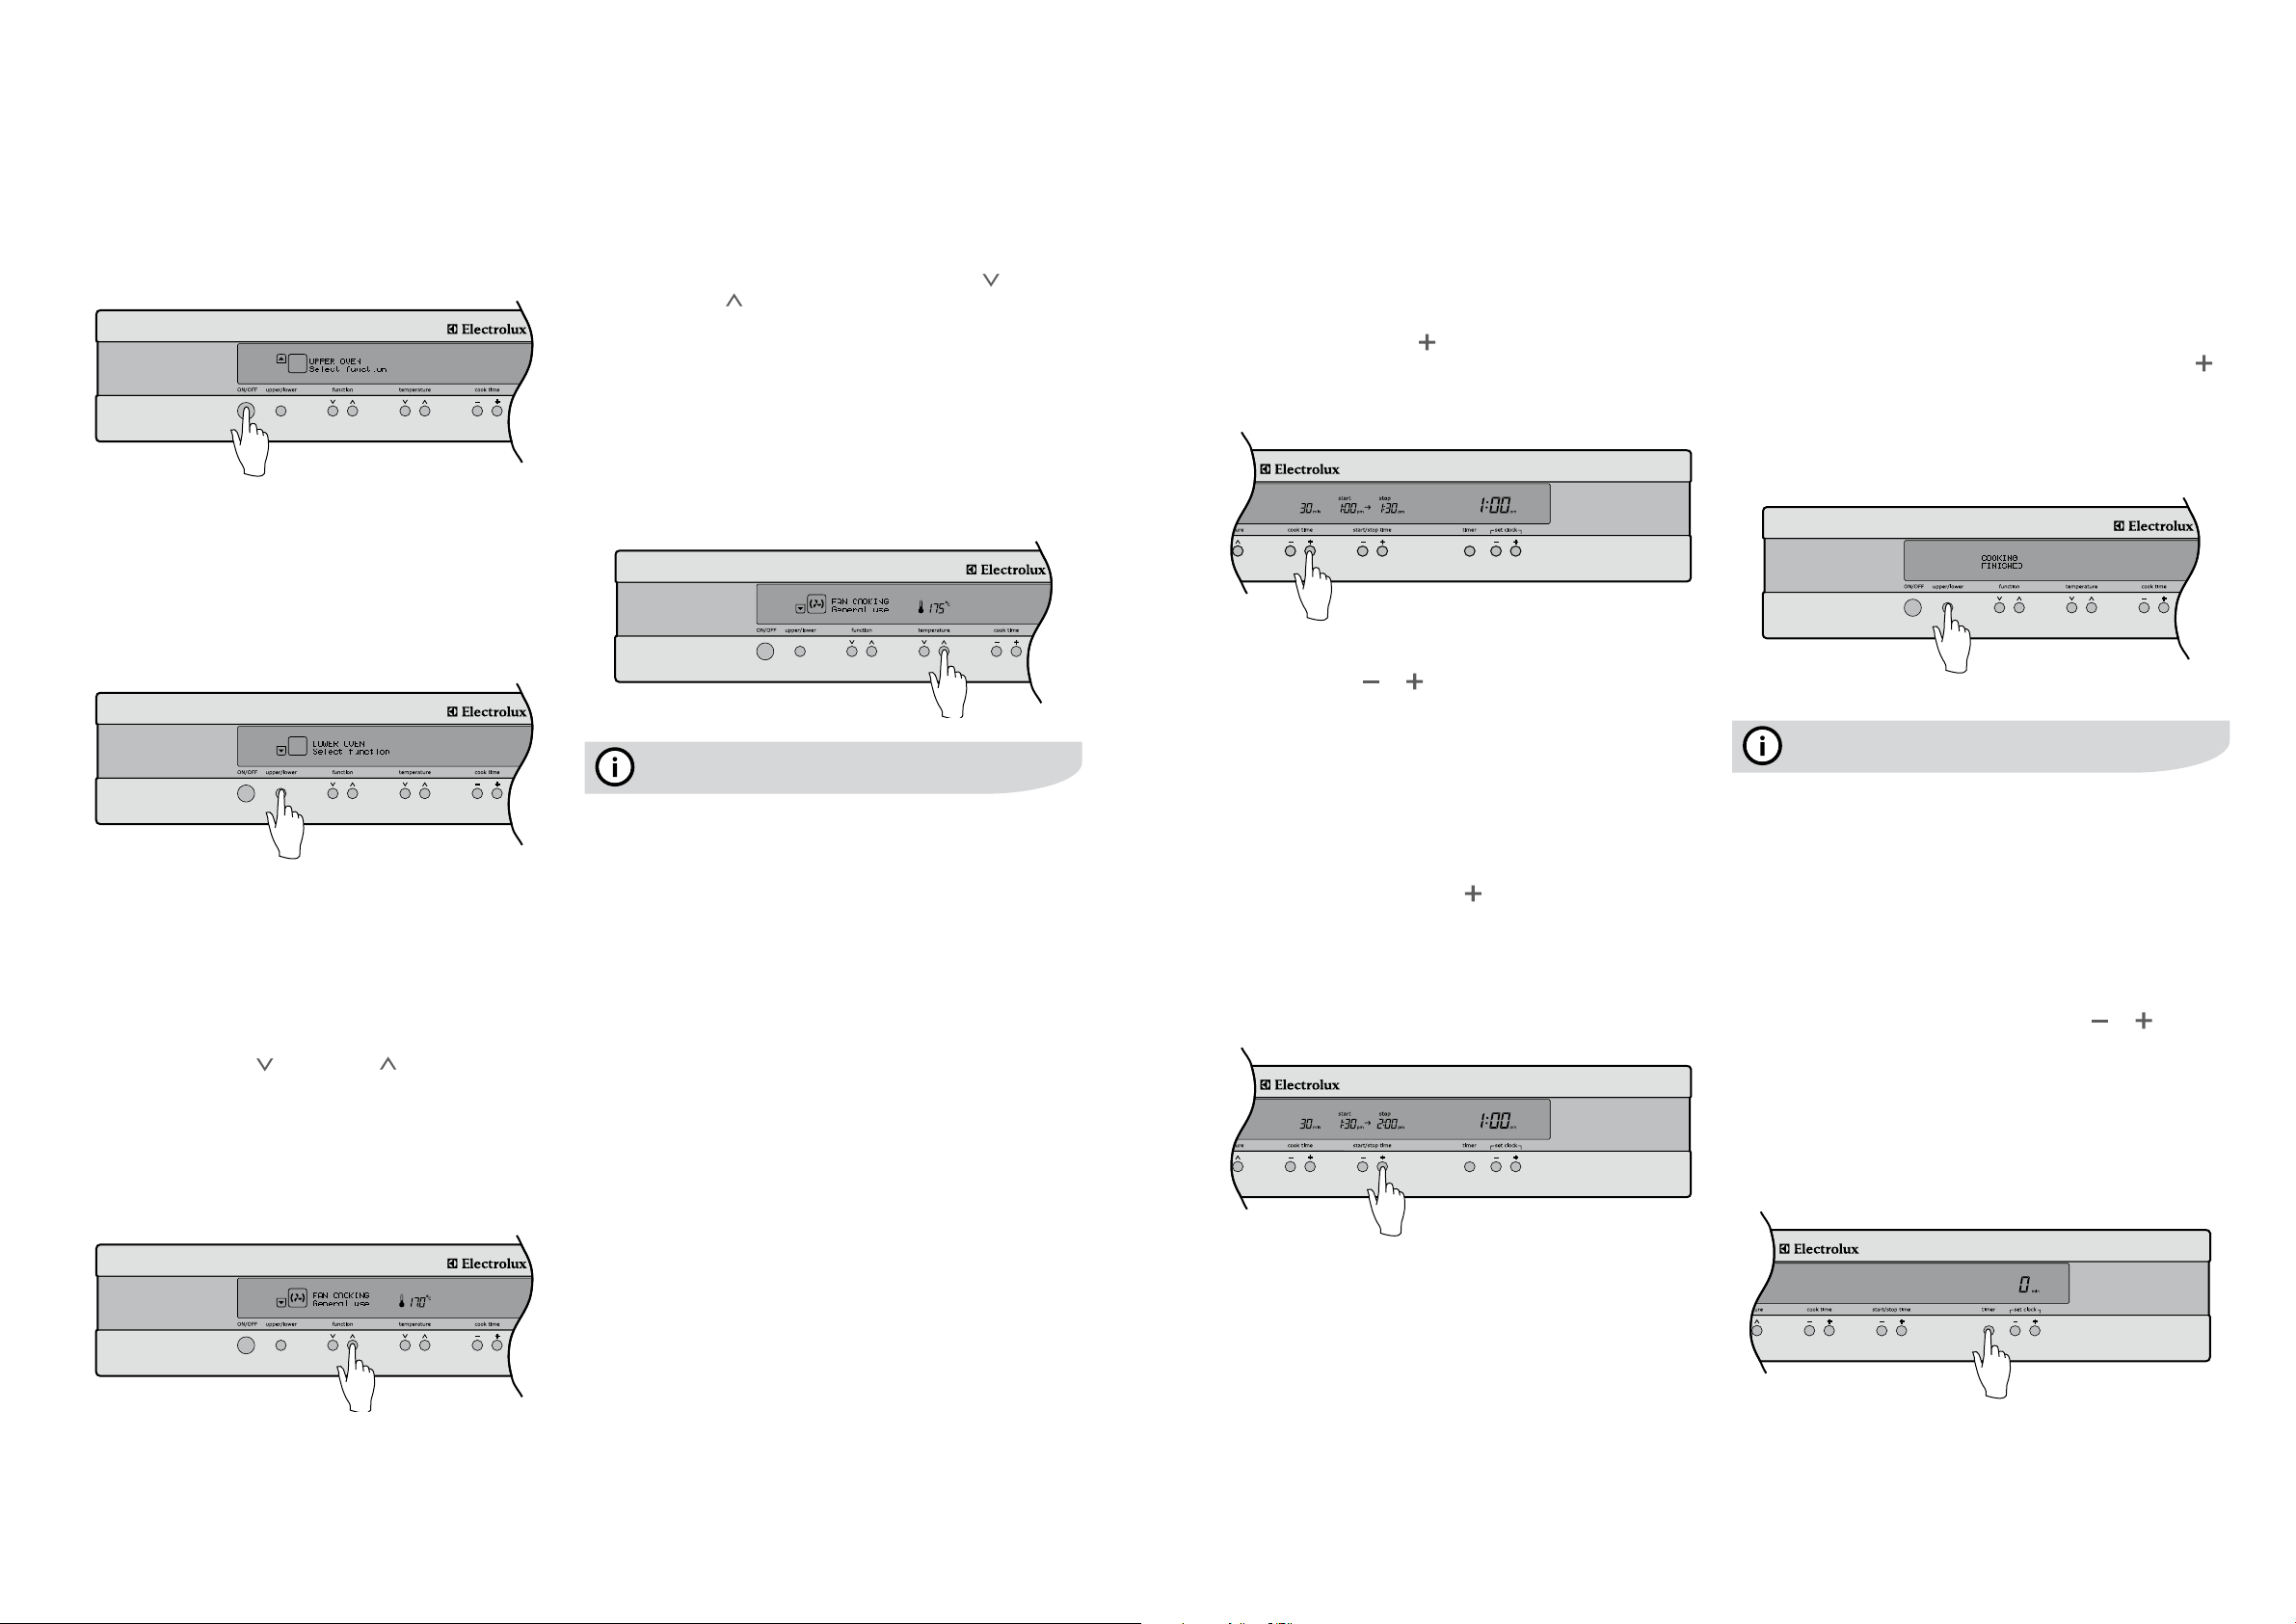
Turning the oven on
• Switchontheovenbypressingthe“ON/OFF”button.
The LCD control panel will come on and inform you that
you need to select a cooking function.
• Ifyoudonotselectafunctionwithin8secondstheoven
will turn off.
SelectingtheUpperorLoweroven
(EDEE63CS,EUEE63CS&EUEE63CKonly)
Your model may be equipped with two ovens. On these
models, use the oven selector button to toggle between the
upper and lower ovens.
• Selectwhichoventousebypressingthe“upper/lower”
button. The oven cavity icon on the LCD control panel
will tell you which oven is currently active.
Note:
Selectacookingfunction
Your oven will have a selection of functions. Refer to the
inside front cover of this manual to confirm what functions
are available to you.
• Pressthe“function
”orfunction ”buttonsasmany
times as necessary until the desired function appears.
• Cookingsuggestionswillappearunderthefunction
name and suggested cooking temperatures will appear
above the temperature selector.
• Ifnootherbuttonistouchedwithin8secondsthe
oven will switch on and begin to heat up to the
displayed temperature.
Operating sequence –
electronic control oven
Selecting a temperature
The temperature in your appliance is electronically
controlled.
• Thetemperaturecanbeselectedwithintherangeof
30°Cto250°Candcanbeadjustedatanytime.To
setthetemperature,pressthetemperature“ ”and
temperature“ ”buttonstoreachthedesiredsetting.
• Ifnofurtherchangesaremadewithin8secondsthe
oven begins to heat. The heating indicators above the
temperature selector will come on and start to rise
slowly, indicating the degree to which the oven
is currently being heated.
• Whenthetemperatureisreached,theindicatorbarsare
fullylit,theheatsourceswitchesitselfoffandthebuzzer
willplayashortsound.Whentheoventemperaturefalls
below the desired setting, the heating source switches
back on.
tips and information
Pre-heatingyourovenisrecommendedinseveralcooking
andgrillingfunctions.Pre-heatingyourapplianceallowsit
to reach the required temperature quickly and efficiently as
well as cook your food at the correct temperature for the
entire cook time.
The programmable controller models are equipped with
abuilt-inrapidheat-upthatactivateseachtimeyoustart
anovenfunction.Duringtherapidheat-upphasetheheat
comes from the element surrounding the fan as well as
the smaller element above the food. This combination will
heat up your oven 30% quicker than it would on standard
“Bake”.Theovenwillautomaticallyreverttothesetcooking
function once the preset temperature is reached.
Turning the oven off
Single cavity models:
1. Press the ON/OFF button to switch off the oven.
Dual cavity models:
1. Presstheupper/lowerovenselectorbuttontotoggleto
the desired oven.
2. Press the ON/OFF button to switch off the desired oven.
The LCD control panel will come off to confirm that the
oven is now switched off.
3. Iftheotherovenisstillactive,after1second,theLCD
control panel will automatically revert to show the setting
of that oven.
4. To turn off both ovens at once, press and hold the
On/Offbuttonfor1second.Allelements,cavitylight
and the LCD control panel will then switch off at the
same time.
Your oven is equipped with a programmable controller that
can be used to turn on and off the oven automatically.
The cook time is used to automatically turn the oven off
after a set amount of time.
Settingthecooktime
1. Select the desired oven function and cooking
temperature.
2. Pressthe“cooktime ”buttonasoftenasnecessary,
until the desired cook time has been set.
3. After8secondsfromthelasttimeadjustmentyouroven
will be programmed and will start cooking.
Note:
Settingthestart/stoptime
Thestart/stoptimecanbeusedtoswitchtheovenOnand
Off at a specific time during the day.
1. Check the clock displays the correct time of day.
2. Select the desired oven function and cooking
temperature.
3. Set the required cook time.
4. Pressthe“start/stop”time button to move the start
and stop time forward.
5. After8secondsfromthelasttimeadjustmentthe
DELAYSETiconwilllightandyourovenisnow
programmed.
The oven will start cooking when the time of day reaches
the set start time.
Cooking with the timer –
electronic control oven
Oncompletionofcooking
Whenthecooktimehaselapsed,anaudiblesignal
will sound for 10 seconds, the oven will switch off and
COOKINGFINISHEDwillbedisplayedonthelefthandside
of the display. On the right hand side of the display, the
remainingtimeindication“0min”willappeartogetherwith
the cooking start and stop time.
• Tostoptheaudiblesignal,pressanyofthebuttonson
the control panel.
• Ifyouwishtocookabitlonger,pressthe“cooktime ”
button for each additional minute you require. The oven
automatically reverts to the function and temperature
previouslyprogrammed.Thisfeatureisavailablefor5
minutesaftercookinghasnished.Afterthat,theoven
automatically switches off.
tips and information
Even though the heating element turns off the oven will still
retain substantial heat. This will continue to cook the food
untilitisremovedortheovencoolsdown.Ifyoudonot
plan on being present when the oven turns off, you should
take this extra heating time into account.
Setting the timer
The timer can be used independently of the oven for setting
acountdownperiod.Whentheperiodoftimehaselapsed,
an audible signal sounds.
1. Press the timer button.
2. Set the desired length of time using the or buttons
whilstthetimerbellisashing.After8secondsfromthe
lastadjustmentthetimerbellwillstopashingandthe
timer will start to count down.
3. Whenthesettimehaselapsed,anaudiblesignalwill
soundfor10seconds.Thetimeindication“0min”and
thetimerbellwillashonthedisplay.
4. To stop the signal, press any of the 3 buttons below the
Clock/Timerdisplay.
Note:
Loading ...
Loading ...
Loading ...