Loading ...
Loading ...
Loading ...
cleaningthepyrolyticovendoor(EPEE63CS&EPEE63CKmodelsonly)electrolux e:line ovens 2928pyrolyticcleaningoftheovencavity(EPEE63CS&EPEE63CKmodelsonly)electrolux e:line ovens
Operation
IfyourovenhasthePyroself-cleaningfunction,itcleans
by burning off the spatters and accumulated dirt and
grease from the oven liner, at high temperature. This
process produces ash which can then be wiped out
of the oven cavity.
During the pyrolytic cleaning process the oven becomes
veryhot(approximately500˚C).
• Pleasekeepsmallchildrenatasafedistance
• Duringpyrolyticcleaningtheairoutletventabovethe
door must be kept clear of any obstruction (eg bulky
tea towels).
• Itisrecommendedyoucleanyourovenregularlyto
keep the oven in its best condition.
• Donotuseyouroventocleanmiscellaneousitems
(eg cookware).
BeforecarryingoutthePyrofunction,
Allaccessoriesmustberemovedfromtheoven.
This includes shelves, trays and side racks.
Clean large pieces of dirt or grease from the oven liner.
Note:
•
Thereare3Pyrocleaningcyclesyoucanuse.
Soiling Duration
Light Clean 2hrs 00min
Medium clean 2hrs 30min
Heavy clean 3hrs 00min
Durationincludesheat-uptimeandcool-downtimeof45
mins
• Lightclean
This is an energy saving cycle that can be used on a
regular basis if your oven is lightly soiled. Possibly after
every 2nd or 3rd time you roast meat.
• Mediumclean
Use this as your regular cycle about once every
2-3monthstoremovemildlydirtyovens.
• Heavyclean
Whenyourovenisverydirtyitmayneedalongercycle
to clean it thoroughly. This cycle will clean the dirtiest
of ovens.
caution
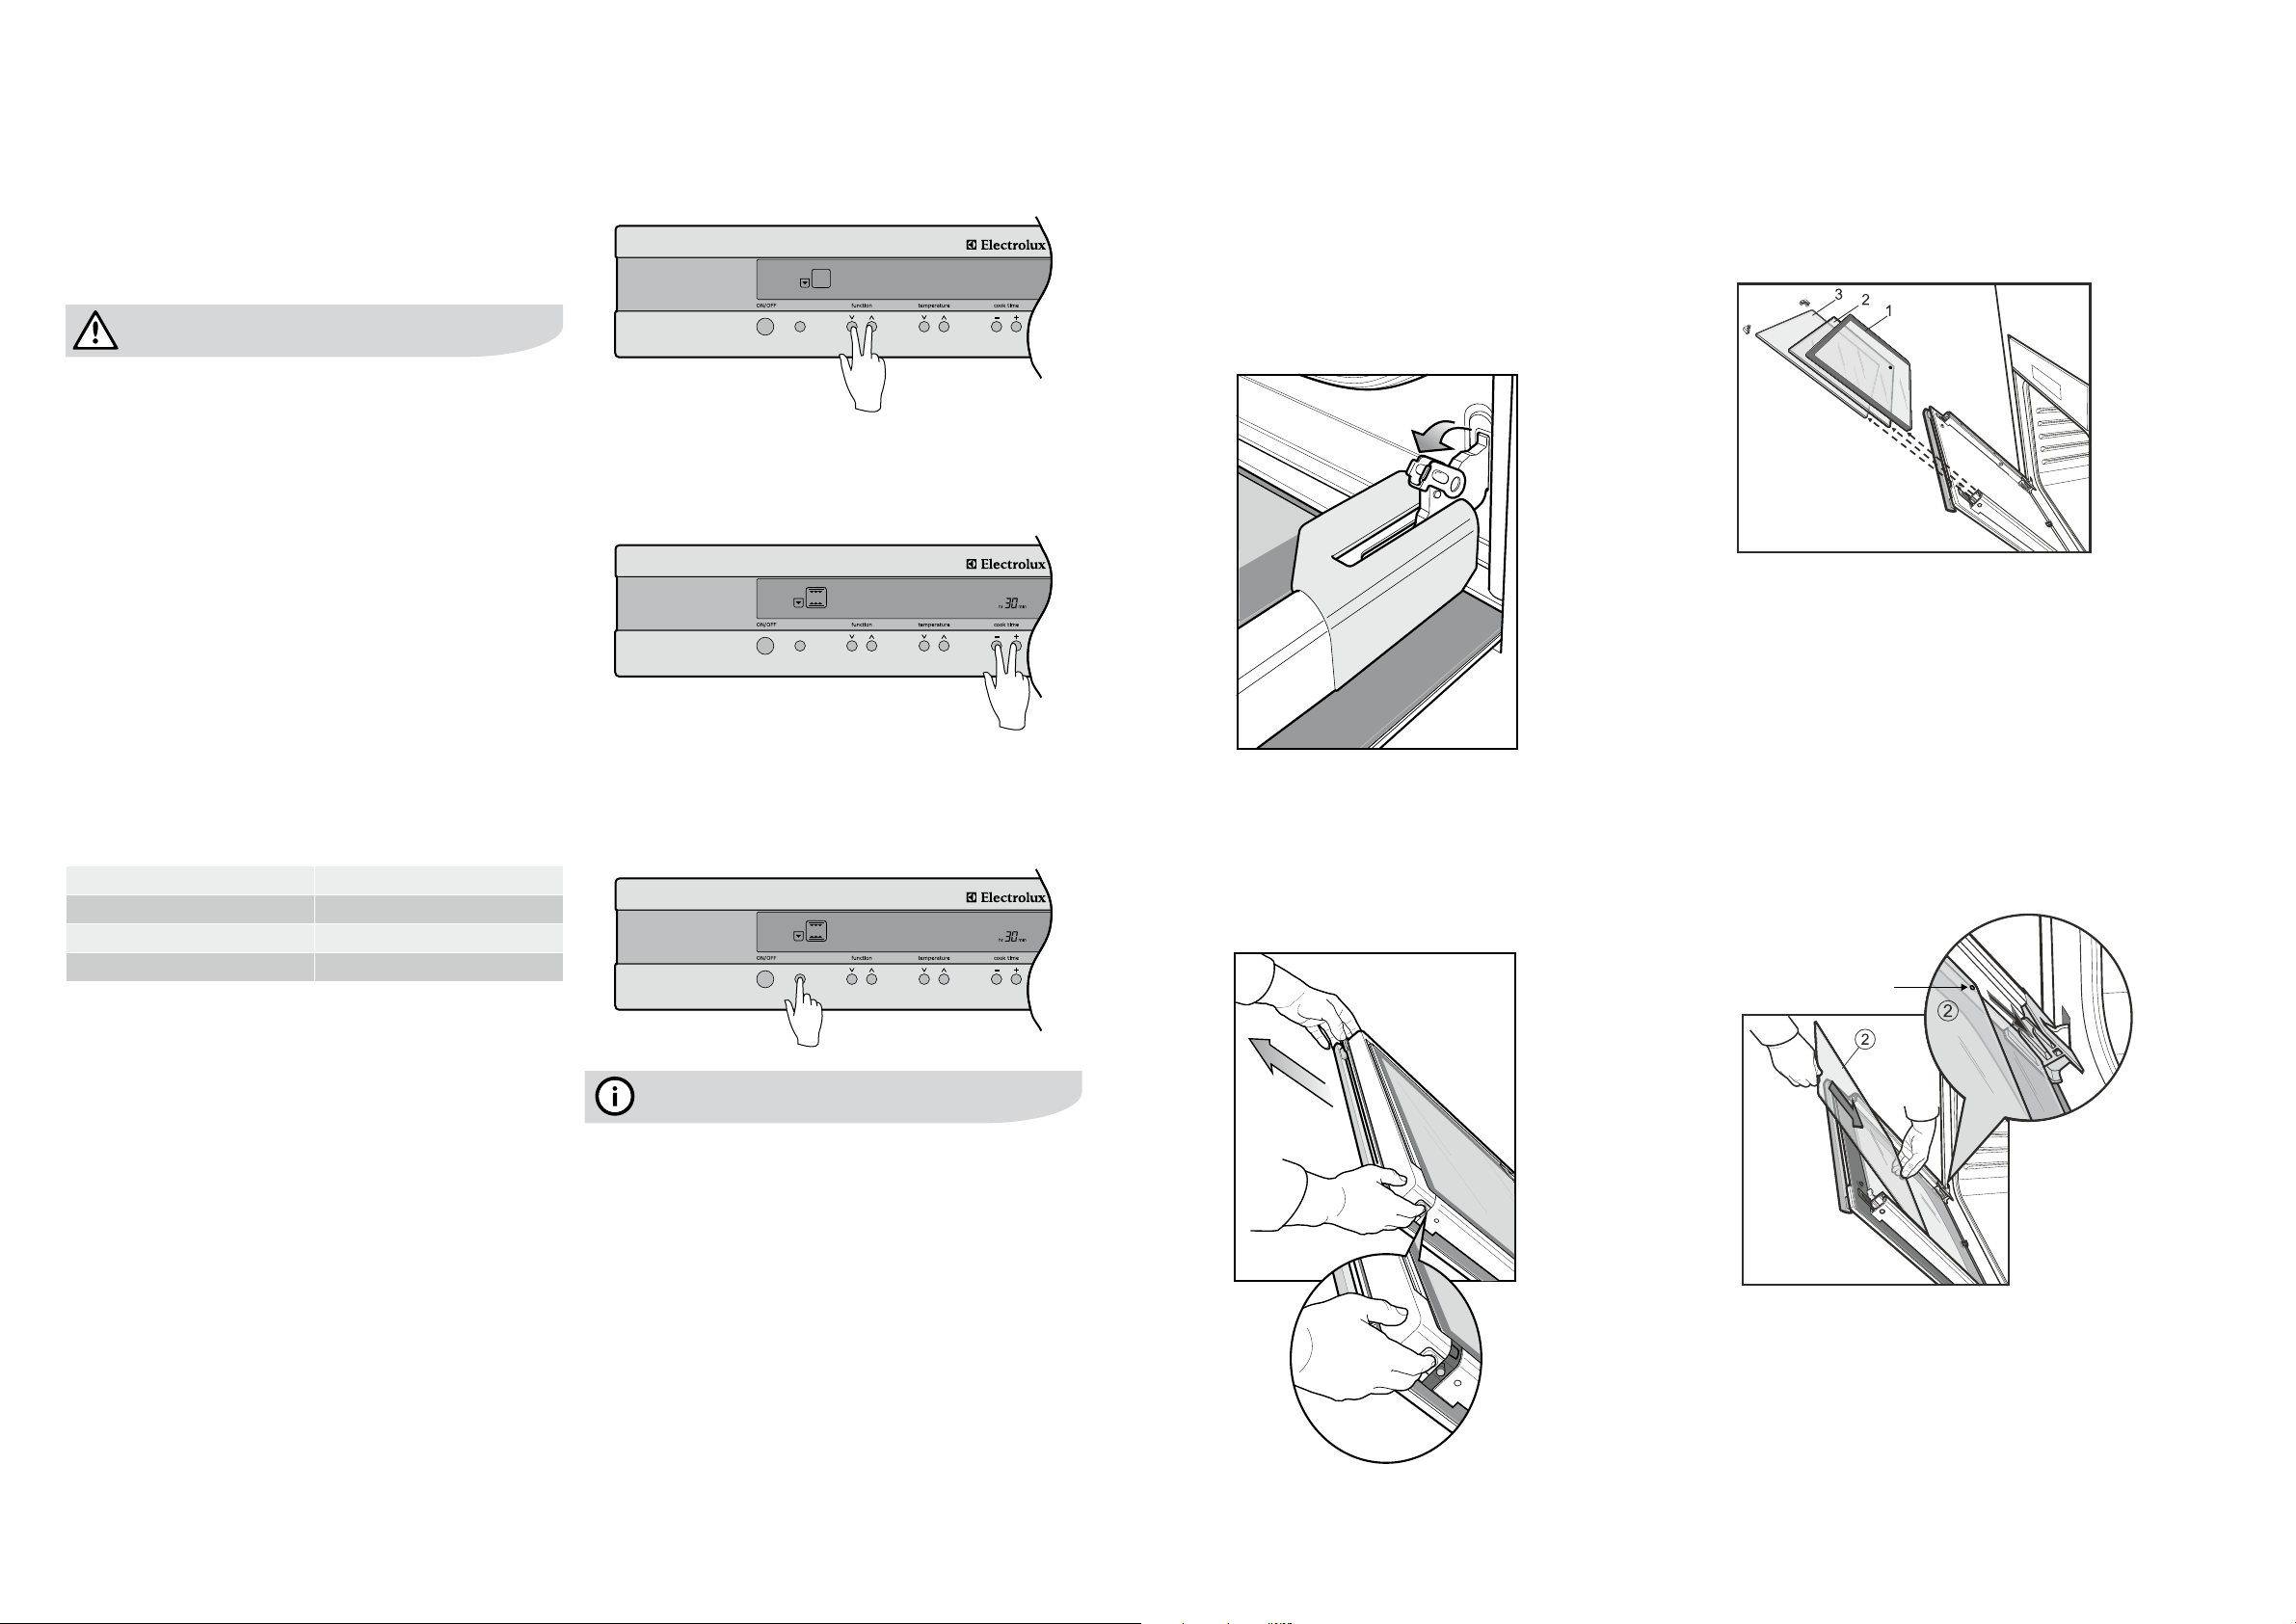
Selecting the Pyro clean function
Select Pyro clean by using the function button.
PYRO CLEAN
pyro accept
Selectingtherequiredcleaningcycle
Select Light, Medium or Heavy depending on the soiling of
the oven. This is done by pushing the cook time button to
the appropriate time.
PYRO CLEAN
Medium clean
2
pyro accept
Selecting Pyro accept
Afterselectingtherequiredcleaningcycle,pushthePyro
accept button and the function will then start automatically.
The oven light will then go out and the Pyro function
will start.
PYRO CLEAN
Medium clean
2
pyro accept
tips and information
During Pyro cleaning the door will automatically lock when
thetemperatureintheovenapproaches300˚C.(Alock
symbol will appear on the display.)
The door will only unlock when the oven has cooled to a
safe temperature. Turning the function off will not unlock
the door. This will only happen when safe temperatures
are reached.
Note:
•
AfterPyrocleaning
Aftercool-downyoucanwipetheashoutoftheoven
with a soft damp cloth and warm water.
To restore the enamel shine to more difficult areas,
use a damp cloth with vinegar and detergent.
Pyrolytic cleaning of the oven cavity
(EPEE63CS&EPEE63CKmodelsonly)
Your pyrolytic oven is equipped with an oven door that can
be disassembled in order to clean all the panes of glass.
Positioning the door for dismantling
The door needs to be positioned at an angle to aid in the
disassembly of the panes.
• Opentheovendoorfullyandipoutthehingelocating
tab to the open position.
• Afterthelocatingtabhasbeenpositioned,gentlyclose
the oven door until it stops on the locating tab. The door
is now ready for dismantling.
Removingthetopdoortrim
• Pushinthe2buttonsoneithersideofthetrim.
• Liftthetrimawayfromthedoor.
Removingtheglasspanes
• Removethe3panesofglassstartingwithpane1.
• Whenremovingpane3ensurethatthe2rubber
supports are removed before cleaning.
Donotmisplacethem!
Cleaning the glass panes
Clean with a damp cloth.
Do not use scouring agents or abrasive sponges as these
coulddamagethereectivesurface.
Dry thoroughly before reassembly.
Replacingtheglasspanes
• Replacetheglasspanesbackintothedoorstartingwith
pane 3.
• Ensurethispaneisplacedintothecorrectslotandthat
the 2 rubber supports are in place.
• Nextreplacepane2.Thereisareectivecoatingon
this pane. This coating is indicated by a circle printed on
its surface. Ensure this circle is in the same corner as
pictured below.
Circle in this corner
• Replacepane1ensuringtheblackscreeningisfacing
inwards towards the oven.
Replacingthetopdoortrim
Replace the trim ensuring the clips snap into the 2 location
holes. Flip the hinge locating tab back into its original
position and close the door.
Whenthepyrolyticcleaningfunctionison,itisadvisable
not to use a cooktop if it is fitted above the oven. This could
cause overheating and damage to both appliances.
Cleaning the pyrolytic oven door
(EPEE63CS&EPEE63CKmodelsonly)
Loading ...
Loading ...
Loading ...