Loading ...
Loading ...
Loading ...
installation electrolux e:line ovens 3332 electrolux e:line ovens installation
warning
Please follow the points below when installing the appliance
Useanauthorisedperson
• Asstatedinthelocalmunicipalbuildingcodesand
other relevant statutory regulations:
• WiringconnectionsmustbeinaccordancewithAS/NZS
3000WiringRulesandanyparticularconditionsofthe
local authority.
• Refertodataplateforratinginformation.Thedata
plate is positioned behind the bottom of the oven door.
The circuit diagram is positioned on the top panel of
the appliance.
• Forapplianceswithopencookingsurfaces,anallpole
disconnect functional switch should be provided near
theapplianceinanaccessibleposition.RefertoAS/
NZS3000clause4.7.1
• Wiringshouldbeprotectedagainstmechanicalfailure.
RefertoAS/NZS3000clauses3.3.2.6,3.9,3.10
• Ameansofdisconnectionwithacontactseparationof
at least 3mm must be supplied in the fixed wiring.
warning
Thisappliancemustbeproperlyearthed.
• Donotlifttheappliancebythedoorhandles.
• Preparethecupboardopeningtomatchyourappliance
measurements. (See diagrams)
• Slideapplianceintothecupboard,ensuringthatthe
supply cable (where fitted) does not kink.
• Topreventtipping,usethescrewssuppliedtosecure
your oven into the cupboard by fastening through the
2 holes to the front panel.
• Wheretheapplianceisbuiltintoacabinet,thecabinet
mustbecapableofwithstanding70°C.Installationinto
lowtemperaturetolerantcabinetry(e.g.Vinylcoated)
may result in deterioration of the low temperature
coating by discolouring or bubbling.
• Iftheapplianceistobeinstalledadjacenttovinyl
wrapped surfaces, use an installation kit available from
thevinyl-wrapsupplier.
• ElectroluxHomeProductscannotacceptresponsibility
for damage caused by installation into low temperature
tolerant cabinets.
• Afterinstallation,testandensurethattheappliance
operates correctly before handing it over to the
customer.
warning
To avoid any potential hazard, you must follow our
instructionswhenyouinstallyourappliance.Failure
to install the appliance correctly could invalidate any
warrantyorliabilityclaimsandleadtoprosecution.
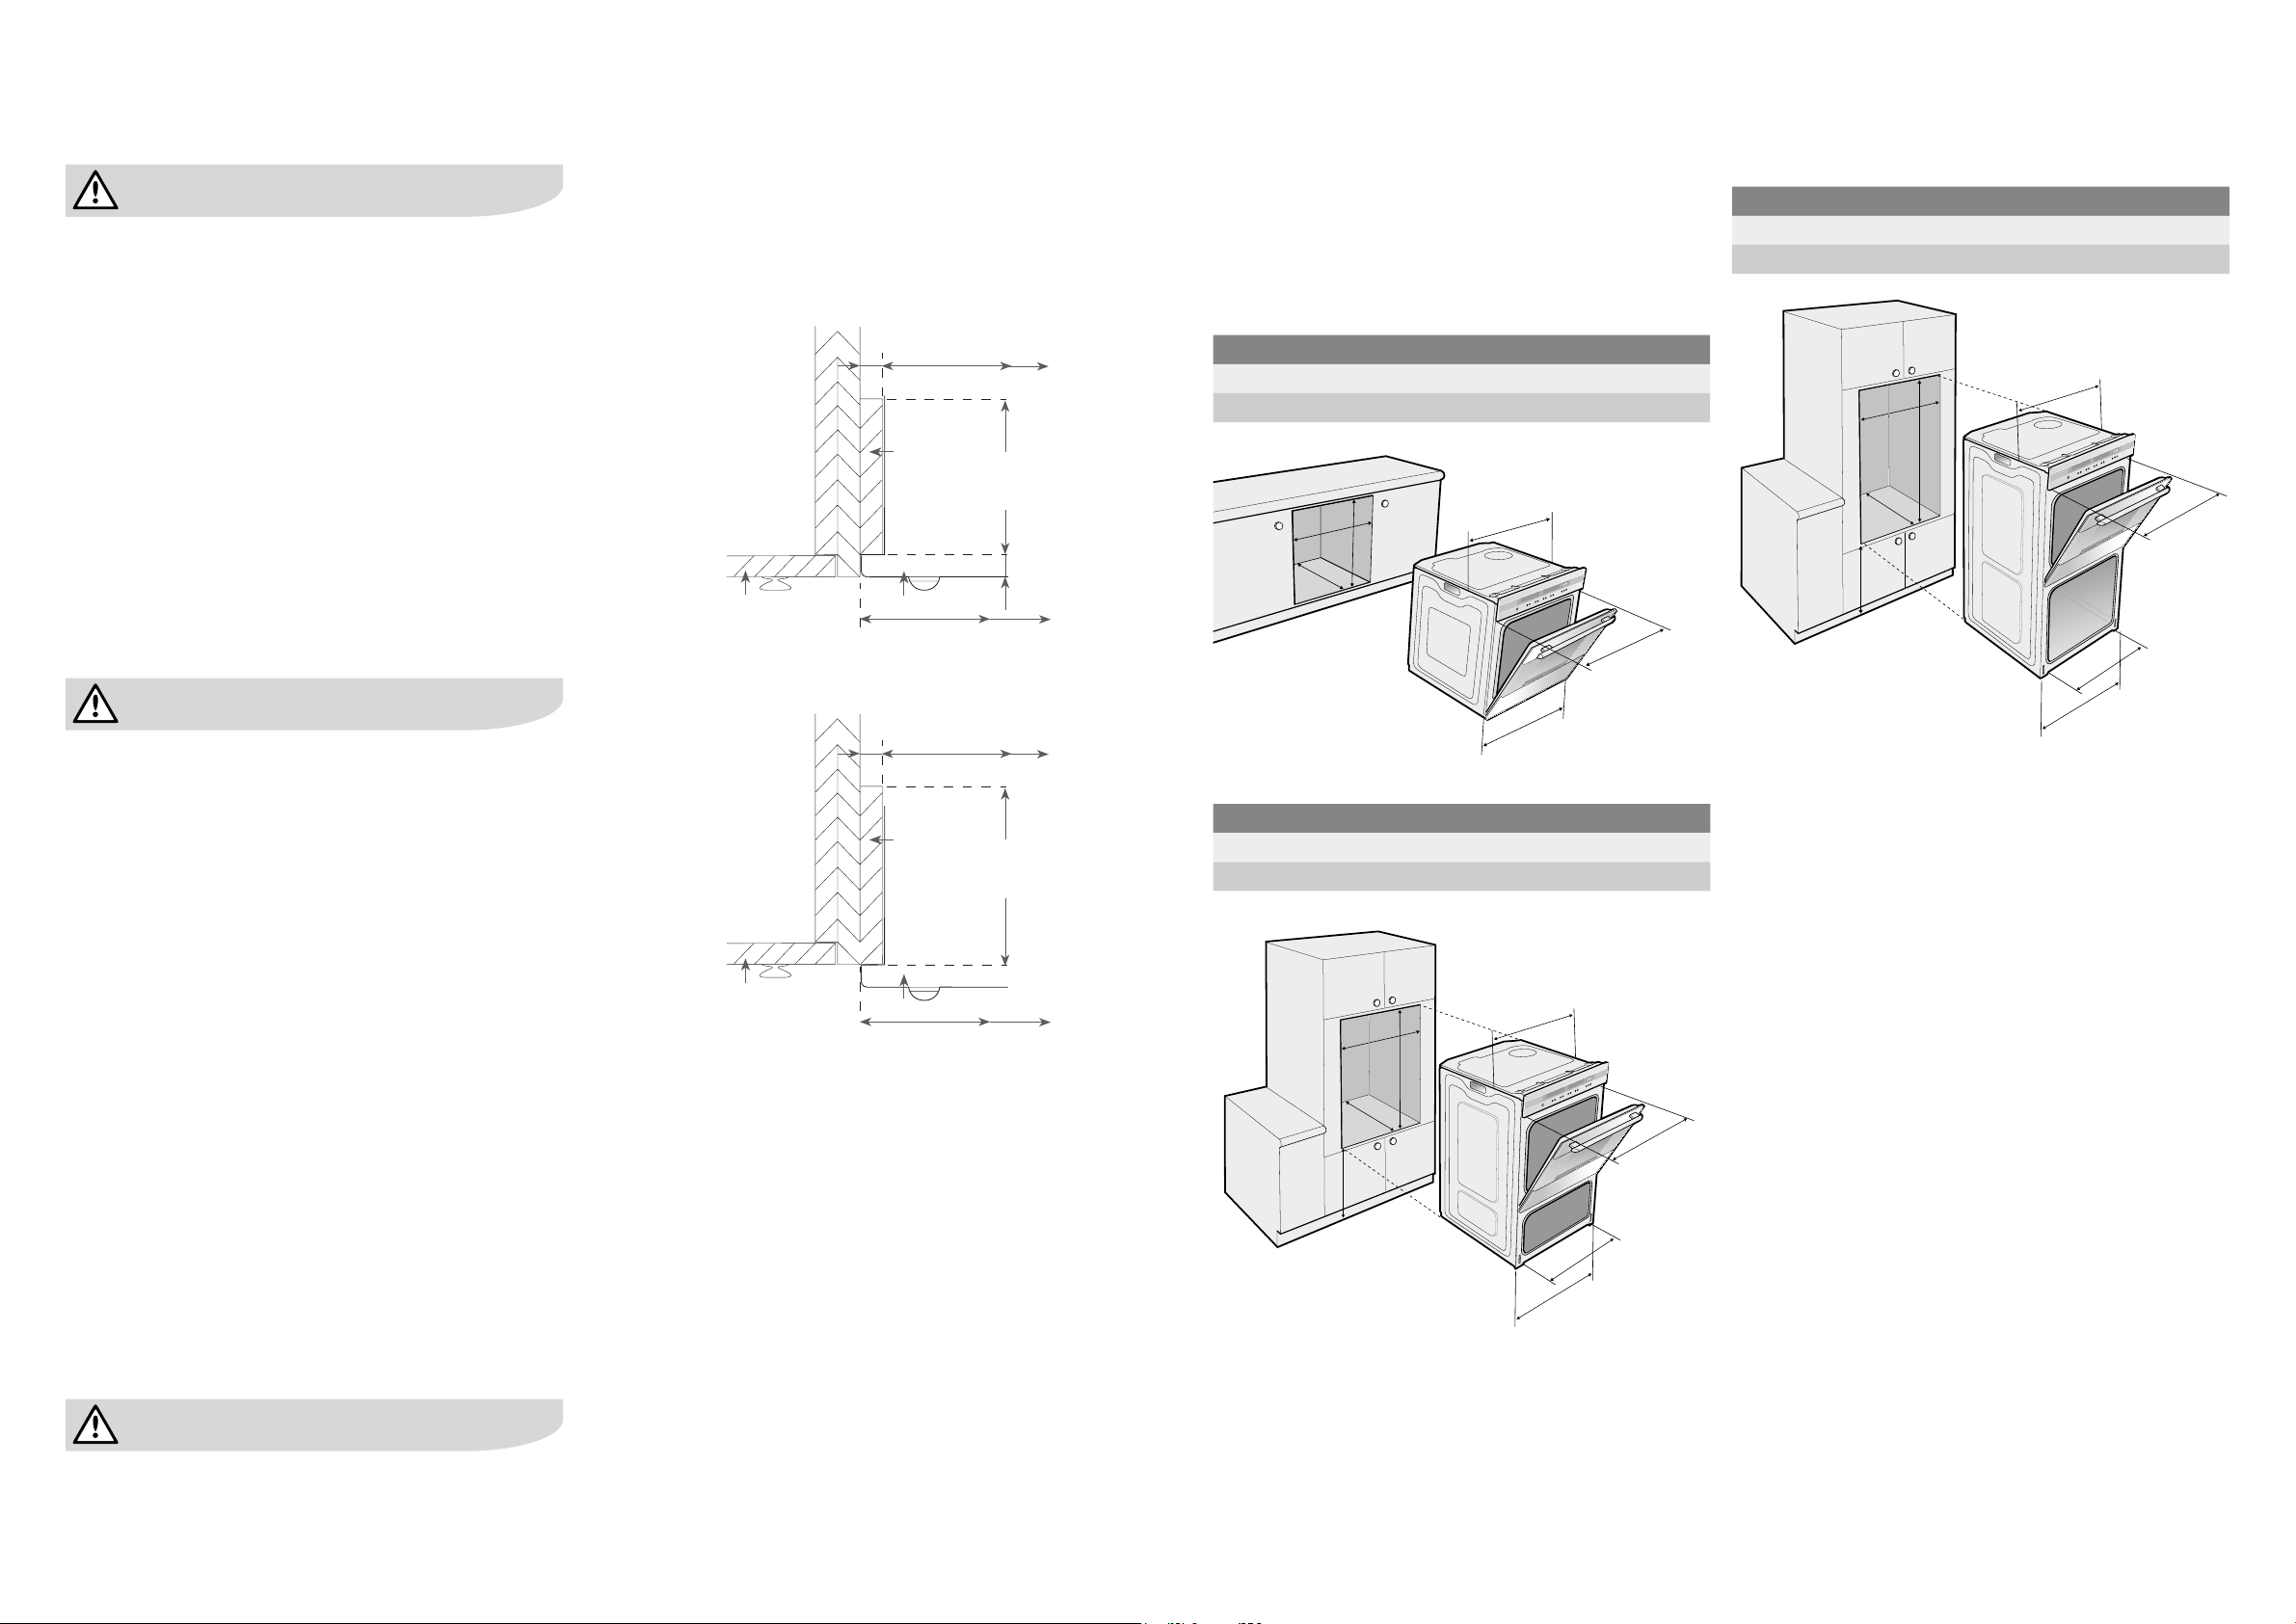
Installation
Cabinet construction for your appliance
For the best integration within a kitchen, install this appliance
inastandard600mmwidecupboardthatgivesausht
withthesurroundingcupboardfronts.Itcanalsobeinstalled
using a proud fit.
FlushFit
16mm
568mm
600mm
20mm
Inll
panel
Cupboard
door
Oven
100mm
max for
Pyro oven
ProudFit
16mm
568mm
600mm
Inll
panel
Cupboard
door
Oven
100mm
max for
Pyro oven
Note:
Underbenchoven
Your underbench oven looks best when the control panel
isdirectlyunderthebenchtop.Anupperinllpanelmay
be added if the cooktop placed above the benchtop is too
deep. Refer to cooktop installation instructions for required
clearance between cooktop and oven.
Cut-out dimensions
type of fit A(width) B(height) C(depth)
Flush fit (mm) 600 600 581min.
Proud fit (mm) 568 590 560min.
A
C
B
561mm
mounting holes
583mm
596mm
DuoovenCut-outdimensions
type of fit A(width) B(height) C(depth)
Flush fit (mm) 600 893 581min.
Proud fit (mm) 568 885 560min.
min. 650mm
A
561mm
mounting
holes
mounting holes
596mm
456mm
B
C
DoubleovenCut-outdimensions
type of fit A(width) B(height) C(depth)
Flush fit (mm) 600 1086 581min.
Proud fit (mm) 568 1078 560min.
min. 650mm
561mm
mounting
holes
A
B
C
mounting holes
596mm
456mm
Loading ...
Loading ...
Loading ...