Loading ...
Loading ...
Loading ...
88 Servicing Your Honda
Valve Clearance
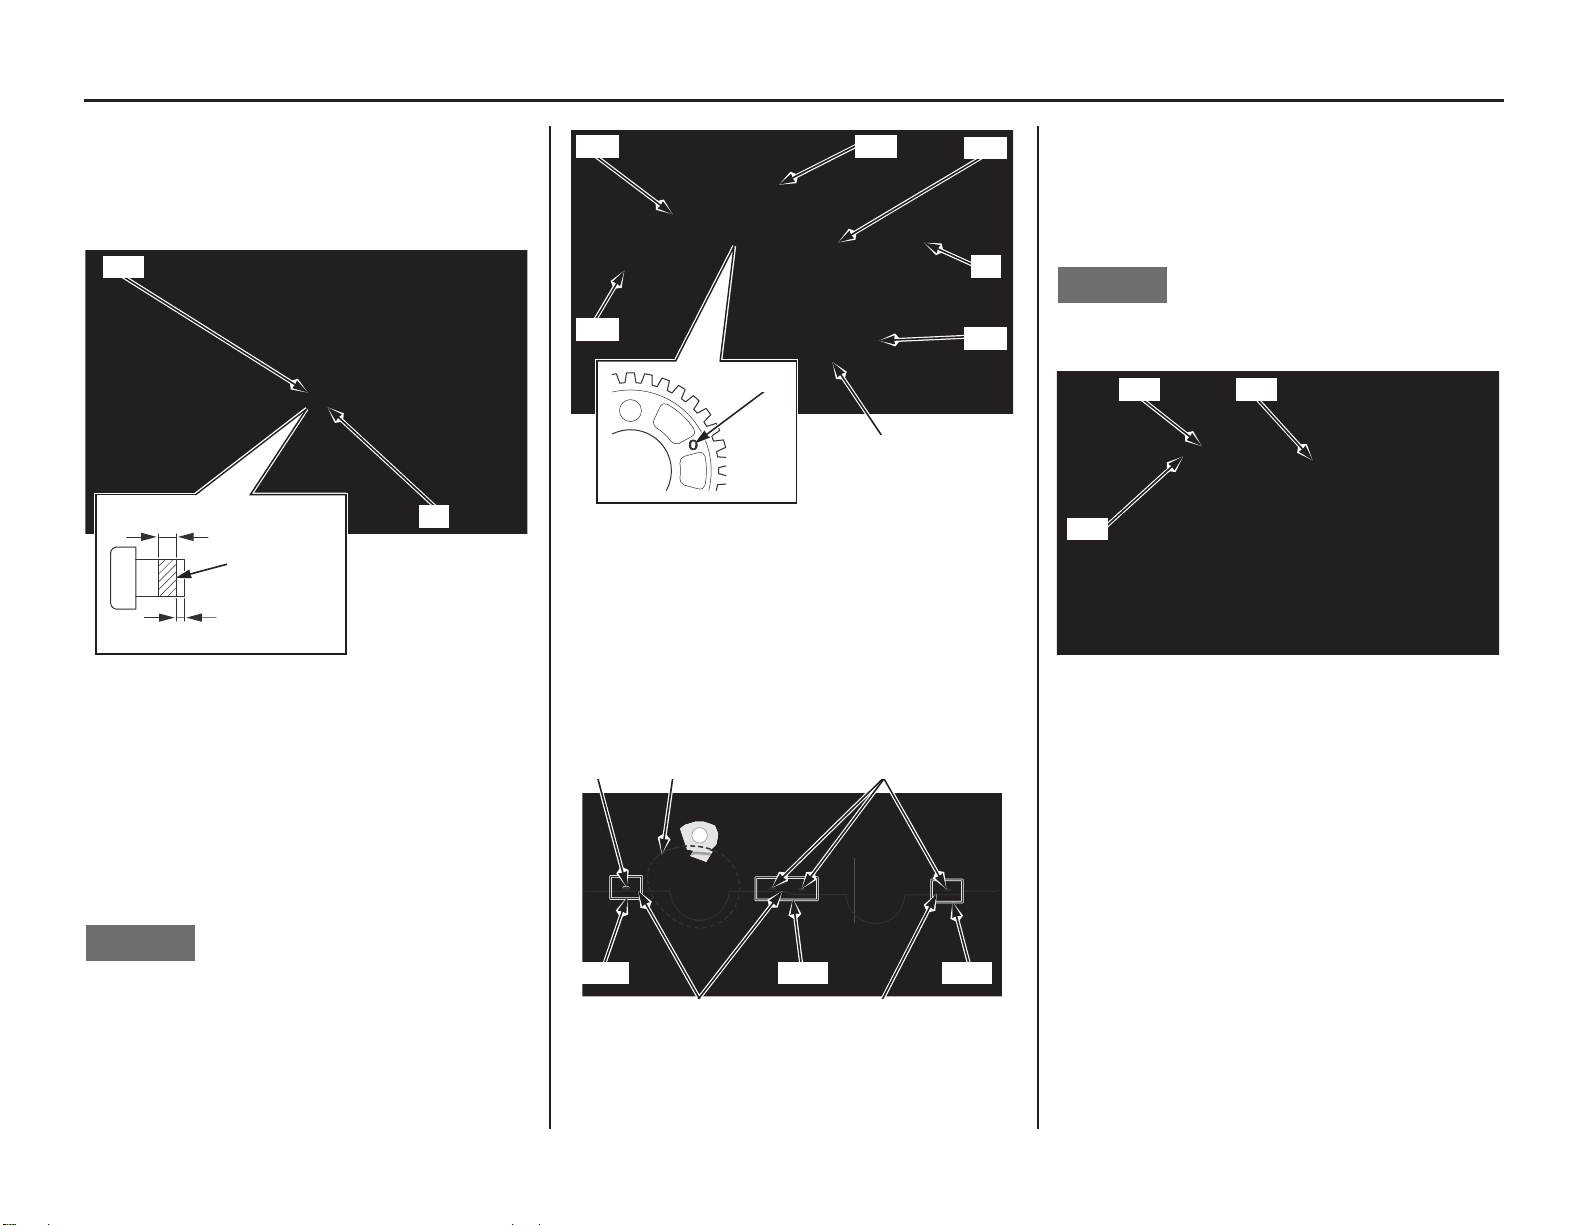
7. Clean the threads of the sealing bolt (9).
Apply locking agent to the bolt threads.
Install a new sealing washer (14) and tighten
sealing bolt to the specified torque:
13 lbf·ft (18 N·m, 1.8 kgf·m)
8. Install the exhaust camshaft (6) onto the
cylinder head (15) with the decompressor
weight (5) facing down as illustrated below.
9. Install the cam chain (16) to the intake (17) and
exhaust (18) cam sprockets while the “O”
mark (19) of the intake cam sprocket is facing
outside as shown.
NOTICE
Do not let the cam chain and intake cam sprocket
fall into the crankcase.
10. Insert the intake camshaft (20) into the intake
cam sprocket (17).
11. Make sure that the timing marks (21) on the
cam sprockets align with the cylinder head
mating surface (22).
Make sure that the intake camshaft cam lobe
(7) is in position as shown.
12. Clean the threads of the cam sprocket bolt (23)
and intake cam sprocket (17) thoroughly.
Install and temporarily tighten the cam
sprocket bolt.
13. Remove the rocker arm shaft stopper bolt (11).
NOTICE
Do not let the cam sprocket bolt and rocker arm
shaft stopper bolt fall into the crankcase.
(9) sealing bolt
(14) sealing washer (new)
(14)
(9)
0.18 ± 0.04 in (4.5 ± 1.0 mm)
0.04 - 0.12 in (1.0 - 3.0 mm)
locking agent
(5) decompressor weight (17) intake cam sprocket
(6) exhaust camshaft (18) exhaust cam sprocket
(15) cylinder head (19) “O” mark
(16) cam chain (20) intake camshaft
(7) camshaft cam lobe
(21) timing marks
(22) cylinder head mating surface
(5)
(18)
(6)
(16)
(20)
(17)
(15)
(19)
(21)
(22)
Align
(22)
Align Align
(21)(7)
(11) rocker arm shaft stopper bolt
(17) intake cam sprocket
(23) cam sprocket bolt
(17)
(23) (11)
Loading ...
Loading ...
Loading ...