Loading ...
Loading ...
Loading ...
Fuel Tank (CRF250R)
34 Servicing Your Honda
Fuel Tank (CRF250R)
Refer to Important Safety Precautions on page 23.
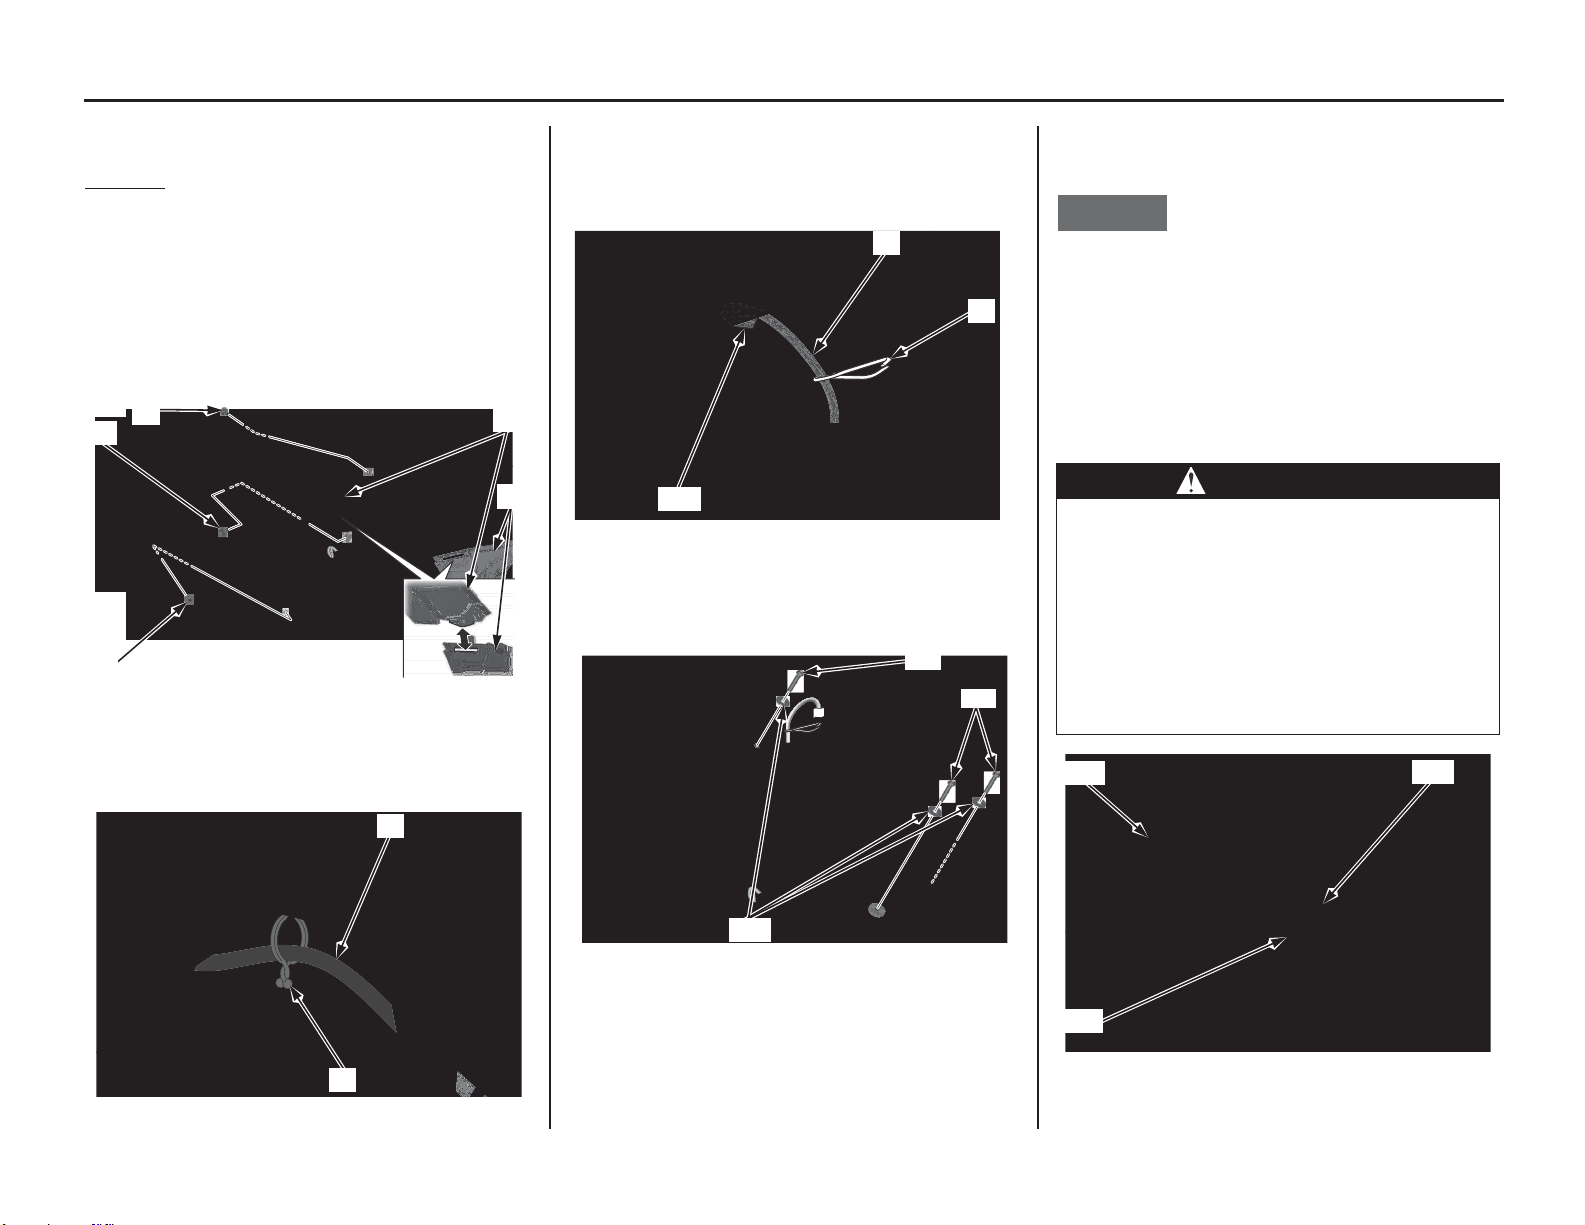
Removal
1. Remove the seat (page 33).
2. Remove the shroud A bolt (1), shroud B bolt
(2) and shroud C bolt (3).
3. Slide the shroud (4) toward the up to separate
from the air cleaner housing cover (5), and
then remove the shroud.
The right and left shrouds can be removed in the
same manner.
4. Disconnect the overflow hose (6) from the
clamp (7).
5. Install a hose clamp (8) to the breather tube (9)
and set the hose clamp securely.
6. Pull the breather tube out of steering stem nut
(10).
7. Remove the fuel tank A bolt (11), B bolts (12)
and washers (13).
8. Lift the fuel tank (14) out of the frame and
hang it to the left of the frame.
Check the fuel tank stopper cable (15) for
deterioration, kinks or other damage.
Do not support the fuel tank by the fuel feed
hose (16).
NOTICE
The fuel tank is made of titanium material. Since
the fuel tank has not been painted, it might be
discolored with mud and dust.
To remove mud or dust, use a sponge or soft cloth
and a stainless steel kitchen detergent, then rinse
well clean water.
After washing, rinse with plenty of water and dry
with a clean cloth.
(1) shroud A bolt (4) shroud
(2) shroud B bolt (5) air cleaner housing cover
(3) shroud C bolt
(6) overflow hose (7) clamp
(4)
(3)
(2)
(1)
(5)
(6)
(7)
(8) hose clamp (10) steering stem nut
(9) breather tube
(11) fuel tank A bolt (13) washers
(12) fuel tank B bolts
(9)
(8)
(10)
(13)
(11)
(12)
WARNING
Gasoline is highly flammable and
explosive.
You can be burned or seriously injured
when handling fuel.
• Stop the engine and keep heat, sparks
and flame away.
• Handle fuel only outdoors.
• Wipe up spills immediately.
(14) fuel tank
(15) fuel tank stopper cable
(16) fuel feed hose
(14)
(15)
(16)
Loading ...
Loading ...
Loading ...