
Loading ...
Loading ...
Loading ...
Emergencies
–
Open the c
o
v
er to access the lights, turning
it by hand in the direction indicated by the
arrows.
–
Access the lights by disconnecting the con-
nector
1
›
›› Fig. 105
and unscrewing
the bulb holder ››› Fig. 105 . Take care not
to lose the bulb holder retaining screw.
–
Change the bulbs ››› page 90.
Changing bulbs
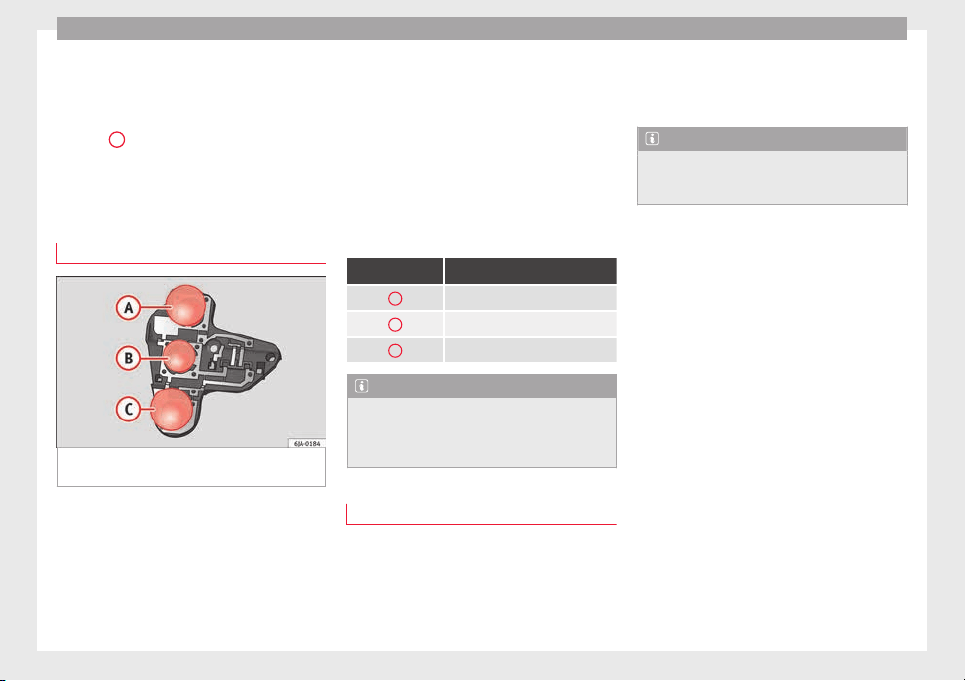
Fig. 106 Position of the bulbs in the bulb
ho
l
der
The bulbs are secured with a bayonet fasten-
er
.
The t
able below gives an overview of the
bulbs ››› table on page 90.
–
Lightly press the defective bulb into the
bulb holder, then turn it anti-clockwise and
remove it.
–
Fit the new bulb, pressing it into the bulb
holder and turn it clockwise as far as it will
go.
–
Use a cloth to remove any fingerprints from
the glass part of the bulb.
–
Check that the new bulb works properly.
–
Re-install the bulb holder ››› page 90.
–
Screw in the bulb holder.
Position of the bulbs
››› Fig. 106 Bulb function
A
Reversing lights: P21W
B
Side lights: R5W LL
C
Fog lights: P21W
Note
One of the two sides may not be fitted with a
fog light, depending on the c
ountry and type
of driving. In this case, the hole for the light
is covered.
Fitting the bulb-holder
–
Position the bulb holder on the tail light
and align it
so th
at
it is securely seated.
–
Screw in the bulb holder using the corre-
sponding screw.
–
Make sure the connector is correctly in
place.
–
Close the inner trim cover.
Note
Check the condition of the seal. If damaged, a
repl
acement can be acquired from an Official
Service.
90
Loading ...
Loading ...
Loading ...