Loading ...
Loading ...
Loading ...
Getting started
TQBS0146
12
When this unit is connected to the network, you
can enjoy network functions (Ultra HD Blu-ray
Playback, DLNA function, Network Service, TV
Anytime, etc.).
For details about connection method, refer to the
instructions supplied with the connected
equipment.
• Use category 5 or above straight LAN cables (STP) when
connecting to peripheral devices.
About wireless LAN connection (> 14, Easy
Network Setting)
• The unit is not compatible with public wireless LAN
services.
Settings
Before use, perform the initial setup of the unit.
1 Turn on the TV, then select the appropriate
AV input to suit the connections to this unit.
2 Press [Í] on the remote control or touch
[Í/I] on this unit.
• The Easy Setting will start at the initial power on.
• The “Region Selection” will appear. Select the region
you live in, and press [OK].
3 Follow the on-screen instructions and
perform the settings.
Auto Setup starts.
(This operation may take some time.)
e.g.,
4 Clock is set automatically.
If the clock setting screen appears, set the
time manually. (> 80, Clock)
5 Set the connection setting for the 4K TV.
When connected to a 4K (50p or
60p)-compatible TV, connection setting to 4K
TV below is displayed.
The screen above does not appear for a
non-4K compatible TV. Proceed to Step 6.
1 Press [OK] to start the setting.
A black screen appears for a few seconds
and then a message appears.
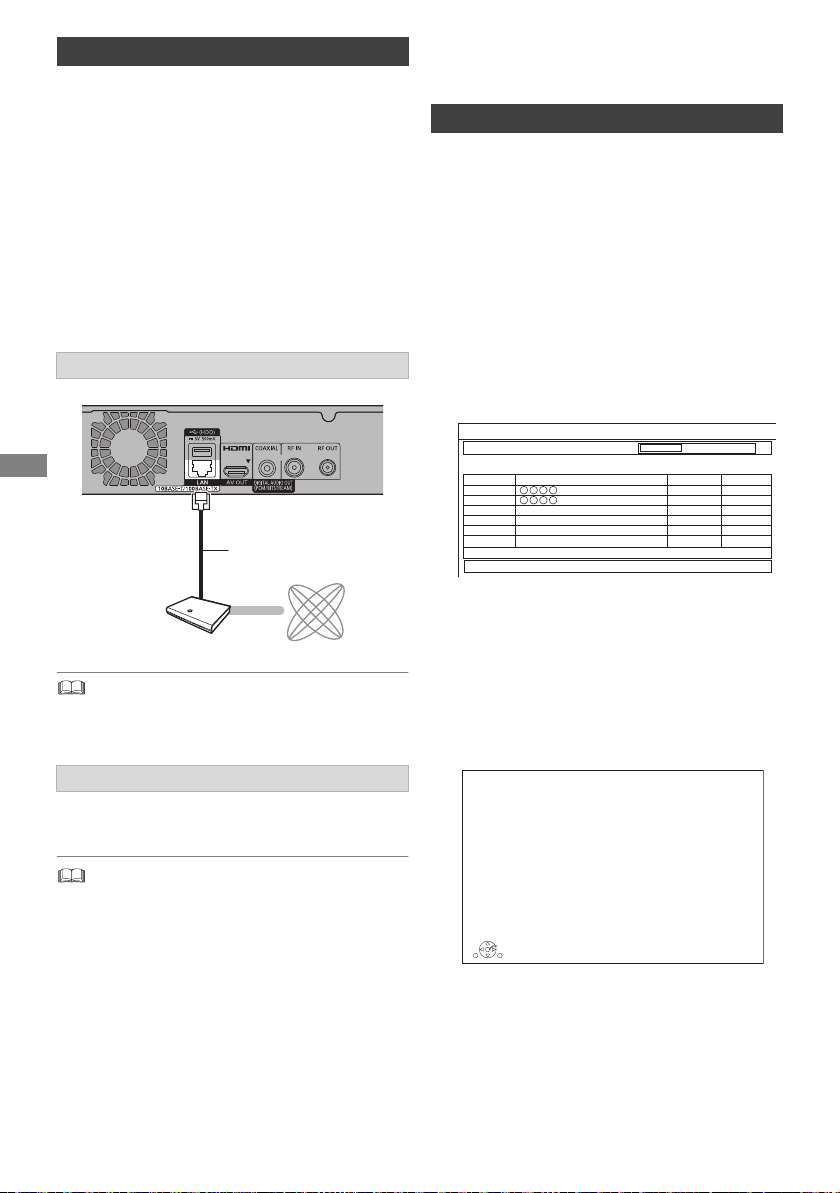
Network connection
After you make the LAN cable/Wireless LAN
connection, the network setting is needed.
(> 14, Easy Network Setting)
LAN cable connection
Wireless LAN connection
Broadband
router, etc.
Internet
LAN (ethernet)
cable
Easy Setting
Progress
Digital TV Auto Tuning
CH 6 69
RF Ch
Digital TV: 2
Searching
Quality
Type
Channel Name
This will take about 3 minutes.
35
10
10
35
Digital TV
Digital TV
4K(50p/60p) Output
Start connection check with your 4K TV.
Once connection check is started and if the video is not displayed
correctly, please wait for the next display. The connection check
could take up to 30 seconds to display the new message screen.
Press OK.
OK
RETURN
DMR-UBT1GL_eng.book 12 ページ 2017年7月25日 火曜日 午後1時45分
Loading ...
Loading ...
Loading ...