Loading ...
Loading ...
Loading ...
34
Start the descaling programme.
The descaling programme can only be started once the
cooking compartment has completely cooled down. There must
be no residual heat (
œ or •) shown in the display.
If you have cooked using steam immediately before descaling,
you must first switch the appliance off so that the residual water
is pumped out of the evaporator system.
1. Dissolve the descaling tablets in water to make a descaling
solution.
Note: Follow the manufacturer's instructions for the descaling
tablets.
2. Switch on the appliance.
3. Press and hold the Í descaling button for 3 seconds.
"Pour descaling solution into tank and press Start button" and
š†™ are displayed.
4. Fill the water tank with 400 ml of descaling solution and slide
it in fully. Dispose of the rest of the descaling solution and
rinse with water.
5. Press the ƒ Start button.
The
ƒ symbol lights up The descaling starts.
Notes
■ If the water tank has not been filled, a signal sounds and the
Descale programme does not start. Fill the water tank with
the descaling solution and slide it in fully.
■ If a signal sounds and the ƒ symbol flashes, this indicates
that the
ƒ Start button has not been pressed. Press the
ƒ Start button.
■ The clock display shows how long the Descale programme
has left to run.
1st rinse
After the descaling is complete, a signal sounds and "Empty
tank and refill with fresh water" is displayed in the text display.
1. Empty the water tank, rinse it out thoroughly and fill it with
400 ml fresh water.
2. Slide in the water tank all the way.
"1st rinse" and
§ü‚ are displayed (rinsing1 = 1st rinse). The
ƒ symbol flashes.
3. Press the ƒ Start button.
The
ƒ symbol lights up The appliance starts rinsing.
After the 1st rinse is complete, a signal sounds and "Empty
tank and refill with fresh water" is displayed in the text display.
2nd rinse
1. Empty the water tank, thoroughly rinse it and fill it with 400 ml
fresh water.
2. Slide in the water tank all the way.
"2nd rinse" and
§ü ƒ are displayed (rinsing2 = 2nd rinse). The
ƒ symbol flashes.
3. Press the ƒ Start button.
The
ƒ symbol lights up The appliance starts rinsing.
After the 2nd rinse is complete, a signal sounds and "Empty
tank and clean" and "Descaling complete" are displayed in the
text display.
Removing the remaining water
1. Empty and thoroughly rinse out the water tank.
2. Switch off the appliance.
Self-cleaning surface
The back wall of the cooking compartment is coated with self-
cleaning enamel. This coating absorbs and disintegrates
splashes from baking and roasting while the oven is in
operation.
Large splashes only disappear after the oven has been used
several times.
Discolouration on the rear wall does not affect the self-cleaning
function.
Caution!
Damage to surfaces on self-cleaning areas due to applying
oven cleaner.Never clean the self-cleaning surfaces with oven
cleaner.
If oven cleaner accidentally gets onto self-cleaning surfaces,
remove it immediately with a sponge and plenty of water.
Caution!
Damage to surfaces on self-cleaning areas due to the use of
abrasive and acidic cleaning agents and aids.
Do not use cleaning agents containing abrasive substances or
acids.
Do not use abrasive cleaning aids such as steel wool or
scourers.
EasyClean®
Your appliance comes with an > EasyClean® function to
make cleaning the cooking compartment easier. An
automatically controlled vaporisation of soapy water loosens
residues and makes it easier to remove them afterwards.
In the case of persistent dirt, you can
■ allow the soapy water to penetrate for a while before
switching on EasyClean
■ rub detergent onto the dirty surfaces before switching on the
cleaning aid
■ repeat the EasyClean® function once the cooking
compartment has cooled
Preparation and switching on
EasyClean® only starts when the cooking compartment is cool.
: Risk of scalding and surface damage!
Never pour water into the cooking compartment when it is hot.
Water vapour will be created and the enamel may be damaged
because of the change in temperature.
1. Remove the accessories from the cooking compartment.
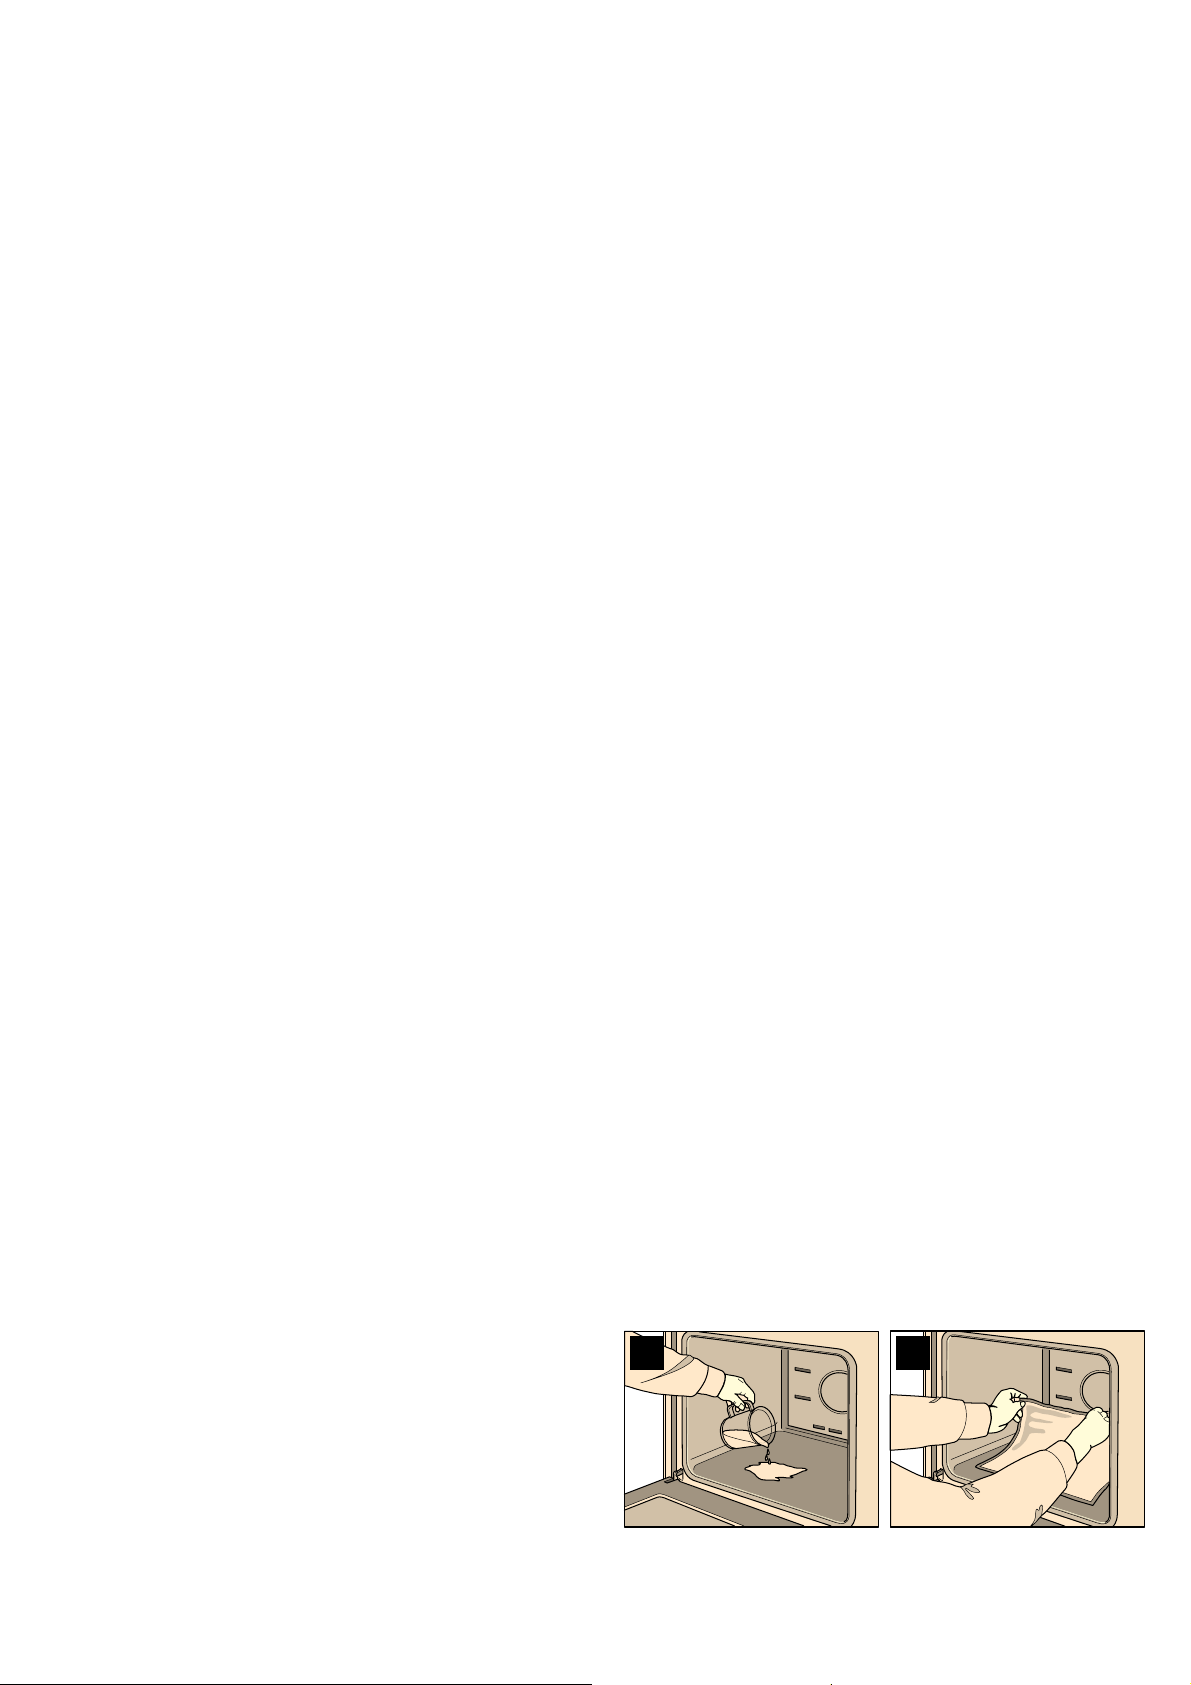
2. Carefully pour 0.4 litres of water (not distilled water) with
some detergent into the base trough of the cooking
compartment (Fig. A).
3. Close the appliance door.
4. Switch on EasyClean®.
"EasyClean in operation" appears in the text display and
“’†
in the temperature display.
If, after EasyClean is switched on, "Not possible" appears in
the text display and
œ or • and “’† appear alternately in the
temperature display, the cooking compartment has not
completely cooled down.
Wait until the cooking compartment has cooled down and
switch EasyClean® on again.
Once EasyClean® has finished, the cooking compartment
light switches on and "EasyClean complete" appears in the
text display. A signal sounds.
5. Press the clock function button to exit the clock function.
$ %
Loading ...
Loading ...
Loading ...