Loading ...
Loading ...
Loading ...
68 Servicing Your Honda
Air Cleaner
4. Wash the air cleaner in clean non-flammable
cleaning solvent such as Pro Honda foam air
filter cleaner. Then wash in hot, soapy water,
rinse well, and allow to dry thoroughly. The air
cleaner element is made in two pieces: inner
and outer, which cannot be separated.
5. Clean the inside of the air cleaner housing (7).
6. Allow the air cleaner to dry thoroughly. After
drying, apply 1.4 US oz (40 cm
3
) of clean Pro
Honda Foam Air Filter Oil or an equivalent air
cleaner oil from the inside of the element.
Place the element into a plastic bag (8) and
spread the oil evenly by hand.
7. Assemble the air cleaner element and holder.
Install the holder tab in the hole of the air
cleaner element.
8. Apply 0.05 – 0.19 oz (1.5 – 5.5 g) of Pro Honda
Foam Air Filter Sealer or equivalent to the air
cleaner element contact area (9) of the air
cleaner housing.
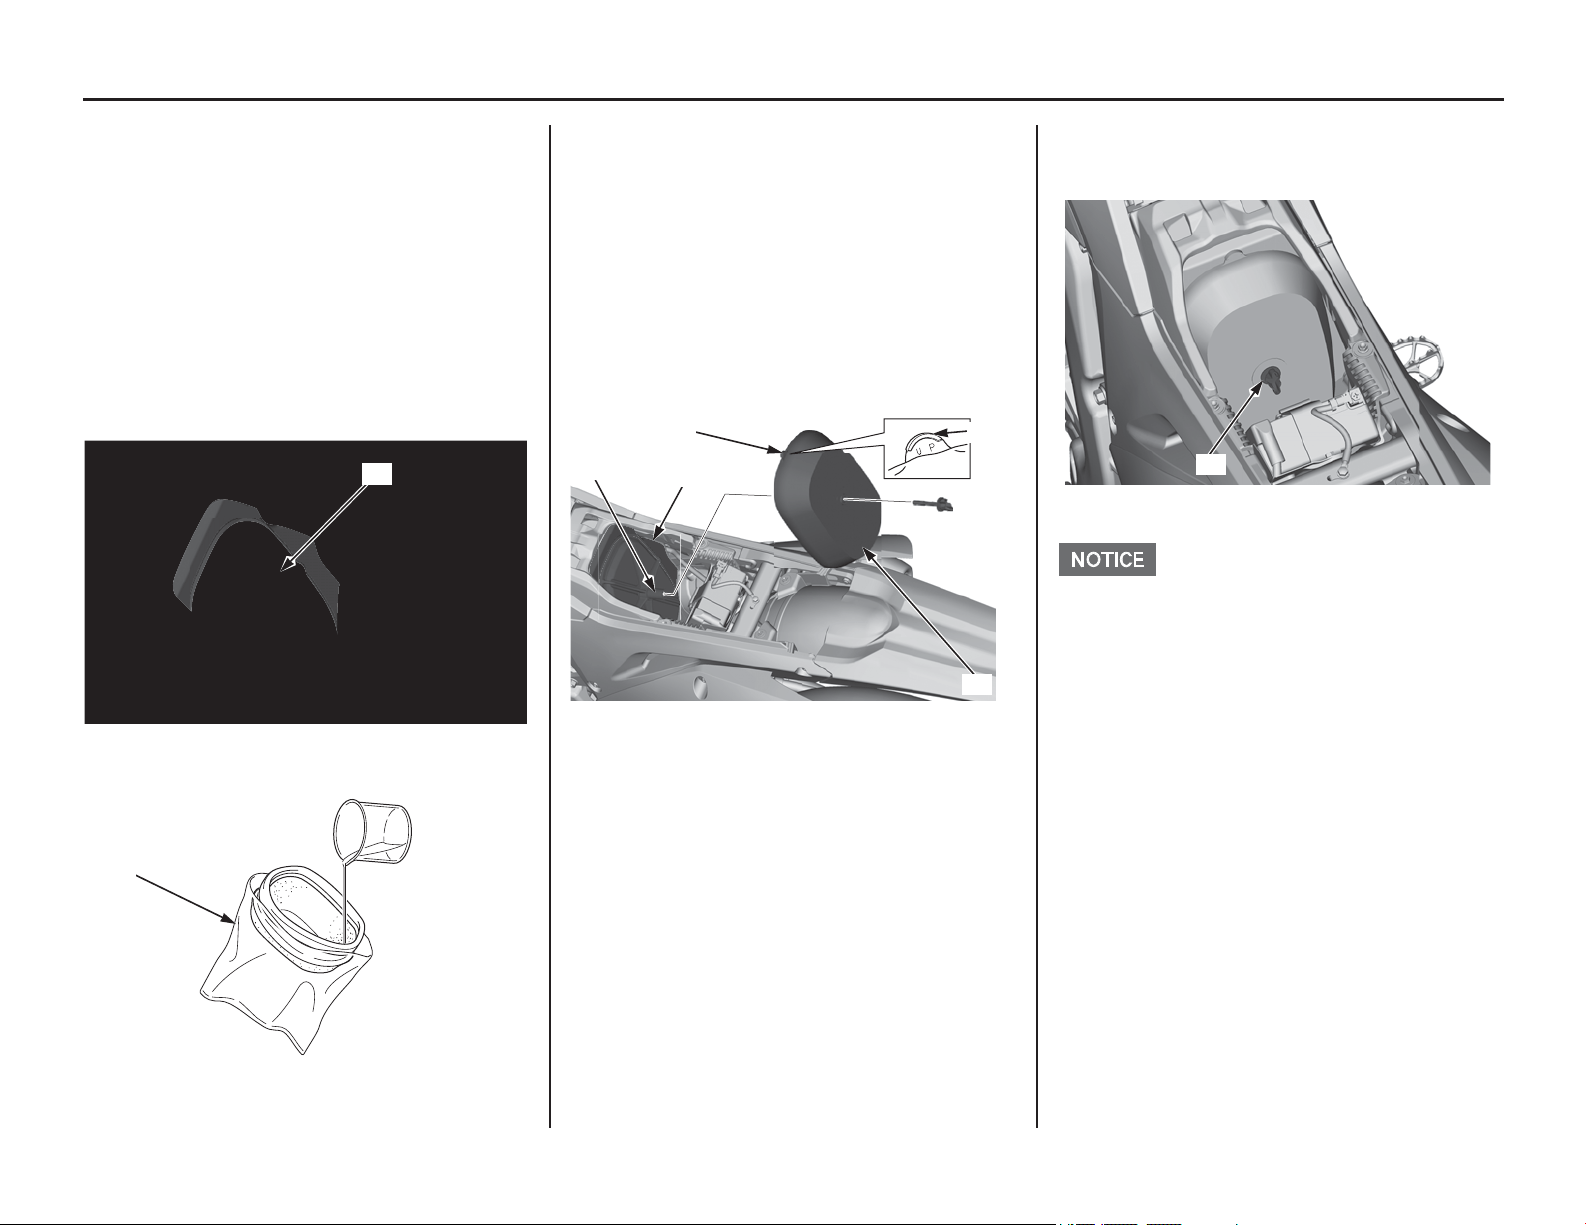
9. Install the air cleaner assembly (2) into the air
cleaner housing stay (10) with the “UP” mark
tab (11) facing up.
10. Carefully position the sealing flange of the
element to prevent dirt intrusion.
11. Install and tighten the air cleaner retaining bolt
(1) to the specified torque:
1.7 lbf·ft (2.4 N·m, 0.2 kgf·m)
Improper installation of the air cleaner assembly
may allow dirt and dust to enter the engine and
cause rapid wear of the piston rings and cylinder.
12. Install the seat (page 34).
(7) air cleaner housing
(8) plastic bag
(7)
(8)
(2) air cleaner assembly
(9) contact area
(10) air cleaner housing stay
(11) “UP” mark tab
(11) (11)
(10)
(2)
(9)
(1) air cleaner retaining bolt
(1)
Loading ...
Loading ...
Loading ...