Loading ...
Loading ...
Loading ...
40 Servicing Your Honda
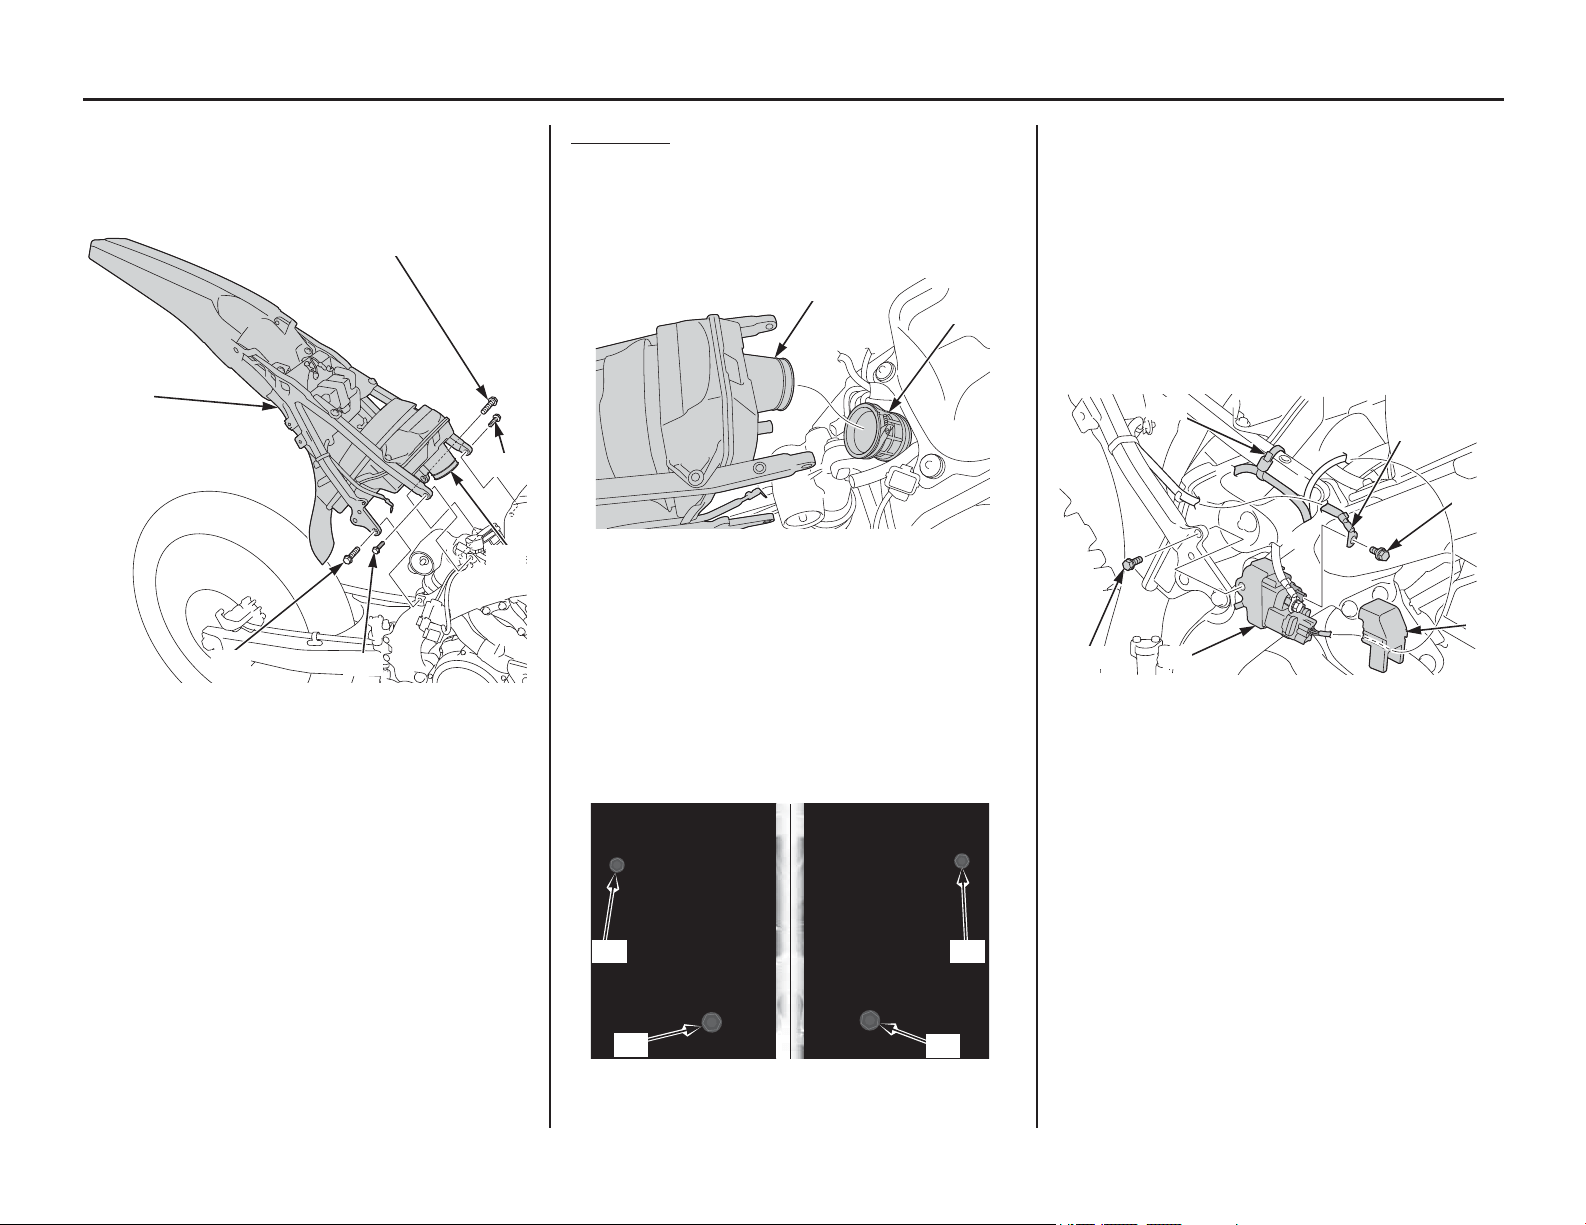
Subframe
11. Remove the subframe lower bolts (17) and
upper bolts (18).
Remove the subframe (5) while disconnecting
the air cleaner connecting tube (19).
Installation
1. Align the upper and lower ends of the
subframe to the main frame while connecting
the air cleaner box (1) to the air cleaner
connecting tube (2), and loosely install all
subframe bolts.
2. Tighten the subframe upper bolts (3) first and
then tighten the lower bolts (4) to the specified
torque:
subframe upper bolts:
24 lbf·ft (32 N·m, 3.3 kgf·m)
subframe lower bolts:
36 lbf·ft (49 N·m, 5.0 kgf·m)
3. Connect the battery cable terminal (5) to the
start magnetic switch (6).
Install and tighten the battery cable terminal
bolt (7) to the specified torque:
5.2 lbf·ft (7 N·m, 0.7 kgf·m)
Install the start magnetic switch cover (8).
Install the start magnetic switch.
Install and tighten the start magnetic switch
stay bolt (9) to the specified torque:
9 lbf·ft (12 N·m, 1.2 kgf·m)
Install the plastic wire band (10).
(5) subframe
(17) subframe lower bolts
(18) subframe upper bolts
(19) air cleaner connecting tube
(5)
(17)
(17)
(18)
(19)
(18)
(1) air cleaner box
(2) air cleaner connecting tube
(3) subframe upper bolts
(4) subframe lower bolts
(1)
(2)
Left side:
Right side:
(3)
(4)
(4)
(3)
(5) battery cable terminal (8) start magnetic switch
cover
(6) start magnetic switch
(7) battery cable terminal
bolt
(9) start magnetic switch
stay bolt
(10) wire band
(5)
(7)
(8)
(6)(9)
(10)
Loading ...
Loading ...
Loading ...