Loading ...
Loading ...
Loading ...
Servicing Your Honda 41
Subframe
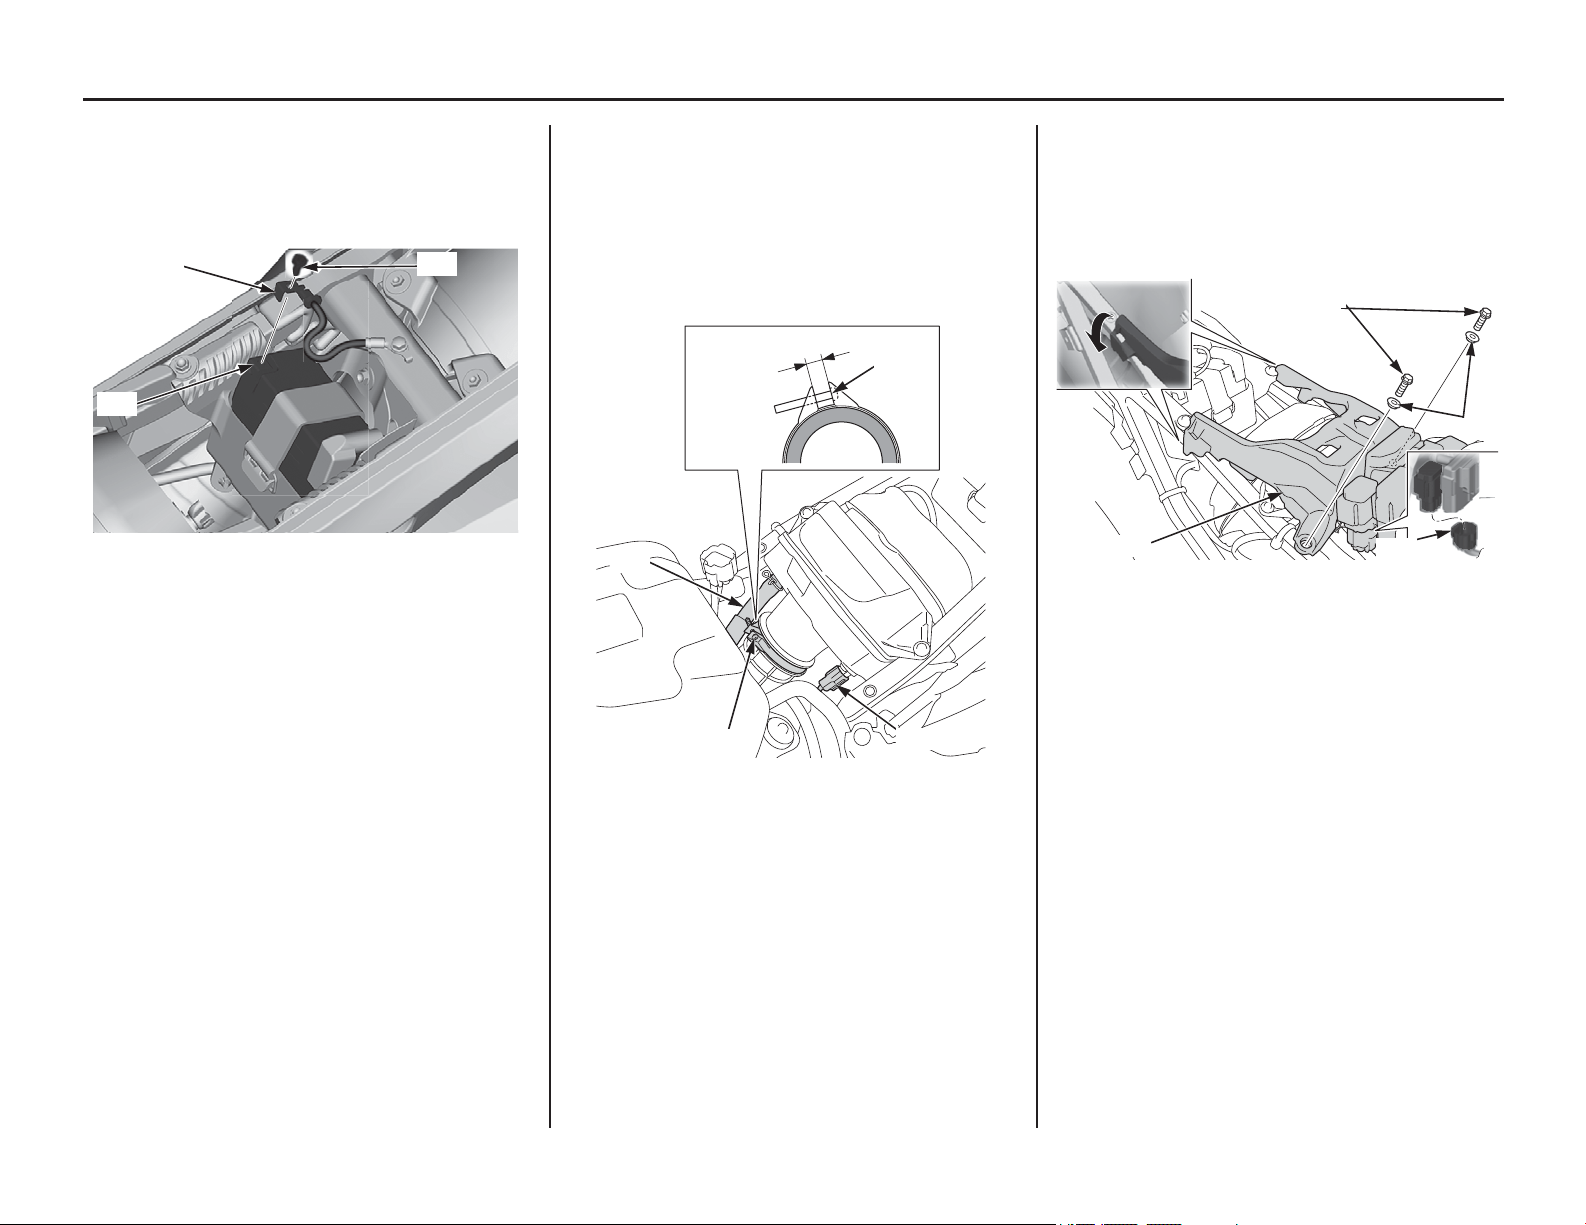
4. Connect the negative (–) terminal (11) to the
battery (12).
Tighten the negative (–) terminal bolt (13) to
the specified torque:
1.5 lbf·ft (2.0 N·m, 0.2 kgf·m)
5. Make sure that the air cleaner box and the air
cleaner connecting tube are correctly
connected and tighten the air cleaner
connecting tube clamp screw (14) so the
distance between the clamp ends is 0.24 - 0.35
in (6 - 9 mm).
6. Connect the breather tube (15) and IAT sensor
connector (16).
7. Connect the starter/ignition relay connector
(17) and install the seat support base (18).
8. Install and tighten the collars (19), and seat
support base mounting bolts (20) to the
specified torque:
7 lbf·ft (10 N·m, 1.0 kgf·m)
9. Tighten the right and left muffler mounting A
bolts, and right and left muffler joint pipe
clamp bolts (page 133). (CRF450RWE only)
10. Install the left and right mufflers (page 127).
11. Install the right and left shrouds (page
36,
page 38).
12. Install the seat (page 34).
(11) negative (–) terminal
(12) battery
(13) negative (–) terminal bolt
(12)
(11) (13)
(14) air cleaner connecting tube clamp screw
(15) breather tube
(16) IAT sensor connector
(15)
(14)
0.24 - 0.35 in (6 - 9 mm)
(14)
(16)
(17) starter/ignition relay connector
(18) seat support base
(19) collars
(20) seat support base mounting bolts
(17)
(18)
(20)
(19)
Loading ...
Loading ...
Loading ...