Loading ...
Loading ...
Loading ...
64 Servicing Your Honda
Engine Oil
5. Place an oil drain pan under the engine to catch
the oil. Then remove the engine oil drain bolt
(5)
and O-ring (6).
6. With the engine stop but
ton pushed, pull the
clutch lever all the way in, and depress the start
button to drain the engine oil completely.
7. After the oil has drained, apply engine oil to
the drain bolt threads, seating surface and a
new O-ring, then install the O-ring on the drain
bolt and tighten the drain bolt to the specified
torque:
13 lbf·ft (18 N·m, 1.8 kgf·m)
Pour the drained oil into a suitable container and
dispose of it in an approved manner (page 164).
Improper disposal of drained fluids is harmful to
the environment.
8. (CRF450RX)
It is recommended to replace the oil and filter
every 4 races or about every 15.0 hours.
However, if you replace only the oil before the
recommended interval, see page 25.
(CRF450R/RWE)
It is recommended to replace the oil and filter
every 6 races or about every 15.0 hours.
However, if you replace only the oil before the
recommended interval, see page 26.
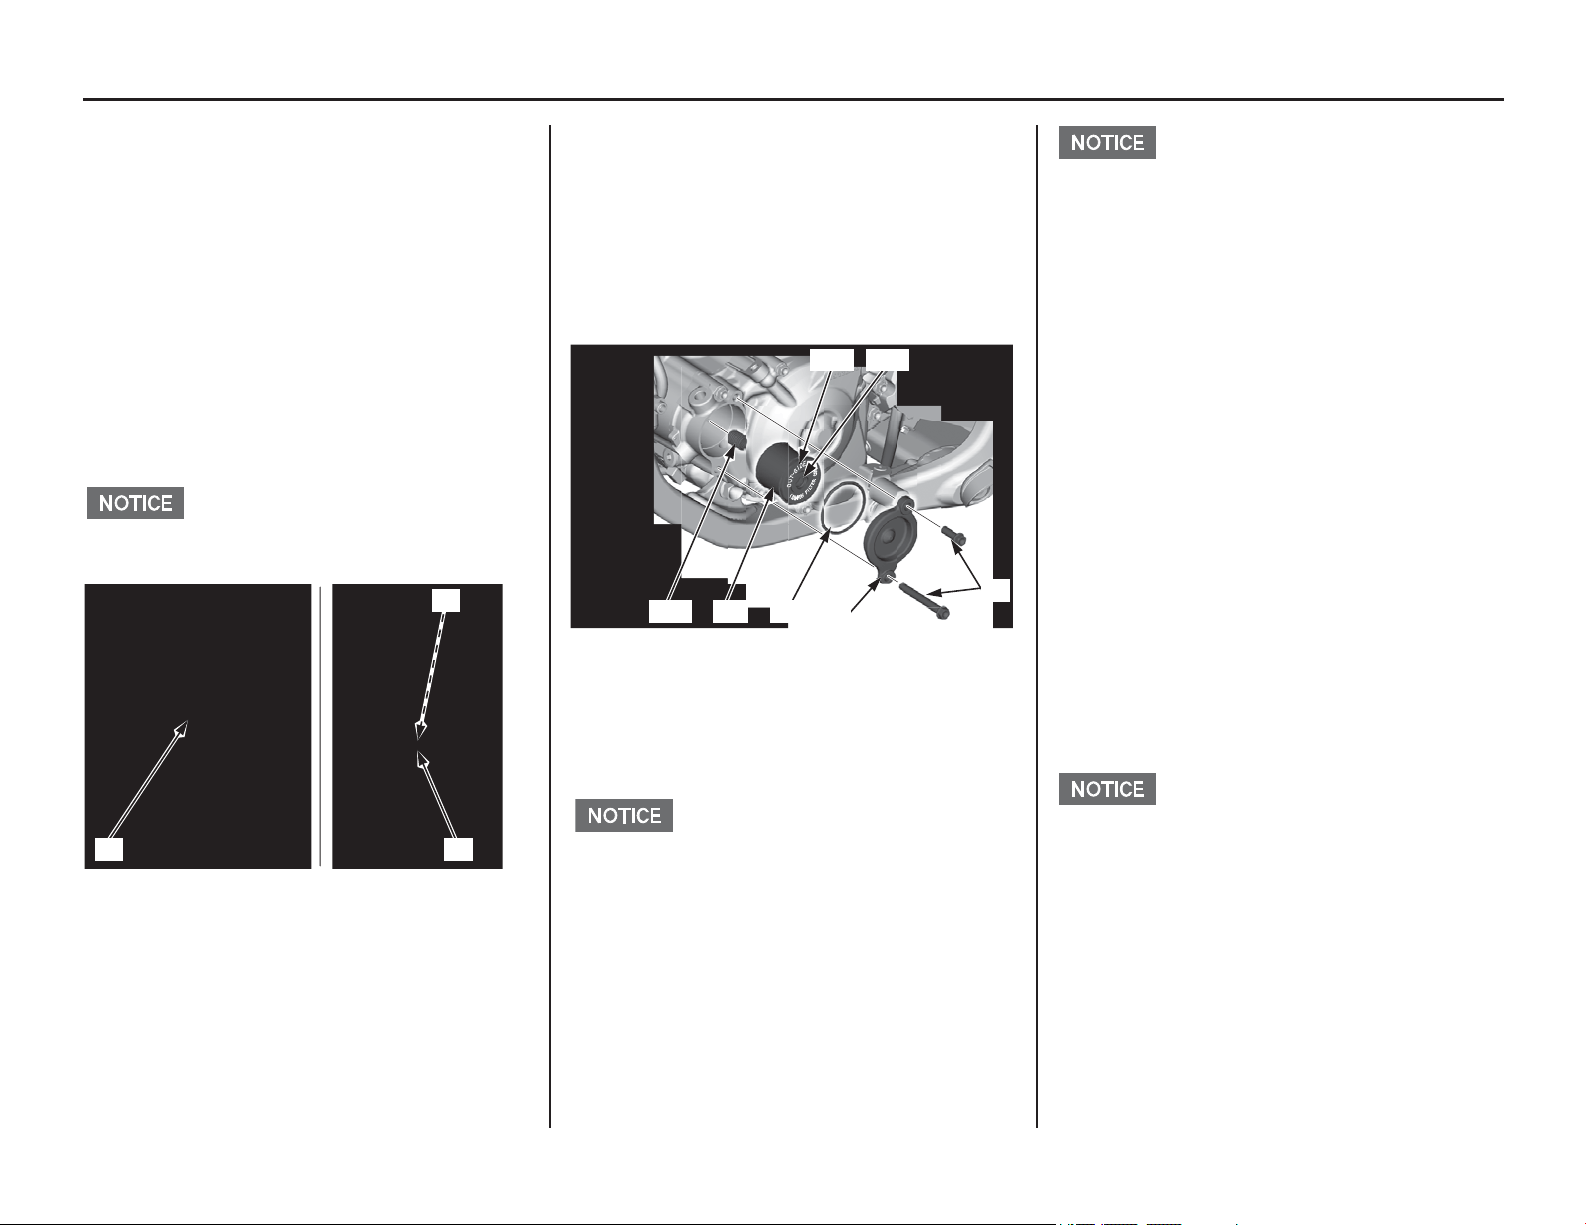
9. Remove the oil filter cover bolts (7) and oil
filter cover (8).
10. Remove the oil filter (9), O-ring (10) and
spring (11).
Using the wrong oil filter may result in leaks or
engine damage.
11. Apply grease to the filter side of the spring end,
then install the spring into a new oil filter.
12. Position the spring against the engine
crankcase and install a new oil filter with the
rubber seal (12) facing out, away from the
engine. You should see the “OUT-SIDE” mark
(13)
on the filter body, near the rubber seal.
Use a new
Honda Genuine oil filter or a filter
of equal quality specified for your model.
If the oil filter is not installed properly, it will
cause serious engine damage.
13. Apply engine oil to a new O-ring and install it
to the oil filter cover.
14. Install the oil filter cover being careful not to
damage the O-ring, then tighten the oil filter
cover bolts to the specified torque:
7 lbf·ft (10 N·m, 1.0 kgf·m)
15. Install the engine guard, then tighten the
engine guard A bolts/washers and B bolt/
washer to the specified torque:
7 lbf·ft (10 N·m, 1.0 kgf·m)
16. Fill the crankcase with the recommended oil.
17. Install the engine oil fill cap/dipstick.
18. Check the engine oil level by following the
steps in Checking & Adding Oil (page 63).
Pour the drained oil into a suitable container and
dispose of it in an approved manner (page 164).
Improper disposal of drained fluids is harmful to
the environment.
(4) engine oil fill cap/dipstick
(5) engine oil drain bolt
(6) O-ring (new)
(6)
(4) (5)
(7) oil filter cover bolts
(8) oil filter cover
(9) oil filter
(10) O-ring
(11) spring
(12) rubber seal
(13) “OUT-SIDE” mark
(7)
(8)(10)(9)(11)
(12)(13)
Capacity: 1.10 US qt (1.04 ℓ)
after draining and filter change
1.06 US qt (1.00 ℓ)
after draining
Loading ...
Loading ...
Loading ...