Loading ...
Loading ...
Loading ...
6
Installation Guide
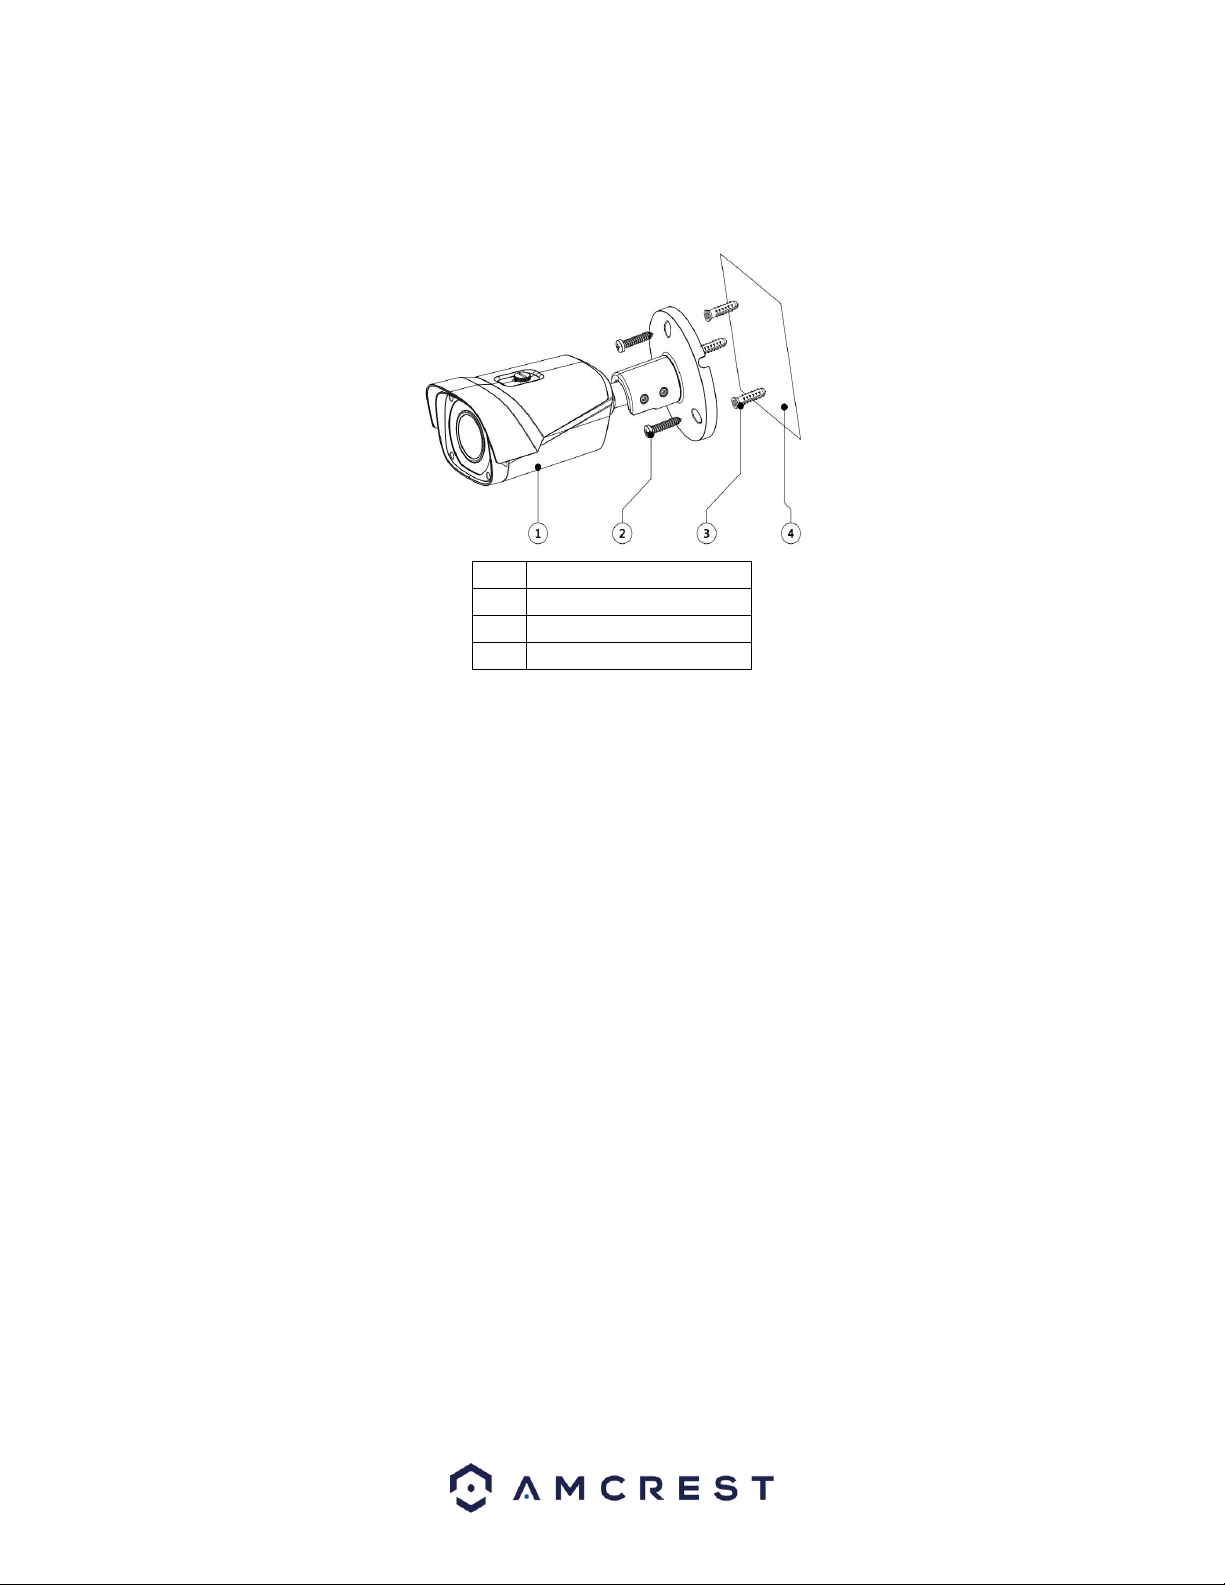
Follow the steps and use the diagram in this section to install the POE cameras.
Note: Prior to installation ensure that the installation environment can support at least 3 times the weight of the
camera.
1.
Network Camera
2.
Mounting Screws
3.
Wall Anchors
4.
Install Template
Installation Guide
1. Stick the installation sticker on the installation surface.
2. Drill 3 holes through the holes on the installation sticker. A 1” paddle bit can also be used if installing wires through an
installation surface.
3. Insert the included wall anchors into the newly drilled holes.
4. Align the bottom bracket of the camera to the installation holes. Then using a Phillips head screwdriver, secure the
camera to the installation surface.
5. To adjust the camera up, down, or side to side, use the included torx wrench to loosen the lock and unlock bracket
bolt on the bottom bracket.
Note: An included analog cable can be used on an analog monitor if needed. The analog connection is found in the
bottom security latch of the camera. The included torx wrench will be needed to open the latch. Secure the latch
when finished.
6. When adjusted, turn the lock and unlock bolt to secure the camera in place.
Note: If a junction box or pole mount is needed for the installation of your device the camera is compatible with a
AMCPFA121 junction box, or a AMCPFA152-E pole mount.
MicroSD Card Installation Guide
To Install a microSD card into your camera, please refer to the step by step guide below:
1. Remove the cover located on the bottom of the camera with the included torx wrench.
2. Locate the provided microSD card slot and insert the microSD card into the slot, (Gold pins down).
3. Push the microSD card into the slot and release, the microSD card will then be locked into place and ready for use.
Loading ...
Loading ...
Loading ...