IMPORTANT SAFEGUARDS
READ ALL INSTRUCTIONS AND SAFEGUARDS BEFORE USING
THIS APPLIANCE. When using an electrical appliance, basic
precautions should always be followed, including the following:
DANGER:To reduce the risk of electrical shock.
1) Do not reach for appliance that has fallen into water. Unplug immediately.
2) Do not use while bathing or in a shower, tub or sink.
3) Do not place or store appliance where it can fall or be pulled into a
tub or sink. Do not place in or drop into water or other liquid.
4) Always unplug this appliance from electrical outlet immediately after using.
5) Unplug this appliance before cleaning.
WARNING: To reduce the risk of burns, fire, electrical
shock, or injury to person.
1) An appliance should never be left unattended when plugged in.
2) This appliance is not intended for use by children and other persons
whose physical, sensory, or mental capabilities or lack of experi-
ence and knowledge prevents them from using the appliance
safely without supervision or instruction by a responsible person to
ensure that they can use the appliance safely. Children should be
supervised by the responsible person to ensure that they do not
play with the appliance.
3) Use this appliance only for its intended use as described in this
manual. Do not use attachments not recommended by manufacturer.
4) Never operate this appliance if it has a damaged cord or plug if it is not
working properly, if it has been damaged or dropped in water. Return
the appliance to Wahl Clipper Corporation for examination and repair.
5) Keep the cord away from heated surface.
6) Never operate this appliance with the air opening blocked or while
on a soft surface, such as a bed or a couch, where the air openings
may be blocked. Keep the air openings free of lint, hair and the like.
7) Never drop or insert any object into any opening.
8) Do not operate where aerosol (spray) products are being
used, where oxygen is being administered or near flammable
liquids, such as certain flammable blade lubricants or cleaning
agents.
9) Do not use this appliance with damaged or broken comb, as injury
may occur.
10) During use, do not place or leave appliance where it may be
damaged by an animal or exposed to weather.
11) Certain sanitizing solutions and spray lubricants may cause stress
crack damage to clippers. We recommend blade lubrication and
cleaning with WAHL CLIPPER OIL ONLY.
12) To disconnect, turn all controls to "off," then remove plug from outlet.
13) If your clipper is supplied with a 3-prong plug, you will need to
connect to a properly grounded outlet only. See Grounding
Instructions.
SAVE THESE INSTRUCTIONS
This clipper has been designed for household use.
The appliance is intended for trimming purposes only.
CORD CARE
The cord should not be used to pull the clipper. Since freedom of
movement needs to be maintained, care should be used to keep the
cord untwisted and unobstructed.
For an appliance that is equipped with a polarized plug
To reduce the risk of electric shock, this appliance has a polarized plug
(one blade is wider than the other). This plug fits in a polarized outlet
only one way. In the event the plug does not fit fully in the outlet,
reverse the plug. In the event it still does not fit, contact a qualified
electrician to install the proper outlet. Do not change the plug in any way.
FACTS ABOUT BLADES & CUTTING
1) The blades are the single most important part of this clipper.
2) Blades do not become dulled from cutting hair – they are dulled by
the abrasive particles on the hair: dirt, sand, etc.
3) Clipper blades should be oiled BEFORE, DURING, AND AFTER clipping;
most clipper problems are due to a lack of oil to lubricate and cool.
4) Blades will not cut if abrasive particles are picked up and carried by
the oil film between the blades. These particles tend to hold the
blades apart and cause chewing and pulling instead of clean cutting.
5) Oiling the blades performs two, distinct functions:
• Provides a low friction, very thin film lubricant between the cutting
blades so that they can take a full cutting stroke without becoming
hot from frictional heat.
• Flushes abrasive particles and hairs out from between the blades.
NOTE: If you cut into dirt, immediately wash the blades with oil
to flush it out. Working the tapering lever back and forth will
assist in removing the dirt particles.
HOW TO OPERATE YOUR WAHL CLIPPER
By following these simple steps, your Wahl quality Pet Clipper will
provide years of satisfactory service.
1) OIL For maximum efficiency, your clipper blades MUST be oiled with
each haircut. Place one or two drops of oil on blades while clipper is
running. If clipper is brand new or hasn’t been used your clipper
blades are dry—they require oiling. DO NOT use a heavy oil use
only Wahl Clipper Oil.
2) POWER SCREW (Not found on all models of Wahl Clippers) If your
clipper has a power screw, it has been adjusted for peak efficiency
before leaving the factory. However, if voltage in your home is low,
you may need to re adjust it. To adjust power screw,
use the plastic brush, a screwdriver or a thin coin to
turn power screw in a clockwise direction until the arm
strikes the coil, making a noise. Then, slowly turn
power screw out (counterclockwise), just until noise stops. This is
the maximum power setting.
3) BLADES Do not try to sharpen the clipper blades. Once they
become dull, special equipment is needed to resharpen the blades.
Also, never wash the blades in water. When the blades do not cut,
they may need oiling or resharpening. If you determine the blades
need resharpening, you can return them to Wahl Clipper Corp. for
resharpening. If you decide to do so, remove the blades from the
clipper, pack each blade individually in soft wrapping paper,
enclose both blades in a durable container and send to Wahl
Clipper Corp., 3001 Locust Street, Sterling, IL 61081 ATTN: Service
Dept. A nominal fee will be charged for resharpening. To remove
cutting blades for sharpening or replacement, loosen and remove the
2 screws on bottom blade. Replace same and retighten.
4) BLADE ALIGNMENT Blades must be realigned if they have been
removed for cleaning or replacement.
• If your clipper has a taper lever - position the taper lever in the close
cut position.
• End of top blade teeth should be approximately 1/32" (.64mm) back from
bottom blade.
• This is important so that the clipper does not cut
too close or allow the moving cutter to touch
the skin.
• Extreme left-hand tooth of top blade must be covering or to the left of
the first small tooth of bottom blade.
• Extreme right-hand tooth of top blade must be touching the big tooth
on the bottom blade.
• If blade alignment is incorrect, add a few drops of oil to the blades,
turn clipper "ON" for a few moments, turn "OFF" and unplug. Loosen
screws slightly and adjust. Tighten screws after blades are aligned.
5) TAPER LEVER Some Wahl Clippers are equipped
with an adjustable taper lever. The taper lever is
conveniently located near your thumb (if you're
right-handed), so it can easily be adjusted while the
clipper is in your hand. The taper lever adds
versatility to your clipper by allowing you to gradually change the
closeness of your cut without a guide comb. When the lever is in the
uppermost position, Pushing the lever downward gradually increases
the cutting length. In its lowest position, the taper lever will leave the
hair approximately the same length as the 1/8" guide comb.
The taper lever will also extend the use of your blades since a different
cutting edge is used in each setting. In addition, if extremely heavy
haircutting has jammed the blades, it will help you remove hair that has
become wedged between the two blades without removing the
blades. While the clipper is running, rapidly move the lever from
"close cut" to "longer cut" a couple of times. Doing this each time
you've finished using your clipper will help keep the blades clear of cut
hair. If your clipper stops cutting and this does not help, your cutting
blades may be dull. Either replace them or return them to Wahl for
sharpening.
CLIPPER CARE AND SERVICE
1) To clean the unit, use either a clean, dry or dampened cloth. DO NOT
USE benzine or thinner to clean the unit.
2) Do not store the clipper in a wet or moist environment.
3) Do not touch any of the internal mechanisms. If the unit should need repair,
do not repair it yourself. Return it to Wahl Clipper Corporation.
4) When stored, make sure cord is not nicked, twisted or obstructed. It
should be coiled and the unit placed in a dry place, away from children.
5) Only use the specified electric power source shown on the rating plate.
6) The cutting blades furnished with Wahl Pet Clippers are made of a
special high carbon steel scientifically heat treated for correct
hardness. Years of experience have created a special process for
grinding these blades to a super sharpness.
7) Be careful not to drop your clipper or to “nick” the blades.
8) Always replace the blade guard when the clipper is not in use. This
will help prevent accidental damage and blade dulling.
9) Periodically dip the teeth of the blade in a shallow pan of Wahl Clipper
Oil (with clipper running) to flush out dirt and hair.
10) Run the clipper through the hair only as fast as it is able to complete-
ly cut. Operating it too fast wedges hair clippings between the blades
and they become unable to cut properly.
11) Avoid pressing the blades strongly against the skin, being especially
careful around the ears.
12) Keep your clipper blades sharp. Clip only clean animals. FOREIGN
PARTICLES are the major cause of dull blades.
13) Sharp clipper blades cut better and faster. FOR GENUINE FACTORY
BLADE SHARPENING, remove and return the blades to: Wahl
Clipper Corp., 3001 N. Locust St., Sterling, IL. 61081, Attn: Service
Dept. Blades will be resharpened for a nominal charge.
NEW REPLACEMENT BLADES are available from your Wahl
products outlet. It is recommended that you order an extra Wahl
Regular Blade as a “spare” so that you will always have a sharp
clipper blade on hand.
TO ATTACH BLADE COMB:
1) Shut clipper off and put Blade Adjustment Lever in the “Fine”
position.
2) Holding Blade Attachment in palm of hand, snap side spring clips
on bottom blade.
3) Slide Blade Attachment into place.
4) BE SURE Blade Attachment is in correct installed position before
operating clipper. The blades can be severely damaged if the Blade
Attachment is allowed to enter the operating clipper blade teeth.
TO REMOVE:
1) Shut clipper off and slide Blade Adjustment forward.
2) Pivot Blade Attachment away from blade teeth and off.
BLADE SELECTION GUIDE
The convenient, thumb-adjustable, multi-cut lever found on most
Wahl Clippers provides for increased cutting variations with fewer
blades. In the uppermost position, cut is very fine and becomes
gradually coarser as the lever is moved downward. The following
chart illustrates the cutting range of each set of blades according
to accepted pet industry grooming standards
CLIPPING LENGTH GUIDE: plastic blade attachments
The Blade Attachment Lever should always be in the “fine” position
when the Blade Attachments are being used.
TYPE OF BLADE DIRECTION OF LENGTH OF CUT
AND BLADE CLIPPING (approximate)
ATTACHMENT FINE COARSE
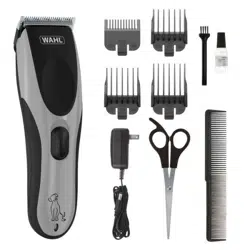
Operating Instructions
for Animal
Grooming Kit
Adjustable Taper Lever
Corded Clipper Kits
WARNING!
Certain sanitizing solutions and spray
lubricants may cause stress crack damage to
clippers.
We recommend blade lubrication and
cleaning with WAHL CLIPPER OIL ONLY.
Wahl Regular Against the grain 1/32” to 1/8”
Blade Without with the grain 1/16 “ to 3/16”
Attachment #1037
*The variables affecting length of cut are greater at these heights
even though clipping is normally done with the grain.
Blade Attachment #1 Against the grain 5/32” to 7/32”
With the grain 1/8” to 1/4”
Blade Attachment #2 With the grain 1/4” to 1/2”
Blade Attachment #3 With the grain *1/2” to 3/4"
Blade Attachment #4 With the grain * 3/4” to 1”
STAINLESS STEEL BLADE ATTACHMENTS
With the STAINLESS STEEL BLADE ATTACHMENTS,
Wahl brings you another fine time-saving development in
pet grooming. Three sizes to give you the widest range of
cutting heights WITH NO BLADE CHANGING.
--Improved Feed since it goes through most thick and
matted hair easily.
--Improved cutting since it lifts and guides hair OVER the Clipper teeth
without snagging.
--Polished Tips that won’t scratch even delicate skin.
--Designed to quickly attach and lock securely in place.
--Fits all models of Wahl Adjustable Blade Clippers.
--These attachments enable you to increase the cutting range of any
Wahl Adjustable Blade Set in 1/4” increments, allowing for a longer
cut without the purchase of additional blade sets.
--NOTE: These attachment combs are not compatible with the Model
1037-600 extra wide blade set.
GROOMING HORSES
When clipping large animals, care should be taken as some
animals may be nervous around the noise and vibration of
the clipper.
BEFORE YOU CUT
1) Make sure clipper is clean and in perfect working condition.
2) Sponge down your horse with clean water and towel dry. Then comb
and brush the longer mane and tail.
CUTTING HAIR
1) Start with the front legs. Clipping with the grain (or lay) of the hair will
give a slightly longer cut. The leg can be clipped while the hoof is on
the ground or with the leg in your hand. Clip the fetlocks, being
careful around joints and projections. Proceed with all four legs.
2) Clip the hair around the muzzle, chin and ears. All the hair on the
outside of the ears can be clipped, but avoid clipping the hair on the
inside. Be careful, also, when clipping the hair on the edges of the
ears; do not hold the clipper with the blades pointing toward the
edges, but parallel to the edges.
3) If you wish to shorten the hair on the mane and tail, hold the hair
between your index and middle fingers with the amount of hair you
wish to cut protruding above your fingers. Then cut that hair off with
a parallel stroke across fingers.
4) To thin the hair on the tail and mane, hold your clipper upside down
with the blades pointed in toward the hair. Then, starting at the top
of the hair and lightly stroking downward in a combing-like manner,
remove just a little hair at a time.
5) Hair on the body of the horse can either be cut or left longer for
weather protection and additional padding. Remember when
clipping, that less hair is removed when cutting with the
grain; more hair is removed when cutting against the grain of
the hair.
6) When you are finished, clean the clipper and oil the blades before
packing it away.
GROOMING AND STYLING YOUR DOG
Assemble your supplies:
Clipper, oil, blades, screwdriver, slicker brush, attachment
combs and comb, scissors, tear-free shampoo, dryer, rubber
bath mat, nail cutters.
Be sure all your equipment is in good working condition and easy
to reach.
Grooming should be done on a solid table (about 30” high) with a
non-slip surface to give your dog a steady and secure footing. A
grooming post to secure the dog would be of considerable aid.
Good lighting is essential. The light should be adequately bright and
evenly distributed; there should be no shadows.
Steps in Grooming
1) Brush out coat thoroughly
(a) Remove all snarls, knots, tangles and mats.
(b) Part the hair and brush on 1” sections-brush from the skin out.
2) Bath Time
(a) Soak the dog thoroughly.
(b) Apply shampoo and work into a good lather.
(c) Pay particular attention to the rectum and pads (bottom of the
paws).
(d) Be careful also not to get soap in the dog’s eyes (for safety use a
“tear- free" shampoo).
(e) Rinse very thoroughly.
(f) Squeeze legs, ears and tail.
(g) Towel dry
(h) Fluff dry or brush and dry.
• Start with the legs using a wire brush and moving up to the body.
• Direct dryer to the area you are brushing. Do one spot at a time.
• Use light, fluffing strokes.
• There should be no snags or tangles when you are done.
POODLE
Because their hair grows so rapidly, poodles need to be
groomed much more often than other breeds.
Clipping the Feet
1) The feet are cut with a Wahl Regular Blade #1037-400.
2) The adjustment lever is in the Coarse Position (#10 position)
3) Clipping is done “Against the grain" (Fig. #6)
(a) Sit the dog on the table facing you.
(b) Bring rear leg forward near front leg (Fig. #7)
(c) Clip sides of foot from NAIL to end of toes.
(d) Clip hair on top of toes using the natural stop at the
ankle joint-do not trim up the ankle.
NOW—Set Blade Adjustment Lever in middle between COARSE and
FINE (#15 Position). Use Wahl Regular Blade #1037-400.
(e) Being careful not to nick the foot webbing, use your free hand
with the thumb on top (Fig. #8) and your forefinger, underneath
to spread the toes apart. Cut the hair between the toes.
(f) Follow the same step and do the other 3 feet.
(g) Again grasp the rear leg and bring it toward you.
(h) Spread bottom pads with your thumb (Fig. #9) and cut hair
between the toes and pads. Again, DO NOT NICK the webbing.
(i) Do the other three feet.
(j) Check feet for any stray hair.
Clipping the Tail
• Clipping the TOP of the tail is done AGAINST the GRAIN.
• Clipping the BOTTOM of the tail is done WITH the GRAIN.
Use Wahl Regular Blade #1037-400 with Blade Adjustment lever in #15 position.
1) Stand dog with his tail toward you.
2) Hold tail with free hand and cut the top and sides from the middle
toward the body.
3) Clip bottom from the body toward the middle (Fig. #10).
4) Comb out pompom (ball at end of tail).
5) Use SCISSORS-Trim around pompom to make the
largest ball possible (Fig. #11)
6) With SCISSORS- CAREFULLY clip around the anal opening.
Clipping Face and Throat
BLADE-WAHL REGULAR #1037-400
ADJ. LEVER SETTING-#15 POSITION
DIRECTION OF CUT-AGAINST THE GRAIN
CAUTION-This is a very sensitive area, too close of cut may cause razor burns.
SUGGESTION: You may want to “rough trim” the face and throat by first
clipping WITH THE GRAIN.
BEFORE YOU START CUTTING read these points:
1) The area to be clipped (Figure 12 to 15).
2) Turn the ears back or place a rubber band behind the head.
3) Figure #12 shows the boundary of the area to be clipped.
4) The clipper is NOT used above the eyes.
5) Use a RUBBER BAND or CLOTH BAND to keep the topknot (bangs)
out of the clipping area.
CLIPPING
1) Sit dog on table facing you.
2) Hold muzzle (upper jaw and nose area) shut with your free hand.
3) Begin your cut from left ear to the outside of the left eye in a
STRAIGHT LINE.
4) With your left hand, stretch the skin at the outside corner of left eye
upward and backward. Clip CAREFULLY under the eye. USE Figure
#12 as your guide.
5) Do the same thing on the right side. Hold the clipper with your left hand
and the muzzle with your right. USE Figure #13 as your guide.
6) Using the thumb of your free hand, keep the skin stretched at the
corner of the mouth and your hand itself to hold the mouth closed.
• Clip around the mouth and lips.
• Clip the cheek and side of face.
• REVERSE the procedure on the other side
7) With your free hand, hold the muzzle and clip the area looking like an
upside down “V” between the eyes and down the nose. DO NOT cut
above the eyes.
8) Clip the muzzle-clip away from the eyes toward the nose.
9) Hold your dog’s head and clip the bottom of the muzzle
(Figure #15). The Adam’s apple area is usually the stopping
point of cut but you may clip lower.
10) Clip the rest of the throat area toward the muzzle. The face and
throat look like the outline in Figure #12 thru #15.
Clipping the Stomach
Use Regular blade in position #15 (use position #10 if the
dog has sensitive skin).
1) Stand dog facing you.
2) Lift front legs and begin clipping from a point above the testicles or
vulva and clip in a straight line to the end of the rib cage. DO NOT
clip up the leg.
3) DO NOT NICK or cut the vulva, penis, testicles or nipple.
Cover them with your free hand while clipping. Use light pressure.
4) Clip the hair on the penis WITH the grain.
5) The clipped part of the stomach should resemble a rectangle.
Clipping the Body
BLADE-Use Wahl Regular Blade #1037-400 with a #3
attachment comb.
1) Clip along the back starting at the base of the skull, and
cut down the middle of the back to the tail (Figure #17).
2) Shorten all hair as shown in Figure #17 by using the clipper in
the same direction. Start from the neck and go to the back.
DO NOT USE CLIPPER BELOW THE SHOULDERS AND HIPS.
3) Figure #18-Clip the hair between shoulders and hips.
4) Clip hair under the chest from behind the front legs to the
end of the ribs.
Rear Legs
1) Stand dog up and brush the hair on the back of the legs in
an upward and outward motion to fluff the hair.
2) You can now shape the legs as full or tapered as you wish.
3) Start by trimming any hair that falls over the foot (Figure #19).
4) Then start at the ankle and cut up to the hip (Figure #20).
Cut just a little hair at a time.
5) Once you get up to the hip, start blending the hair so that it
is tapered into the shorter body hair.
6) Scissor cut the other back leg, making it the same size as the
other leg.
Front Legs (using scissors)
1) Have dog face you.
2) Comb the hair UP and OUT.
3) Scissor cut the front legs so they are the same size and shape as
the rear legs.
4) Comb the hair at the shoulders up and blend it with the shorter
body hair.
5) Comb the hair on the chest and between the front legs and trim the
hair to the length of the shoulder and body hair.
Head
1) Have the dog face you.
2) Comb the hair on the top of the head (topknot)
upward and forward. (Figure #21 and Figure #22).
3) Scissor cut a square or round topknot.
4) Blend the lower topknot hair with the shorter neck hair. Use
a Regular Blade #1037-400 with a #3 attachment comb.
Ears
1) Have the dog face you.
2) Start clipping at the top of the ear downward. NEVER turn the
clipper in the other direction.
3) Lay the ear in the palm of your hand (Figure #23).
4) Clip the inside of the ear first, and then the outside.
5) Hold the ear with your free hand and scissor cut the sides. Be
careful not to cut the ear itself. (Figure #24).
6) Clip the other ear.
7) With scissors, touch up any stray hairs.
SCHNAUZER
Use the Wahl Regular Blade with the Blade Adjustment
Lever in the “Coarse” position; use Blade Attachment #1 if a
longer trim is desired.
With the Schnauzer, it is most important that it is trimmed at least
once before the ear cropping is done, usually completed at 12 weeks
of age.
Otherwise, your schnauzer will probably associate clipping with
cropping and the next few grooming sessions will be most difficult.
1) Stand dog on grooming table. Clip the top of the back from the
base of the skull to the base of the tail. Clip the throat, front and
sides of the body and the tail. Clip all the areas with the grain. Clip
sides and back of rear legs toward the hock; curve the sides into
the hock and do not clip the front of the rear legs. Remove Blade
Attachment #1.
2) Clip stomach area from the rear to the front; clip penis carefully
with the grain. Clip skull from a point above the eyebrows to the
base of the skull and to the ears. Clip from the outside corner of
the eyes to the base of the ears and to the corner of the mouth.
3) Set the Blade Adjustment Lever midway between “fine” and
“coarse”, #15 position, and clip both sides of the ears from the base
to the tip.
4) Scissor and trim front legs to gain a rounded and straight appear-
ance. Scissor and trim body and rear legs; do the same with
eyebrows, muzzle and mustache. The purpose is to achieve a
straight and square look.
AIREDALE, IRISH, LAKELAND, WELSH & WIRE FOX TERRIERS
If you plan to show your terrier and he has wire coat,
stripping, not clipping is required. However, clipping is a far
easier method of grooming for both pet and groomer.
These terriers are clipped in much the same manner as the
Schnauzer except for the rear legs. Use the Wahl Regular blade
with the Blade Adjustment Lever in the “coarse”, #10 position and
install Blade Attachment #1. Do not clip the rear legs; blend
the clipping of the sides into the hips. Scissor and trim the
eyebrows, muzzle and mustache to the recognized standard of the
particular breed.
COCKERS-SETTERS-SPANIELS
Sporting dogs generally require little clipping. However, all
longhaired Sporting Dogs can be more effective in the field
when properly groomed.
The hunting dog with long, silky hair needs to have his coat kept
brushed, clean and free of burrs and tangles. Clipping your dog several
weeks in advance of the hunting season will facilitate better hunting,
offer greater comfort to the dog and provide easier coat care. Clipping
allows the growth of the shorter, denser coat that is both warmer and
more resistant to burrs and stickers. Checking your dog’s diet to assure
a prime coat is also very important.
1) Stand dog on grooming table. With the Wahl regular Blade and the
Blade Adjustment Lever in the “coarse” position, clip the skull, base
of the ears and the throat. Clip “With the Grain” and blend hair.
2) Clipping With the Grain, clip the neck, shoulders and chest, using
the same blade, with the Blade Adjustment Lever in the “Fine”
position and Blade Attachment #1 installed. Blend the hair into the
body and lower chest. Clip the legs and tail.
3) If it is needed, clip the body. Blade Attachment #5 is suggested-it will
leave the hair about 1/2” to 3/4” long. This type of clipping, even
though it may detract from the dog’s “looks” is a sensible approach
for a dog used in hunting.
After a day in the field, go over your dog with a medium comb. A
“tangle-remover” spray will help in getting rid of burrs. Check for and
treat cuts and injured paws.
SERVICES AND REPAIR
This appliance contains no user-serviceable parts.
Any servicing, other than changing of the blades, should be done by
Wahl Service Department.
Do not return this product to the store where purchased. If you
have problems with your clipper, send it prepaid with a note
explaining the problem to:
Wahl Clipper Corporation
Attn: Service Department
3001 Locust Street
Sterling, Illinois 61081
Telephone: 1-800-PRO-WAHL or visit www.wahl.com
Sharp clipper blades cut faster. FOR GENUINE FACTORY BLADE
SHARPENING, remove as a set (do not send one blade only). Please
wrap blades securely when mailing them to Wahl. Blades will be
resharpened for a nominal charge.
Return to:
Wahl Clipper Corporation
Attn: Service Department
3001 Locust Street
Sterling, Illinois 61081
For products purchased in Europe, return to:
Wahl Europe
Herne Bay Trade Park
Herne Bay, Kent CT6 8JZ England
For products purchased outside the United States or Europe, contact
your distributor.
New replacement blades are available from your retail tack or pet shop
or from Wahl Clipper Corporation.
If a 13 amp (BS 1363) plug is used, a 3 amp fuse must be fitted, or if
any
other type of plug is used, a 5 amp fuse must be fitted either in the plug
or adapter at the distribution board. Replacement fuses should be ASTA
approved to BS 1362.
Fuse cover must be fitted when changing the fuse. If fuse cover is lost,
the plug
must not be used until a replacement is obtained. Information for obtaining the
correct fuse carrier is marked on the carrier itself and in the bottom of the fuse
cavity on the plug. These may be obtained from Wahl UK
If the supply cord is damaged, it must be replaced by the manufacturer or its
service agent or a similarly qualified person in order to avoid a hazard.
For an appliance that is equipped with a grounded plug
GROUNDING INSTRUCTIONS
This appliance should be grounded. In the event of an electrical short circuit,
grounding reduces the risk of electric shock by providing an escape wire for the
electric current. This appliance is equipped with a cord having a grounding wire
with an appropriate grounding plug. The plug must be plugged into an outlet
that is properly installed and grounded in accordance with all
local codes and ordinances.
DANGER - Improper use of the grounding plug can result in a risk of electric
shock. If repair or replacement of the cord or plug is necessary, do not connect
the grounding wire to either flat-blade terminal. The wire with insulation having an
outer surface that is green with or without yellow stripes is the grounding wire.
Check with a qualified electrician or serviceman if the grounding instructions are
not completely understood, or if in doubt as to whether the appliance is properly
grounded. Do not modify the plug provided; if it will not fit the outlet, have the
proper outlet installed by a qualified electrician.
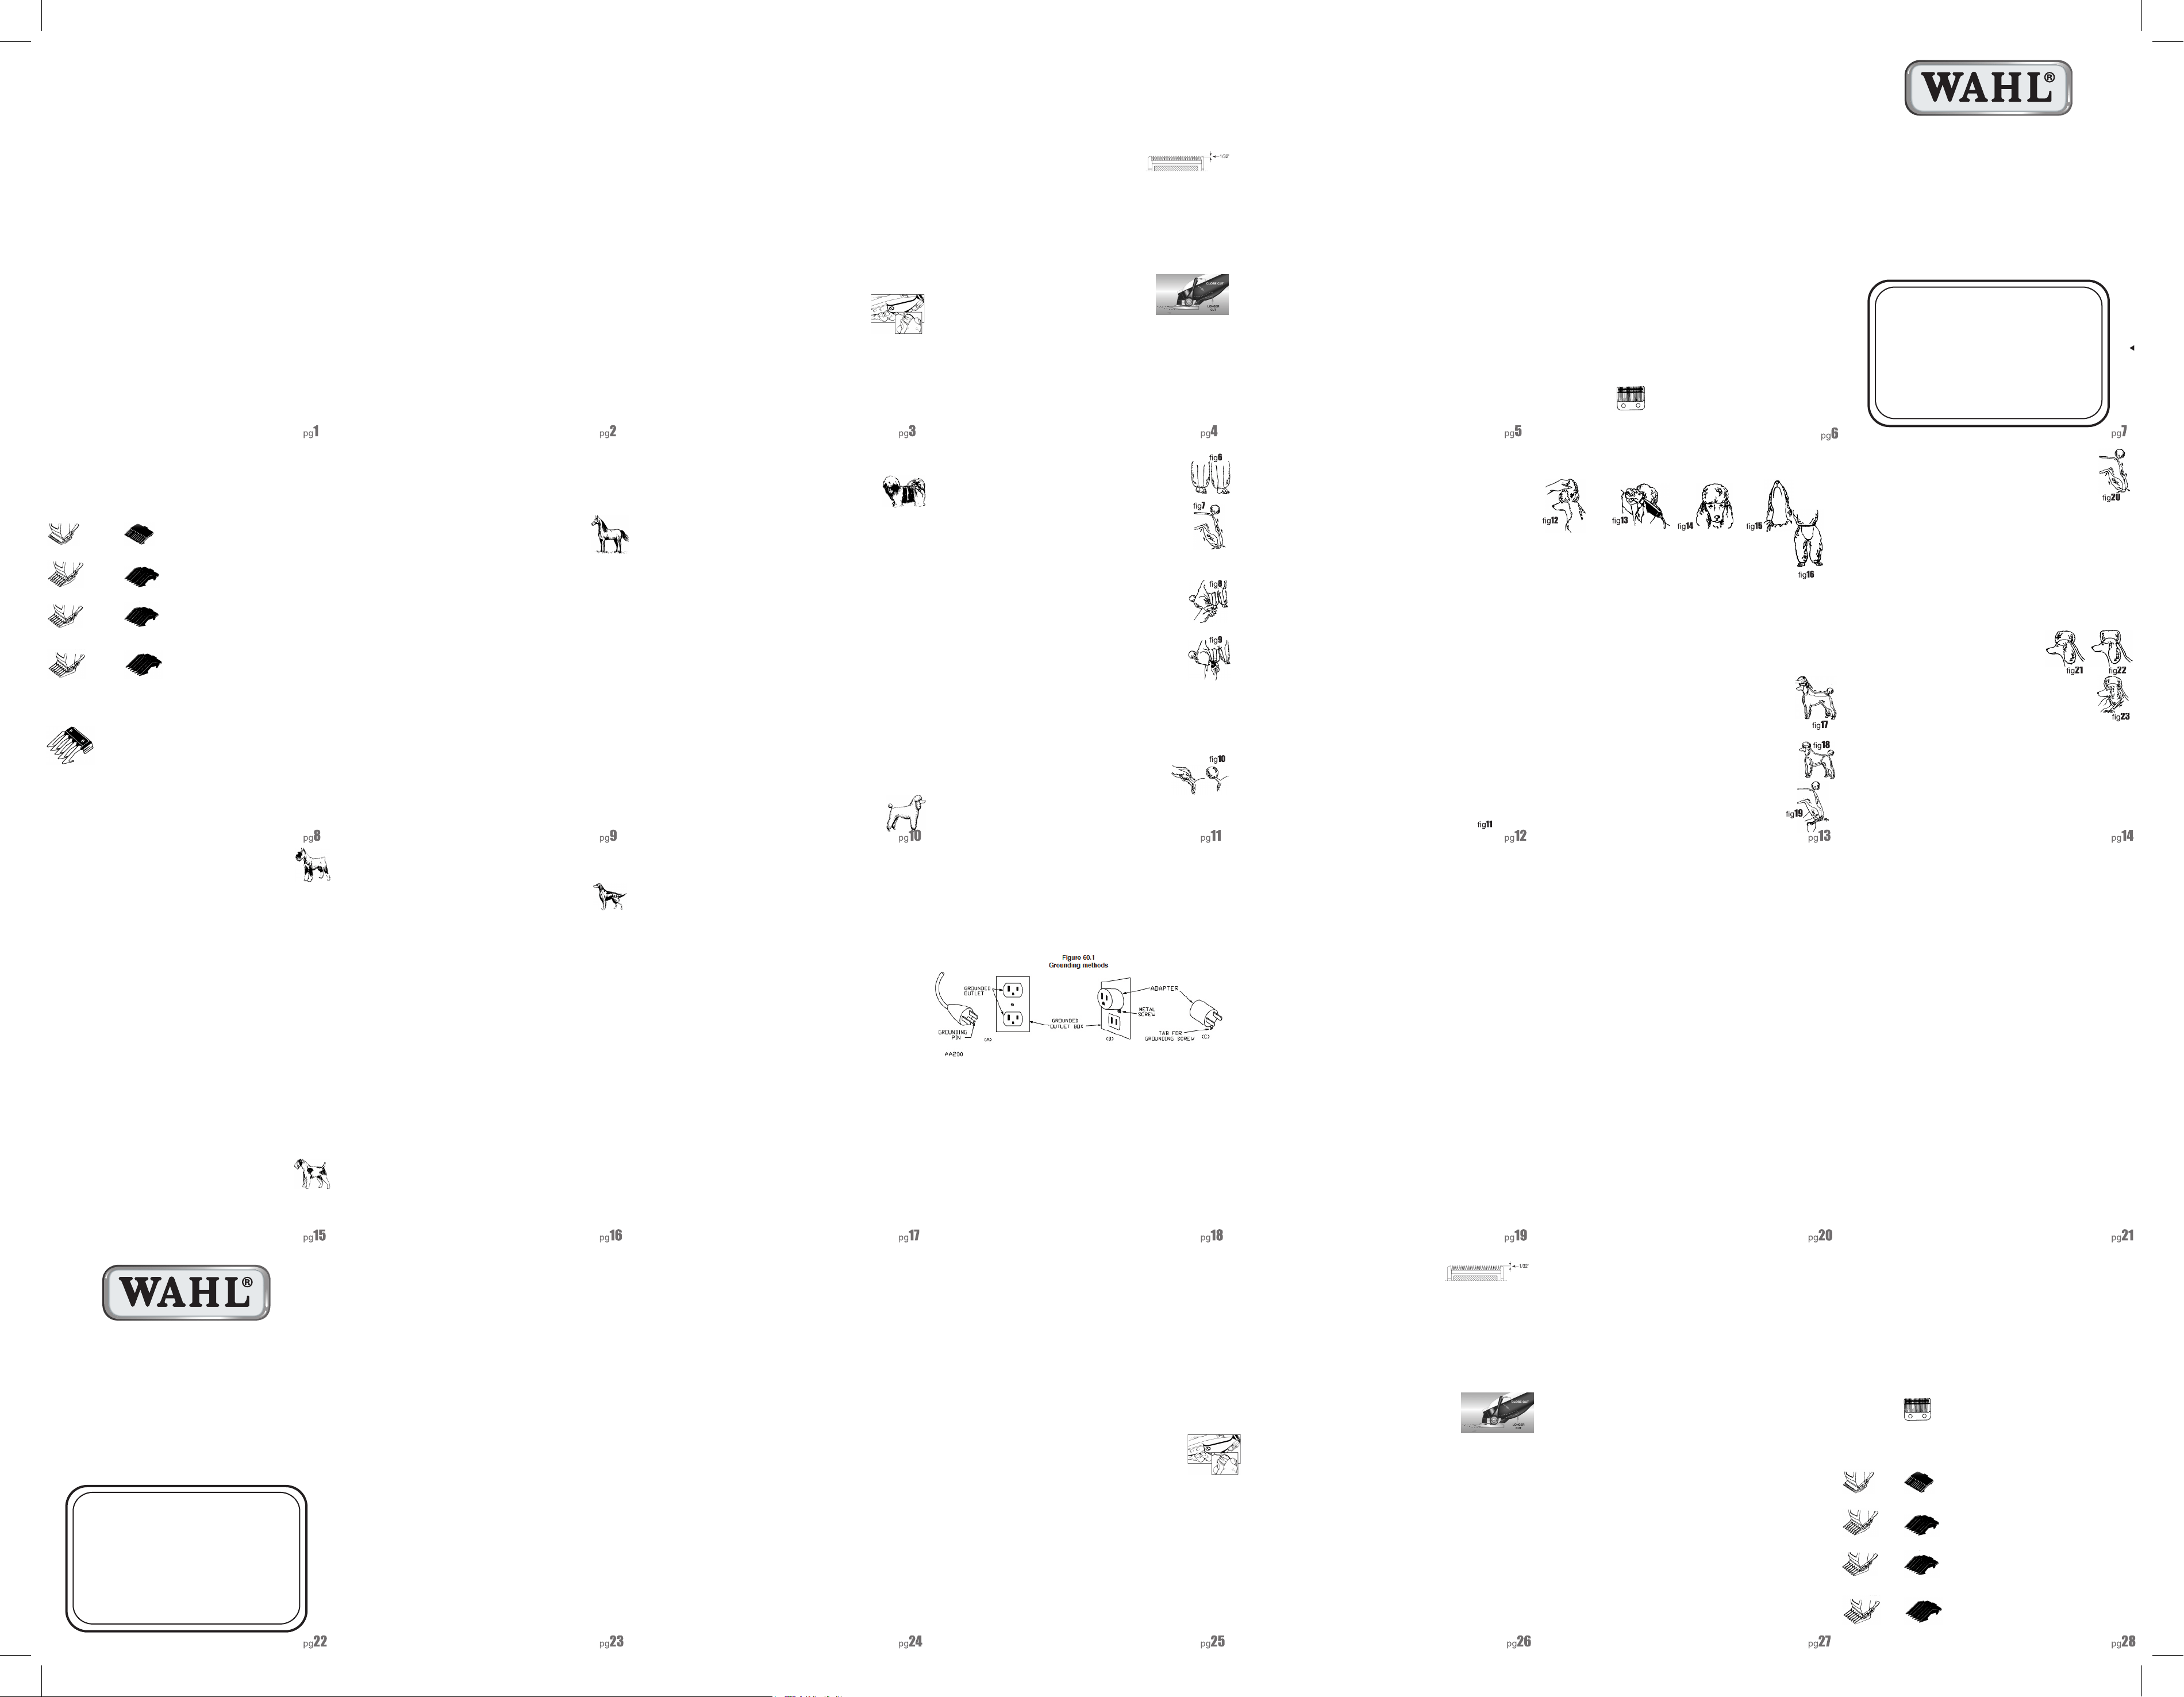
This appliance is for use on a nominal 120-V circuit, and has a
grounding plug that looks like the plug illustrated in sketch A in
Figure 60.1. A temporary adapter, which looks like the adapter illustrated in
sketches B and C, may be used to connect this plug to a 2-pole receptacle
as shown in sketch B if a properly grounded outlet is not available. The
temporary adapter should be used only until a properly grounded outlet
(sketch A) can be installed by a qualified electrician. The green-colored
rigid ear, lug, or the like extending from the adapter must be connected to a
permanent ground such as a properly grounded outlet-box cover.
Whenever the adapter is used, it must be held in place by a metal screw.
LIMITED WARRANTY: This warranty valid only for sales in the Continental
United States. For sales outside of the Continental United States contact local
distributor for warranty and terms.
If your Wahl product fails to operate satisfactorily within one(1) year from
the date of original purchase or receipt as a gift, Wahl will at our option
repair or replace it and return it to you FREE OF CHARGE. Our warranty
does not cover blades, which are wear out parts. Please mail your product
prepaid to Wahl Clipper Corporation, Sterling, Illinois 61081,
Attention: Service Department, with a Note describing the defect and the
date of original purchase or receipt as a gift (if in warranty). Products out of
warranty will be repaired at our standard repair charges.
The warranty is void and no repair or replacement will be made under this
warranty or otherwise if:
1. The product is modified in any manner.
2. The product is repaired by anyone other than Wahl Clipper Corporation.
3. The product has been subjected to unreasonable use.
This warranty gives specific legal rights and you may also have other
rights, which may vary from state to state. No other written express
warranty is given. Any implied warranty including any warranty of
merchantability, which may arise from purchase or use, is limited to the
one-year period provided in this express warranty. Some states may not
allow such limitation, so it may not apply to you. No responsibility is
assumed for accidental or consequential damages of any type, or for the
use of unauthorized attachments. Some states may not allow the
exclusion or limitation of incidental or consequential damages, so the
limitation or exclusion may not apply to you.
Models listed in this booklet may not be available in certain
voltages and cycleages, contact your Wahl distributor for further
information.
WAHL CLIPPER CORPORATION
2900 LOCUST STREET / PO BOX 578
STERLING, ILLINOIS 61081
PHONE 1-800-PRO-WAHL / 815-625-6525
www.wahl.com
Wahl Canada
165 Riviera Drive
Markham, Ontario
L3R 5J6 Canada
www.wahlglobal.com/canada
Wahl UK, Ltd
Herne Bay Trade Park
Sea Street, Herne Bay
Kent CT6 8JZ, England
Phone (44) 1227 740066
FAX (44) 1227 37563
PRECAUCIONES IMPORTANTES
LEA TODAS LAS INSTRUCCIONES Y PRECAUCIONES ANTES
DE USAR ESTA CORTADORA.
Cuando se está usando un electrodoméstico,
han de seguirse unas precauciones básicas, incluyendo las siguientes:
PRECAUCIÓN:
Para reducir el riesgo de electrocución.
1) No intente recuperar un electrodoméstico que se haya caído en
agua. Desenchufe inmediatamente.
2) No lo use cuando se esté duchando o bañando.
No coloque ni guarde al artefacto donde pueda caerse o ser
arrastrado a una tina o un fregadero. No lo coloque ni lo deje caer
en el agua u otro líquido.
4) Desenchufe siempre este electrodoméstico de la red
inmediatamente después de su uso.
5) Desenchufe este electrodoméstico antes de limpiarlo.
PELIGRO:
Para reducir el riesgo de quemaduras, fuego,
electrocución o daños a personas.
1) Un electrodoméstico no se debe dejar desatendido mientras esté
enchufado.
Este artefacto no debe ser usado por niños o por personas cuyas
capacidades físicas, psicológicas o mentales, o falta de
experiencia y conocimiento necesarios, les impidan usarlo de
forma segura sin la supervisión o instrucción de un responsable
que garantice que pueden usarlo de forma segura. Los niños
deben ser supervisados por un adulto responsable que garantice
que no jueguen con el artefacto.
3) Use este electrodoméstico solamente para el uso al que ha sido
destinado como se describe en este manual. No use accesorios no
recomendados por el fabricante.
4) Nunca use este electrodoméstico si tiene el cable dañado o si el
enchufe no está funcionando correctamente, o si ha caído en
agua. Devuélvalo a Wahl Clipper para su reparación.
5) Mantenga el cable alejado de superficies calientes.
6) Nunca use este electrodoméstico si la salida de aire está
bloqueada o mientras esté en una superficie blanda, como una
cama o un sofá, donde se pueden bloquear esas salidas de aire.
Mantenga las salidas de aire libres de residuos, pelo y similares.
7) Nunca inserte o deje caer algún objeto en ninguna apertura.
8) No use este electrodoméstico donde se estén usando
productos de aerosol, donde se esté administrando oxígeno o cerca
de líquidos inflamables, como algunos lubricantes de cuchillas o
agentes limpiadores.
9) No use este electrodoméstico con uno de los peines roto o dañado,
ya que podría producir lesiones.
10) Durante su uso, no coloque o deje este electrodoméstico donde
pueda ser dañado por animales o pueda estar expuesto a las
inclemencias del tiempo.
11) Algunos líquidos de limpieza y lubricantes en spray pueden
causar daños de estrés a las cortadoras. Recomendamos la
lubricación de las cuchillas y la limpieza con ACEITE WAHL
CLIPPER SOLAMENTE.
12) Para desconectar, apague todo los controles a la positión "OFF" y
leugo el enchufe de la salida de toma corientes.
13) Si su cortadora viene con un enchufe de 3 espigas, deberá
conectarlo únicamente a un tomacorriente con conexión a tierra
apropiada. Vea las instrucciones de conexión a tierra
GUARDE ESTAS INSTRUCCIONES
Esta cortadora ha sido diseñada sólo para su uso do- méstico.
El dispositivo está diseñado solo con fines de recorte.
MANTENIMIENTO DEL CABLE
El cable no debe usarse para tirar o levantar la cortadora. Como ha de
mantenerse la libertad de movimientos, ha de usarse cuidado en no retorcer el
cable y evitar que se obstruya.
Para un dispositivo disponible con un enchufe polarizado-
Para reducir el riesgo de electrocución, este electrodoméstico tiene un enchufe
polarizado (una de las patas del enchufe es más ancha que la otra). Este
enchufe encaja en una toma de corriente polarizada solamente de una forma.
En el caso en el que el enchufe no entre en la toma de corriente, déle la vuelta.
En caso de que todavía no quepa, contacte con un electricista cualificado para
instalar la toma de corriente adecuada. No cambie el enchufe de ninguna forma.
NOTAS ACERCA DE CUCHILLAS Y CORTES
1) Las cuchillas son el elemento más importante de esta cortadora.
2) Las cuchillas no se gastan por cortar el pelo - se gastan por las partículas
abrasivas que se encuentran en el pelo: suciedad, arena, etc.
3) Las cuchillas de la cortadora deben ser aceitadas ANTES, DURANTE Y
DESPUÉS de cortar el pelo; muchos de los problemas de las cortadoras se
deben a falta de lubricación y enfriado.
4) Las cuchillas no cortarán si las partículas abrasivas se pegan a la
película de aceite que hay entre las cuchillas. Estas partículas
tienden a mantener las cuchillas separadas y enganchan y tiran del pelo en
vez de cortarlo limpiamente.
5) El aceitado de las cuchillas realiza dos funciones distintas:
• Provee una película muy fina de lubricante de baja fricción entre las cuchillas, de
forma que puedan cortar limpiamente sin calentarse por la fricción.
• Elimina partículas abrasivas y pelo de entre las cuchillas.
AVISO: Si usted corta con el pelo sucio, lave inmediatamente las
cuchillas con el aceite para eliminarla. Si mueve la palanca de ajuste
de delante hacia atrás, ayudará a eliminar las partículas de suciedad.
CÓMO OPERAR SU CORTADORA WAHL
Siguiendo estos simples pasos, su cortadora Wahl quality Pet, le dará años de
servicio satisfactorio.
1) ACEITE Para máxima eficiencia, las cuchillas de su cortadora DEBEN ser
aceitadas con cada corte de pelo. Coloque una o dos gotas de aceite en las
cuchillas mientras la cortadora está funcionando. Si la cortadora es nueva o
no ha sido usada las cuchillas de su cortadora están secas—requieren aceite.
NO USE un aceite espeso. Use solamente aceite Wahl Clipper.
2) TORNILLO DE SINTONIZACIÓN (no se encuentra en todos los modelos de
cortadoras Wahl.) Si su cortadora tiene un tornillo de sintonización,
éste ha sido ajustado para la potencia perfecta antes de salir de
fábrica. Sin embargo, si el voltaje en su casa es bajo, puede que
tenga que reajustarlo. Para ajustar el tornillo de sintonización, use
un cepillo de plástico, un destornillador o una moneda delgada
para girar el tornillo en la dirección de las agujas del reloj, hasta que el brazo
vibrador choque contra la bovina, haciendo un ruido. Después, lentamente
apague el tornillo de sintonización (en dirección contraria a las agujas del
reloj), justo hasta que el ruido pare. Esta será la máxima potencia.
3) CUCHILLAS No intente afilar las cuchillas de la cortadora. Una vez que
se desafilan, es necesario un equipamiento especial para volver a afilarlas.
Tampoco lave las cuchillas en agua. Cuando las cuchillas ya no cortan,
pueden necesitar aceite o volver a afilarlas. Si usted cree que deben
afilarse, puede devolverlas a Wahl Clipper Corp. para su afilado. Si decide
hacer esto, saque las cuchillas de la cortadora, empaquete cada cuchilla
individualmente en un papel suave, póngalas en un contenedor resistente y
envíelas a Wahl Clipper Corp., 3001 Locust Street, Sterling, IL 61081 ATTN:
Service Dept. Se cobrará una cantidad nominal por el reafilado o
sustitución. Para sacar las cuchillas, afloje y saque los dos tornillos de la
cuchilla de abajo. Vuélvalos a colocar y apriételos.
4) ALINEADO DE LAS CUCHILLAS Las cuchillas deben realinearse si se
han sacado para limpieza o reemplazo..
• Si su cortadora tiene una palanca de control – coloque la palanca en la
posición de corte apurado (close cut)
• El extremo de la cuchilla de arriba debe estar
aproximadamente a 1/32" (.64mm) hacia atrás de la
cuchilla de abajo.
• Esto es importante para que la cuchilla no corte demasiado apurado o permita
que entre en contacto con la piel.
• El extremo izquierdo del diente de la cuchilla de arriba tiene que cubrir o
estar a la izquierda del primer diente pequeño de la cuchilla de abajo
• El extremo derecho del diente de la cuchilla de arriba debe tocar el diente
grande en la cuchilla de abajo.
• Si la alineación es incorrecta, añada unas pocas gotas de aceite en las cuchillas,
encienda la cortadora (ON) por unos momentos, apáguela (OFF) y
desenchúfela. Afloje los tornillos ligeramente y ajuste. Apriete los tornillos
después de que las cuchillas estén alineadas.
5) PALANCA DE CONTROL Algunas cortadoras Wahl están
equipadas con una palanca de control ajustable. La
palanca de control está convenientemente situada cerca
de su dedo pulgar (si usted usa su mano derecha), de
forma que puede ser ajustada cómodamente mientras la
cortadora está en su mano. La palanca de control añade versatilidad a su
cortadora y le permite cambiar gradualmente la clase de corte que necesite sin
el peine guía. Cuando la palanca está en la posición más alta, las cuchillas le
darán el corte más apurado y dejarán el pelo muy corto. Empujando la palanca
hacia abajo, se incrementa gradualmente el largo de corte. En su posición más
baja, la palanca de control dejará el pelo en un largo aproximadamente igual al
largo de corte de un peine guía de 1/8" pulgadas. La palanca de control
extenderá también el uso de sus cuchillas ya que se usa un diferente corte en
cada posición.
Además, si un corte en un pelo demasiado grueso ha atascado las
cuchillas, ayudará a sacar el pelo que ha quedado atrapado entre las dos cuchillas.
Mientras la cortadora esté funcionando, mueva rápidamente la palanca de control
de la posición más baja a la más alta, un par de veces. Haciendo esto cada vez
que ha acabado de usar la cortadora, ayudará a mantener las cuchillas libres de
pelo. Si su cortadora no corta y este procedimiento no ayuda, sus cuchillas
pueden estar desafiladas. Reemplácelas o devuélvalas a Wahl para su afilado.
MANTENIMIENTO DE LA CORTADORA Y SERVICIO
1) Para limpiar la unidad use, o bien un paño limpio y seco o húmedo. NO USE
benceno o químicos para limpiar la unidad.
2) No guarde la cortadora en un entorno mojado o húmedo.
3) No toque los mecanismos internos. Si la cortadora necesitara reparación, no la
repare usted mismo. Devuélvala a Wahl Clipper Corporation.
4) Cuando esté guardada, asegúrese de que el cable no esté enganchado,
retorcido u obstruido. Debe enroscarse y la unidad debe guardarse en un
lugar seco, lejos del alcance de niños.
5) Solamente use el específico voltaje que aparece en la placa.
6) Las cuchillas que se encuentran en las cortadoras Wahl Pet, están hechas con
un acero de carbono especial, tratadas científicamente con calor para su
correcta dureza. Años de experiencia han creado un proceso especial para que
estas cuchillas alcancen un nivel de afilado supremo.
7) Sea cuidadoso en no dejar caer su cortadora o golpear con algo las cuchillas
8) Vuelva a colocar siempre el protector de cuchilla cuando no esté usando la
cortadora. Esto prevendrá daños accidentales y desafilado de la cuchillas.
9) Sumerja periódicamente los dientes de la cuchilla en un recipiente no
profundo con aceite Wahl Clipper, con la cortadora en funcionamiento,
para eliminar suciedad y pelo.
10) Pase la cortadora a través del pelo solamente a la velocidad a la que es
posible realizar el corte. Pasarla por el pelo demasiado rápido, puede
atascarla y no cortar el pelo apropiadamente.
11) Evite presionar las cuchillas demasiado fuerte contra la piel, siendo
especialmente cuidadoso alrededor de las orejas.
12) Mantenga las cuchillas afiladas. Corte el pelo de los animales cuando esté
limpio. PARTÍCULAS EXTRAÑAS que entren en las cuchillas causará
que se desafilen.
13) Las cuchillas cuando están afiladas cortarán mejor y más rápido. PARA
UN AUTÉNTICO AFILADO DE FÁBRICA, retire y devuelva las cuchillas a:
Wahl Clipper Corp., 2902 N. Locust St., Sterling, IL. 61081, Attn: Repair
Dept. Se cobrará un importe nominal por el afilado.
Si desea CUCHILLAS NUEVAS, éstas están disponibles en la tienda de
productos Wahl. Se recomienda que encargue un set extra de cuchillas
normales Wahl, de forma que asñi tenga siempre un juego de repuesto a mano.
TO PEINE ACCESORIO DE CUCHILLA:
1) Apague la cortadora y ponga la palanca de ajuste de la cuchilla en la
posición Fina (Fine).
2) Sujetando el Accesorio de la cuchilla en la palma de la mano, cierre los
muelles de clip en la cuchilla de abajo.
3) Deslice el accesorio de cuchilla en su lugar, como se indica en la Figura 3.
4) ASEGÚRESE de que el Accesorio de Cuchilla esté correctamente
instalado, antes de encender la cortadora. Las cuchillas pueden dañarse
severamente si el Accesorio de Cuchillas entra en contacto con los dientes
de las cuchillas de la cortadora.
TO DESMONTAJE:
1) Apague la cortadora y deslice el Accesorio de Cuchilla hacia delante.
2) Gire hacia fuera de los dientes de la cuchilla el Accesorio y sáquelo.
GUÍA DE SELECCIÓN DE CUCHILLAS
La palanca multi- corte, ajustable con el pulgar, más conveniente, y que se
encuentra en la mayor parte de las cortadoras Wahl, proporciona diferentes
variaciones de corte con menos cuchillas. En su posición más alta, el corte es
muy fino y se va volviendo más grueso, conforme la palanca se va moviendo hacia
abajo. El siguiente esquema ilustra los diferentes tamaños de corte de cada juego
de cuchillas, según aconsejan los guías de la industria de peluquería animal.
GUÍA DE LARGOS DE CORTE: accesorios de cuchilla de plástico
The La palanca del accesorio de cuchilla debe estar siempre en la posición fina
(Fine), cuando los accesorios de cuchilla se estén usando.
TIPO DE CUCHILLA DIRECCIÓN DE LARGO DE CORTE
Y ACCESORIO DE CORTE (Aproximado)
CUCHILLA FINO GRUESO
Wahl Regular Contra la raíz del pelo 1/32” a 1/8”
Cuchilla sin En la dirección de la raíz 1/16 “ a 3/16”
Accesorio #1037
*Las variables que afectan al largo de corte son más grandes que estas medidas,
aun- que el corte se realice normalmente en la dirección de la raíz
Accesorio de cuchilla #1 Contra la raíz del pelo 5/32” a 7/32”
En la dirección de la raíz 1/8” a 1/4”
Accesorio de Cuchilla #2 En la dirección de la raíz 1/4” a 1/2”
Accesorio de cuchilla #3 En la dirección de la raíz *1/2” a 3/4“
Accesorio de cuchilla #4 En la dirección de la raíz * 3/4” a 1”
ACCESORIOS DE CUCHILLA DE ACERO INOXIDABLE
Con los ACCESORIOS DE CUCHILLA DE ACERO INOXIDABLE,
Instrucciones de Operar
Parajuego
de Corta
Brazo de Cuchilla Ajustable
Cortadoras con Cordo
AVISO!
Ciertas lubricantes de Soluciones y de spray que
desinfectan pueden causar daños a la cortadora.
Recomendamos lubrica cion de cuchillas y
limpieza con el acieta WAHL CLIPPER OIL. ONLY.
¡
part no. 94606-605
94606-605 56 TaperLever TRI IB.pdf 1 3/2/15 8:39 AM