Loading ...
Loading ...
Loading ...
Black plate (227,1)
北米Model "A1160BE-C" EDITED: 2014/ 3/ 17
3. Press the switch repeatedly until the
correct zone setting for your location is
displayed.
4. Releasing the button for 10 seconds
will exit the zone setting mode.
! Compass calibration
1. If a “C” is displayed in the compass
window, the compass needs to be cali-
brated.
2. Drive the vehicle in a circle at 5 mph (8
km/h) or less until the display reads a
direction.
3. You can also calibrate the compass by
driving your vehicle on your everyday
routine. The compass will be calibrated
once it has tracked a complete circle.
4. To recalibrate your compass, push and
hold the switch for 9 seconds until a “C”
appears in the compass window.
5. Calibrate the compass according to
step 2 or step 3.
& Auto-dimming mirror/com-
pass with HomeLink
®
(if
equipped)
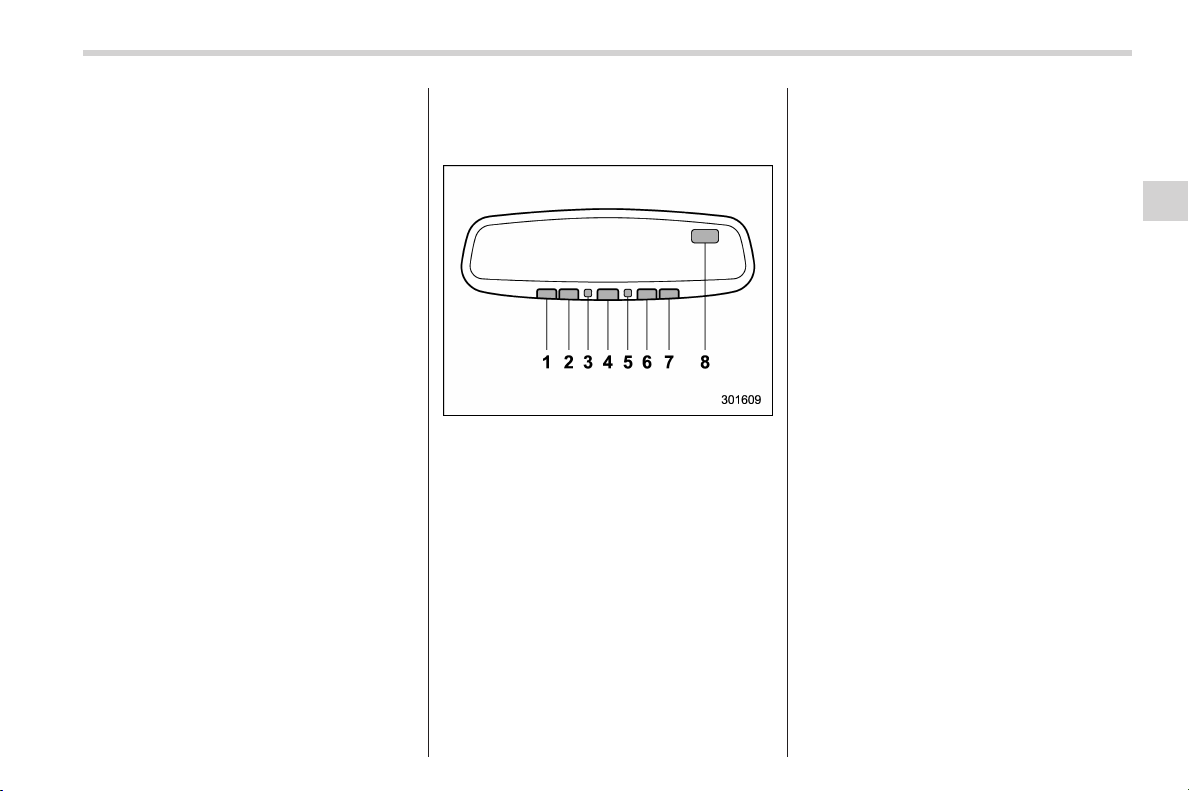
1) HomeLink
®
button 1
2) HomeLink
®
button 2
3) LED
4) HomeLink
®
button 3
5) Sensor
6) Automatic dimming on/off button
7) Compass display button
8) Compass display
The auto-dimming mirror has an anti-glare
feature which automatically reduces glare
coming from headlights of vehicles behind
you. It also contains a built-in compass
and HomeLink
®
wireless control system.
. By pressing the automatic dimming on/
off button, the automatic dimming function
is toggled on or off. When the automatic
dimming function is on, the LED indicator
will illuminate.
Even with the mirror in the automatic
dimming mode, the mirror surface turns
bright if the transmission is shifted into
reverse. This is to ensure good rearward
visibility during reversing.
. By pressing the compass display but-
ton, the compass display is toggled on or
off. When the compass is on, an illumi-
nated compass reading will appear in the
upper right corner of the mirror.
When cleaning the mirror, use a paper
towel or similar material dampened with
glass cleaner. Do not spray glass cleaner
directly on the mirror as that may cause
the liquid cleaner to enter t he mirror
housing and damage the mirror.
Instruments and controls/Mirrors
3-87
– CONTINUED –
3
Loading ...
Loading ...
Loading ...