Loading ...
Loading ...
Loading ...
Emergencies
Fig. 53
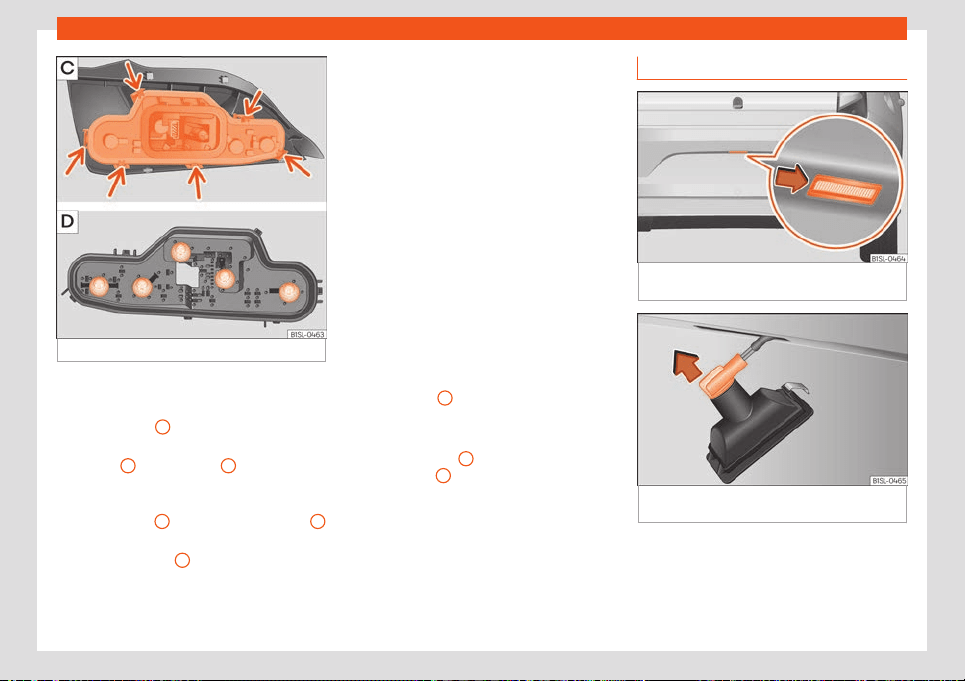
Tail light unit: remove the bulb holder
Removing the rear light units
●
Open the rear lid.
●
Remove cover
1
by carefully levering it
›
›
›
Fig. 52 .
●
Pull lock
3
on connector
2
in the direction
of the arr
o
w
›
››
Fig. 52 . Help yourself with
the screwdriver from the vehicle tool kit.
●
Press fastener
4
and remove connector
2
›››
Fig. 52 .
●
Unscrew wing nut
5
›
›
›
Fig. 52 .
●
Remove the tail light from the bodywork by
carefully pulling backwards.
●
Disassemble the tail light unit and place it
on a flat, clean surface.
To change the bulb
●
Unlock the bulb holder on the locking flang-
es (arrow)
›››
Fig. 53 and remove the bulb
holder from the tail light.
●
Replace the damaged bulb with a new
identical bulb
›››
Fig. 53 .
●
Place the bulb holder in the tail light unit.
The locking tabs (arrow) must be heard to en-
gage
›››
Fig. 53 .
Assembling the rear light units
●
Carefully insert the tail light unit into the
opening in the bodywork.
●
Hold the tail light in the installation position
with one hand and tighten the wing nut with
the other hand
5
›
›
›
Fig. 52 .
●
Ensure that the tail light unit has been cor-
rectly fitted and is firmly secured.
●
Insert connector
2
into the bulb holder
and pr
ess l
ock
3
on the connector in the di-
r
ection opposit
e t
o the arrow
›››
Fig. 52 .
●
Insert the cover. The cover should lock into
place.
●
Close the rear lid.
Changing the number plate bulb
Fig. 54
In the rear bumper: detach the number
pl
at
e light.
Fig. 55
Number plate light: remove the bulb
hol
der
.
●
With one hand, press on the number plate
light fr
om l
eft t
o right and remove it from the
bumper
›››
Fig. 54.
●
Detach the number plate light carefully
from the bumper.
52
Loading ...
Loading ...
Loading ...