Loading ...
Loading ...
Loading ...
9
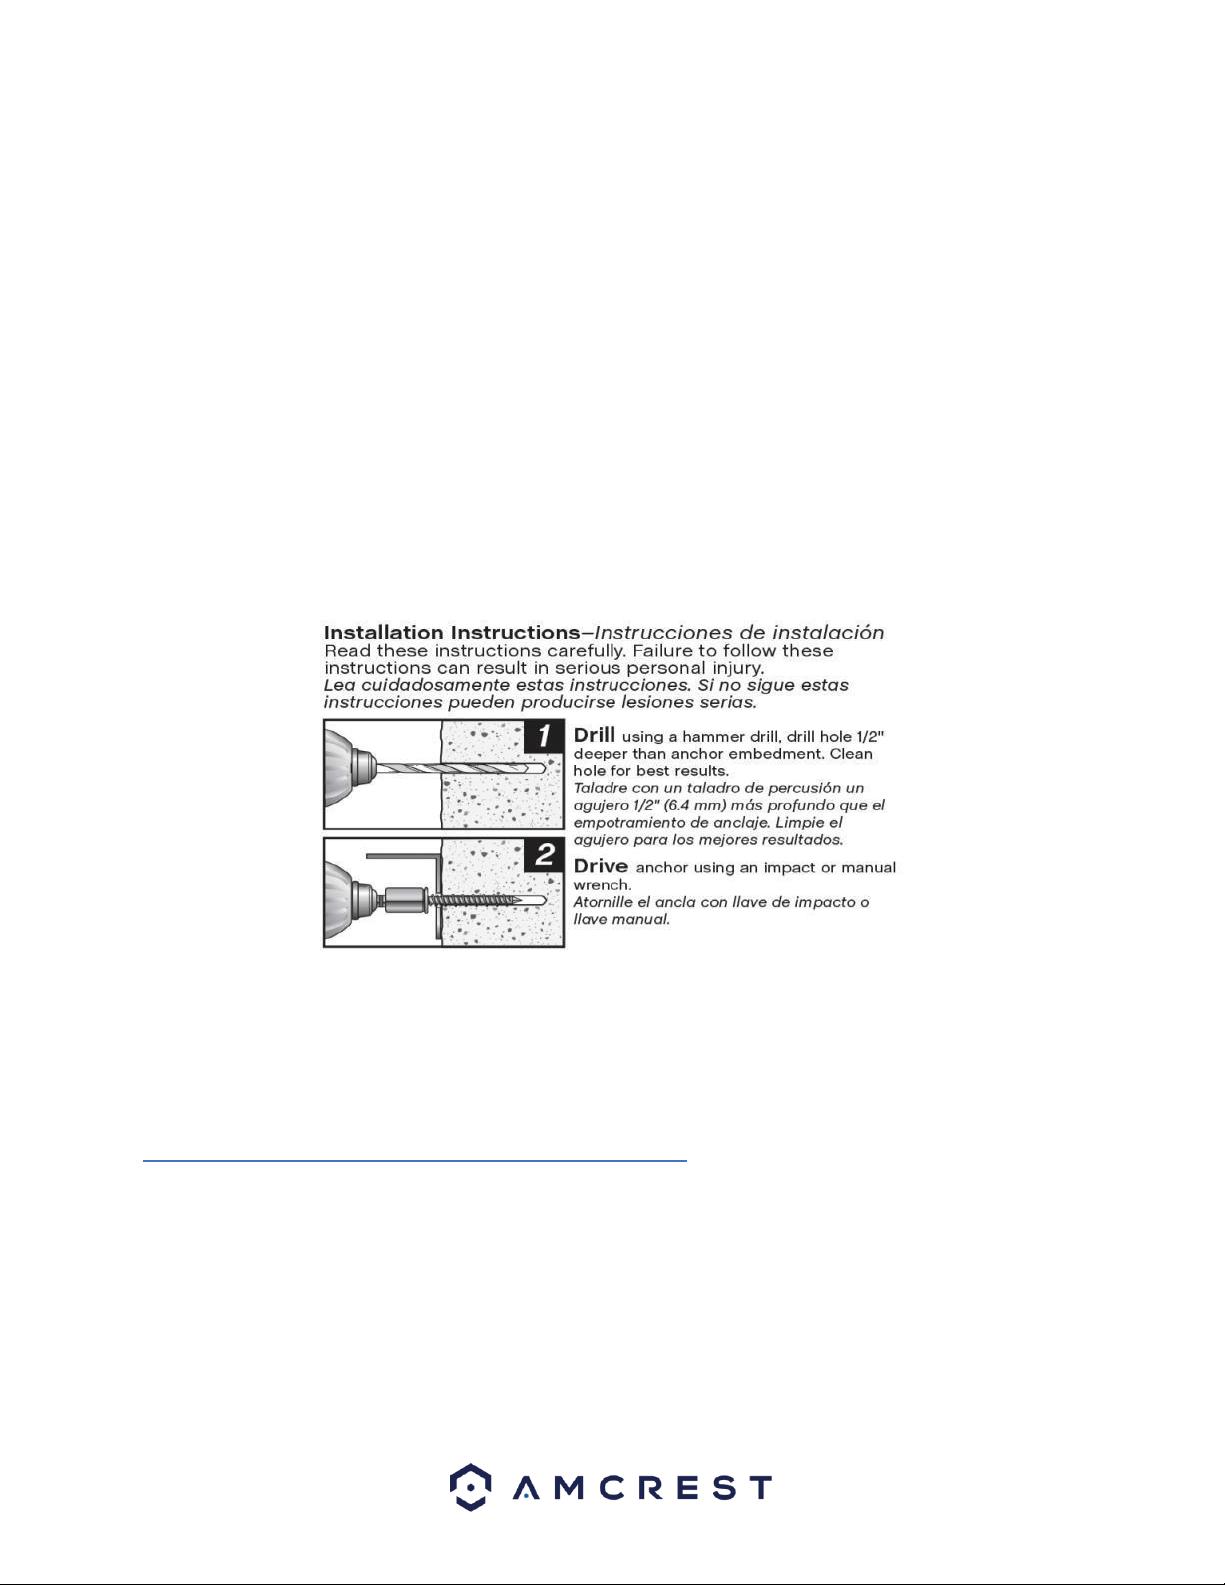
3.4.3 Cement Installation
1. Using a 3/16 Allen wrench, remove the three security screws from the mounting bracket to remove the unit
from its base.
2. Using the mounting bracket, mark holes in the appropriate areas you would like to mount the camera.
3. Remove the mounting bracket and using a 1” drill bit, drill a hole into the center of the surface area.
4. Run the camera wiring through the mounting bracket and to the applied 1” hole created for in-wall installation.
5. Using a 9/16 drill bit, drill a hole into each marked area to insert the appropriate concrete anchor screw into the
hole.
6. Align the mounting bracket to the drilled holes and place the 9/16 concrete anchor screw to the mounting
bracket.
7. Using an impact or manual wrench, drive the concrete anchors into the appropriate hole to secure the bracket
to the surface area.
8. Secure the camera back to the mounting bracket with the three provided bolts using a 3/16 Allen wrench.
Note: For a more detailed representation of the process, please refer to figure 3.4.3 below:
Figure 3.4.3
4. Camera Access Setup
This section of the guide will provide the user with information on how to setup access to the camera through any
of the following methods.
4.1 Default Username and Password
To login to the system for the first time, use one of the following default username/password combinations. Once
you’ve successfully logged in, it is highly recommended to change the password for security reasons.
Username: admin
Password: admin
Note: Logging in for the first time will prompt the user to change the password to the admin account.
Loading ...
Loading ...
Loading ...