Loading ...
Loading ...
Loading ...
14
EN
Installing the Magnets
Installing the Magnets
4
Slowly rotate the crank set one rotation.
Conrm that the magnets do not interfere with the crank, transmitter or chainring adapter.
Use a pair of snips to cut the excess parts off the magnet's cable ties if they interfere with the crank, transmitter or chainring adapter. •
When you do this, remember to leave a long enough piece of the cable tie so you can tighten it.
5
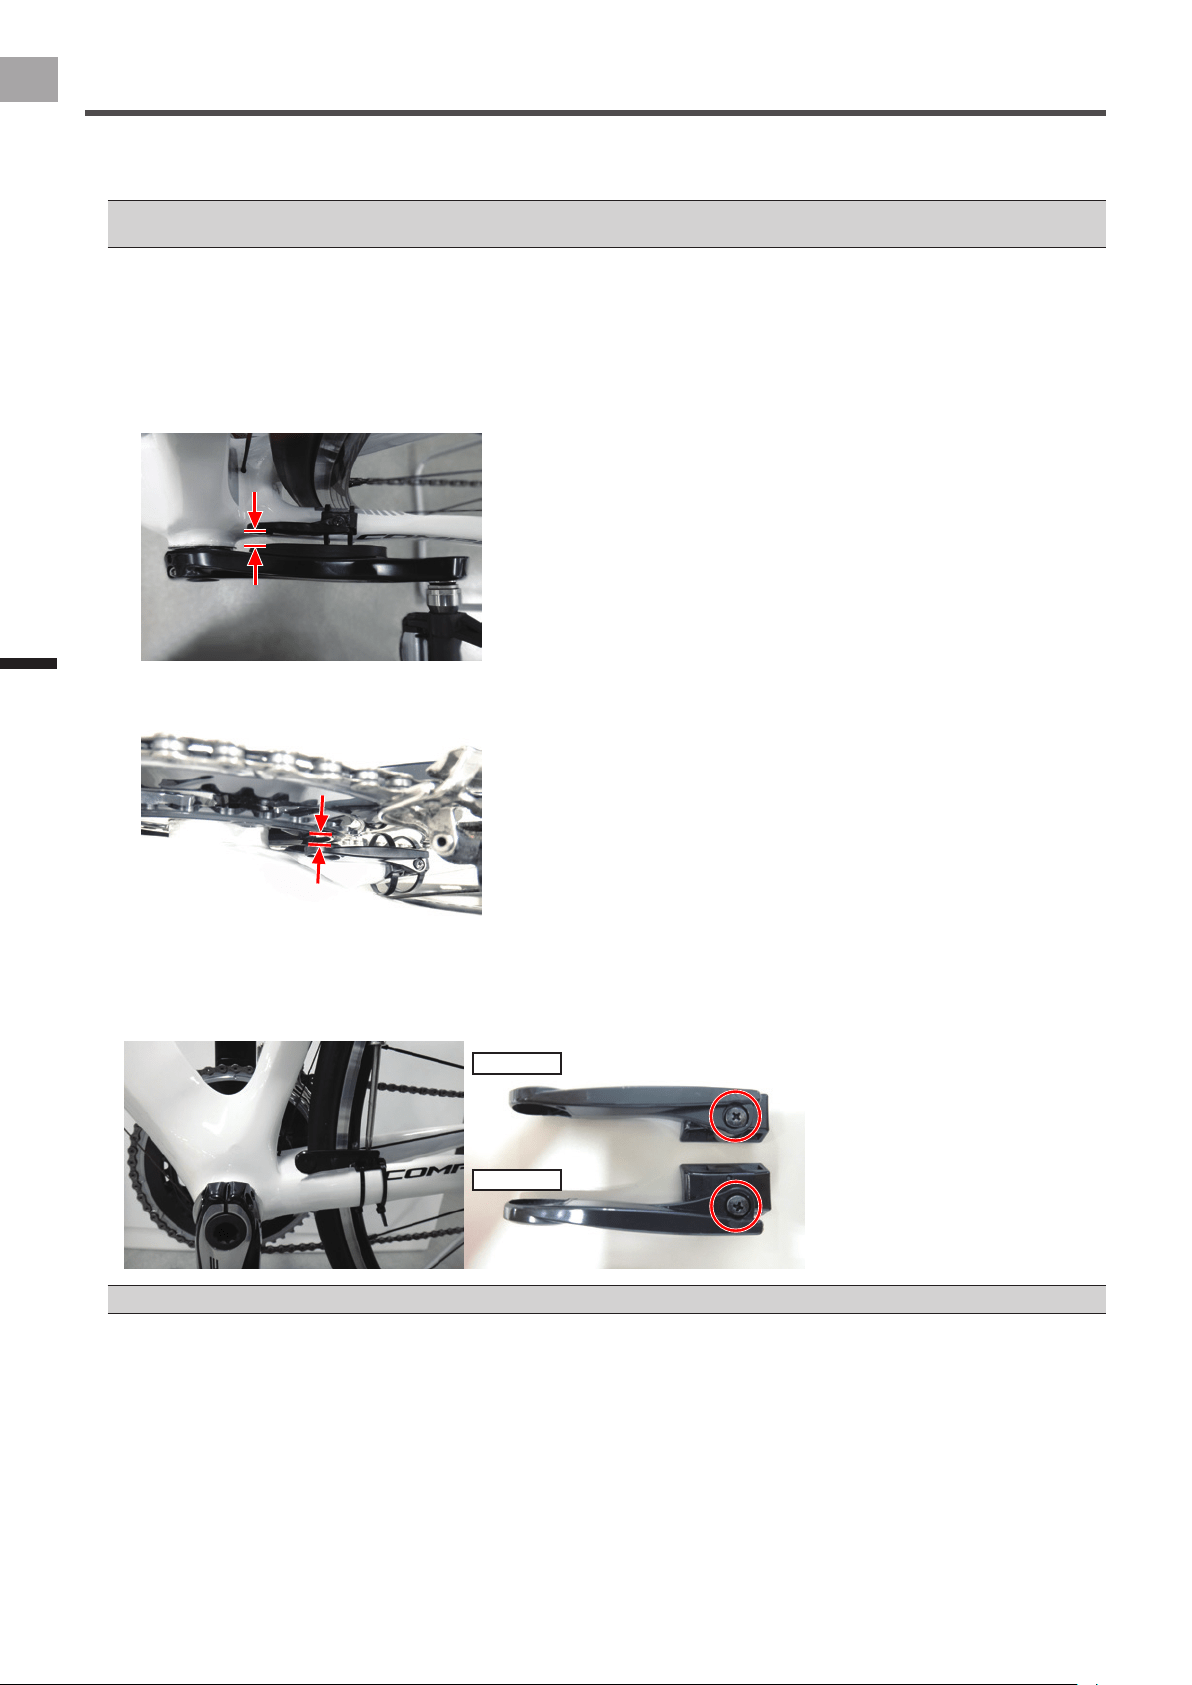
Adjust the position of the magnets.
Adjust the position of the magnets so they are positioned on a line square to the magnetic sensors.
After that, measure the distance between the magnet and magnetic sensor and the chainring adapter, and conrm it is
within the following range.
Left side:•
Distance between the magnet and magnetic sensor: Between 3 mm and 9.6 mm
Right side:•
Distance between magnet and chainring adapter: Between 1.5 mm and 5.0 mm
If the chain stay is angled, or for some other reason, loosen the screw on the base of the magnet to adjust the angle. After
adjusting the angle, tighten the screw to the specied torque.
Tightening torque: 30 cN•m•
Left side
Right side
Do not adjust the angle of the arm type magnet to more than XX° from the chain stay.•
This completes the temporary installation of the magnet on the chain stay.
Lightly tighten the cable ties so the temporarily installed magnet does not move.
After you have completed the temporary installation of the right and left magnets, calibrate the magnets and x them in
place (page 15).
The magnets are only temporarily attached, they must be calibrated and xed in place.
Loading ...
Loading ...
Loading ...