Loading ...
Loading ...
Loading ...
11
FIGURE 7
10. Apply English or French conversion label on top of
the burner data decal located on the burner baseplate.
FIGURE 8
“LPG”
SETTING
SETTING
INDICATOR
Installation Checklist
•
Check that both labels have been installed as described
in “Preparing for Kit Installation,” step 3 and Step 10 above.
•
If converting to Propane, check that the number 55 is not
marked on either of the remaining orices. If converting to
Butane, check that the number .049 is not marked on either
of the remaining orices.
Pressure Testing (Both Styles)
Check minimum and maximum inlet gas pressure:
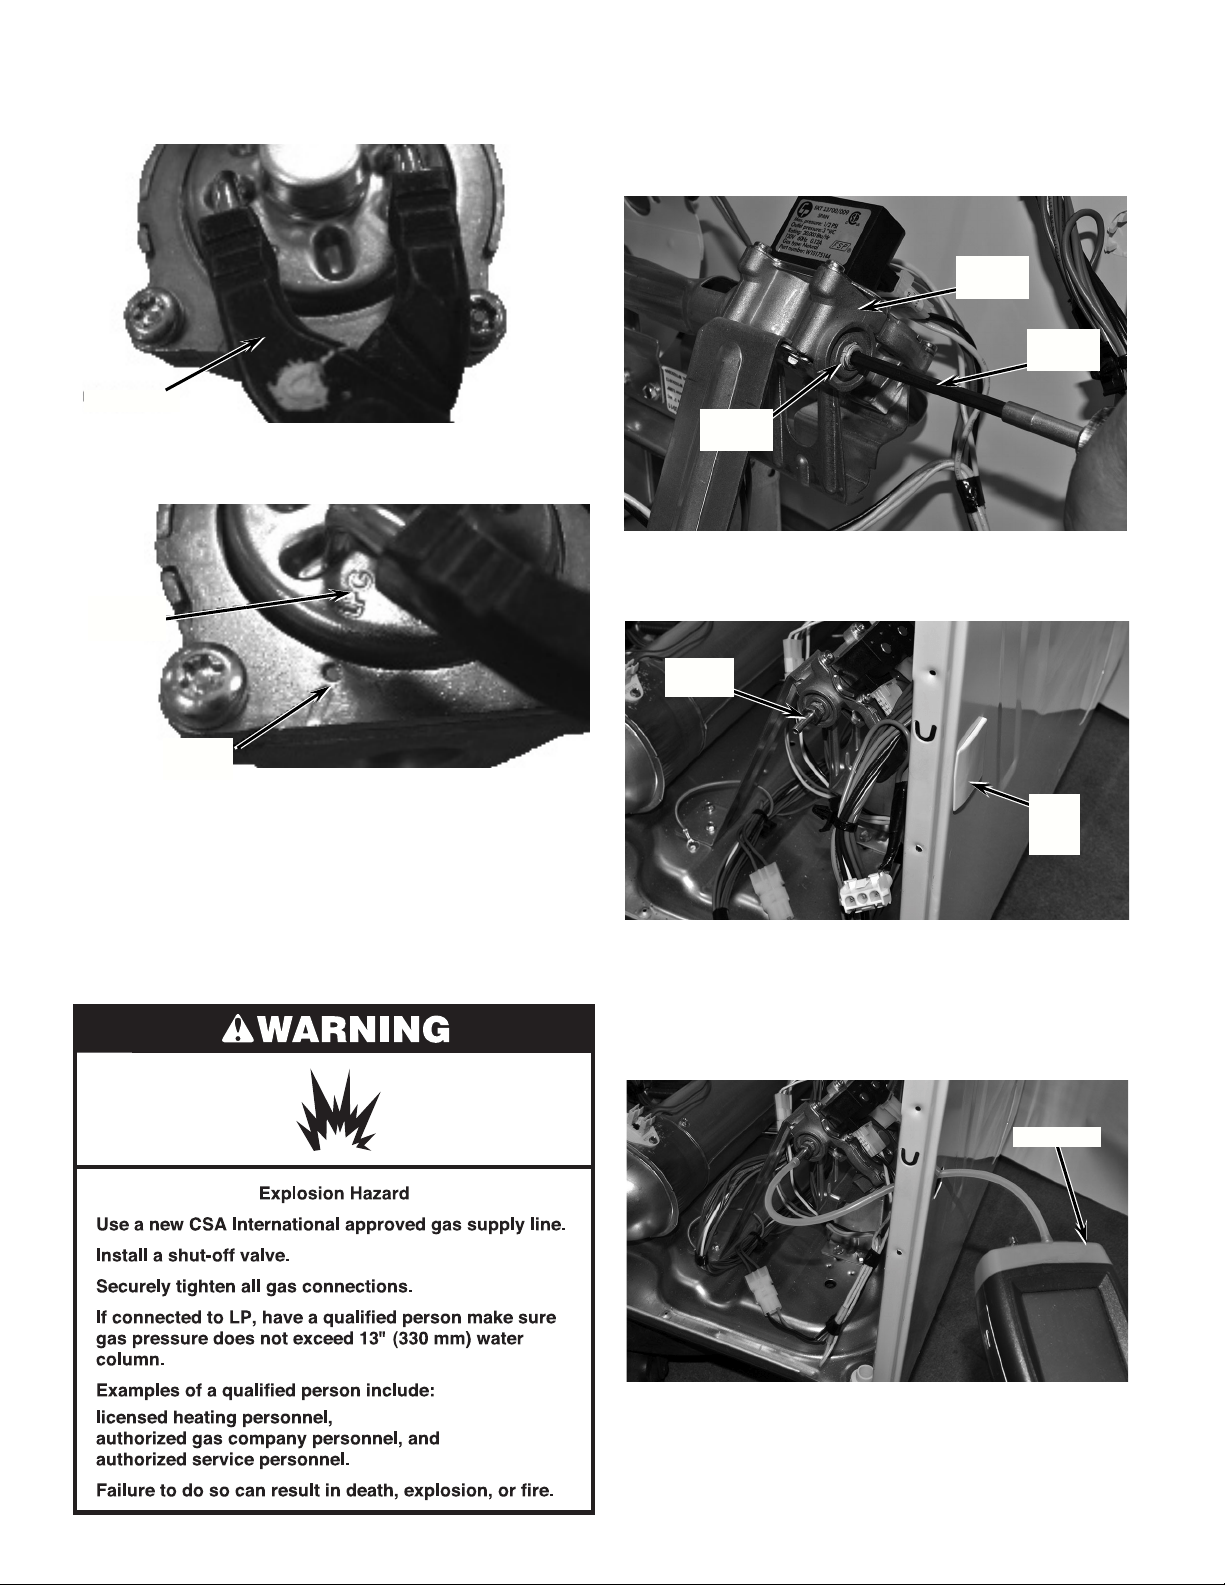
1. Remove pressure tap plug from valve body using a
3/16" hex wrench. See Figure 1.
FIGURE 1
(3/16") HEX
WRENCH
GAS VALVE
ASSEMBLY
PRESSURE
TAP PLUG
2. Insert pressure tap and nger-tighten. Remove view hole
plug from side panel. See Figure 2.
FIGURE 2
VIEW
HOLE
PLUG
PRESSURE
TAP
3. Connect a airtight hose to pressure tap and run the hose
through the view hole on the right side panel. Connect
other end of hose to manometer (airtight hose will attach
between pressure tap and manometer.) See Figure 3.
FIGURE 3
MANOMETER
NOTE: Be sure to replace all parts a panels, and to reconnect
all wire leads and connections that were disconnected during
disassembly of dryer.
9. Rotate cover dial 25 degrees counterclockwise, lining
up “LPG” marking with the indicator on the gas valve.
See Figure 8.
BEND PLIERS
Loading ...
Loading ...
Loading ...